Official Luthiers Forum! http://w-ww.luthiersforum.com/forum/ |
|
What Not To Do - '42 Banner SJ "Repairs" http://w-ww.luthiersforum.com/forum/viewtopic.php?f=10101&t=18000 |
Page 1 of 2 |
Author: | David Collins [ Mon Jul 14, 2008 11:27 pm ] |
Post subject: | What Not To Do - '42 Banner SJ "Repairs" |
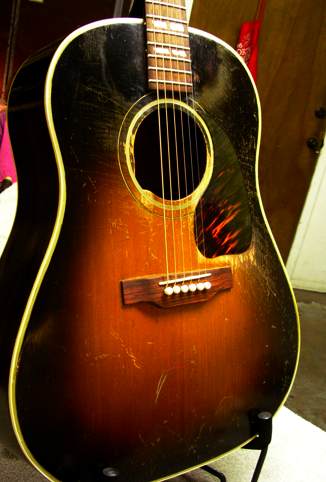
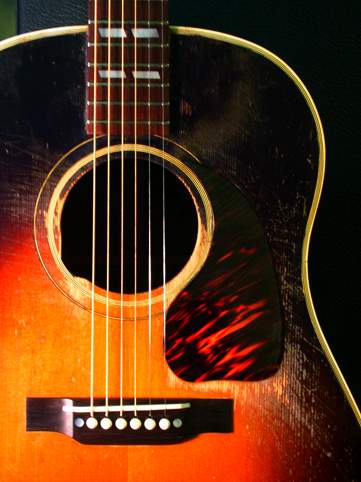
This one came in a few weeks ago, immediately after leaving another area repair shop. It's a '42 Gibson Southern(er) Jumbo. First year made, only year with the firestripe pickguard, maple neck reinforcement (war era, no truss rod), still had mahogany neck and neck block before they started using maple and poplar soon after. Low 2000's batch number (I think 2118), scalloped braces. This was the highest model Gibson made at the time, and were built by about a 10% skeleton crew during the war era, where Gibson kept only their best luthiers to build guitars. Phenomenal guitar, valuable guitar, and certainly worth preserving When it entered the previous repair shop, it was certainly beaten and played, had it's share of scars, and had been refretted with jumbo wire, which appears to have been a good professional job. A fair amount of cleated cracks from years of use, replaced tuners, one replaced and a few cracked pearl fingerboard inlays, not sure about if the neck was ever previously reset (probably not), but the bridge was original. These guitars with the heavy radius tops are generally so stable that they don't often need neck resets, though at this point I have no way of really knowing if it really did here or not. In any case, the other shop did do a neck reset, and here are the results. 
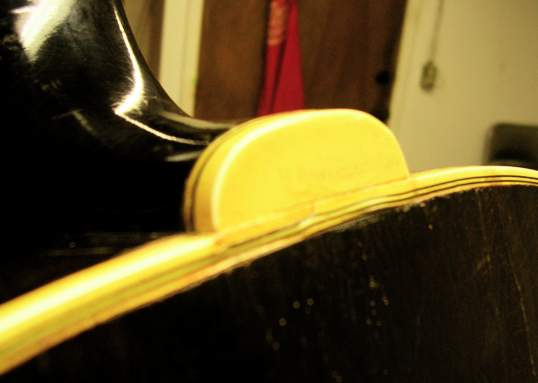
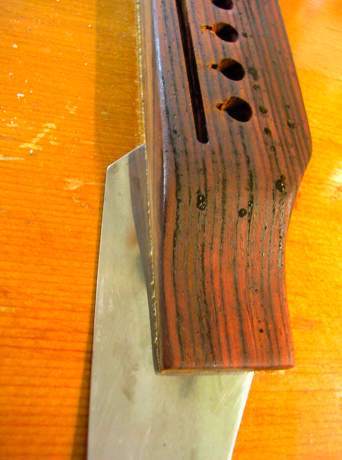
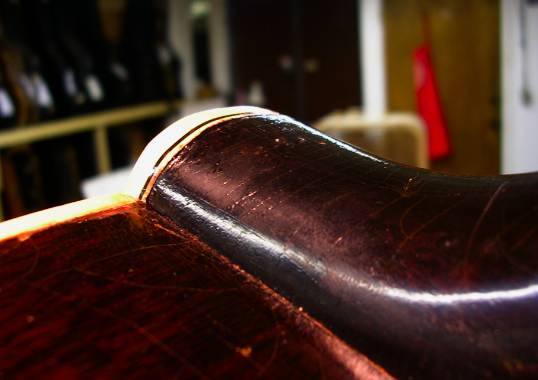
Heel cap fit - that's kind of shoddy ![]() 
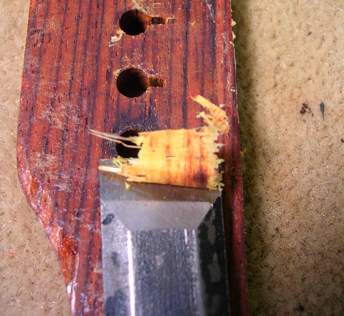
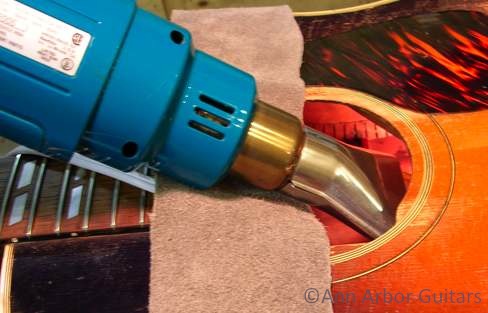
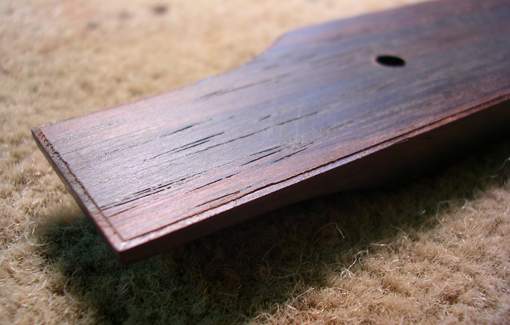
Looks like it got a bit hot during removal - ooh, that wasn't there before. ![]() 
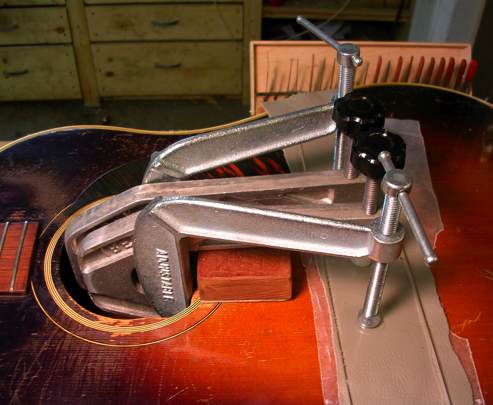
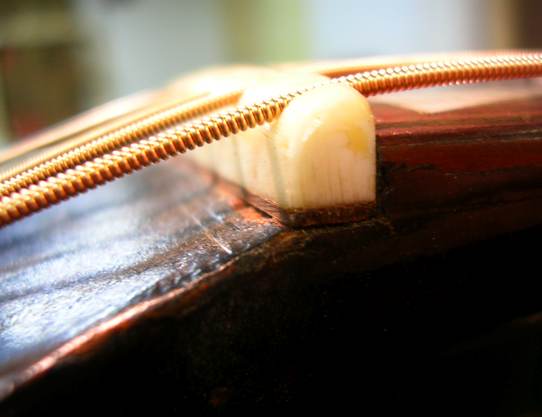
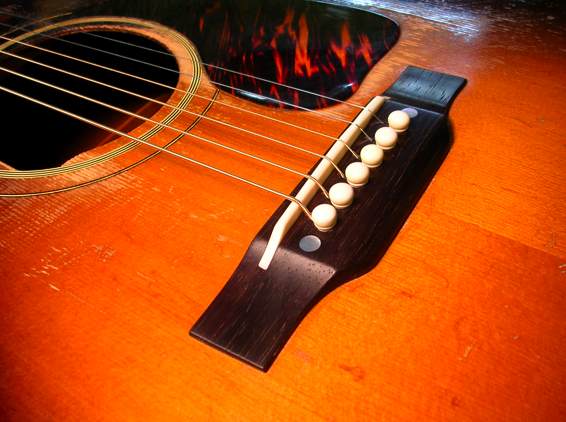
But at least they got the angle up. and after some touchup around the extension, they even threw in a beautiful new bridge. ![]() 
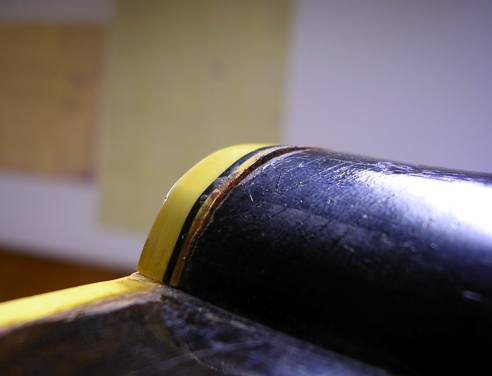
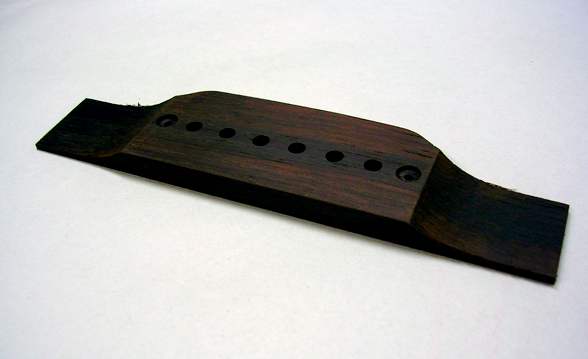
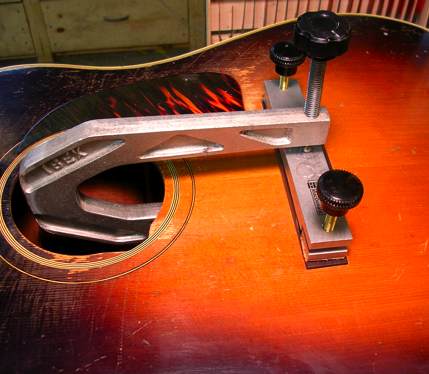
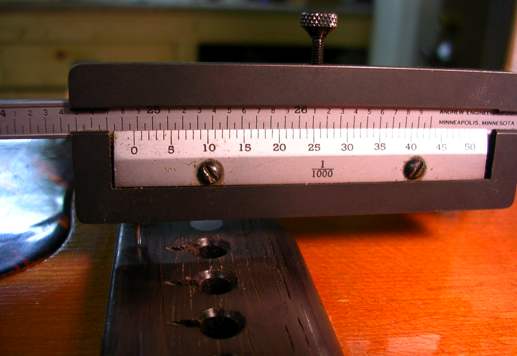
A beautiful new cocobolo bridge. How nice... And just to make sure it wouldn't need another neck reset any time soon, they kicked the angle back a bit more, and made the bridge about .400" tall (way better than those old 1/4" Gibson bridges, right?). The old bridge appears to be gone now. Let's get another look at that beauty - just look at those Gibsonesque lines. ![]() 
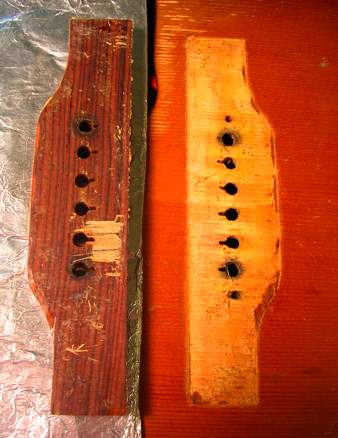
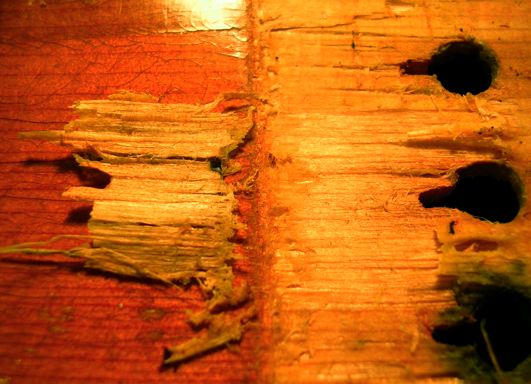
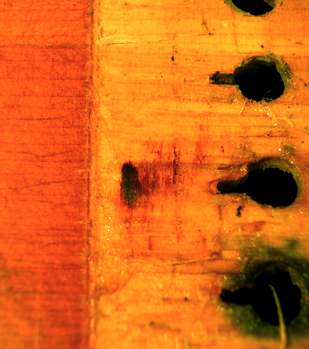
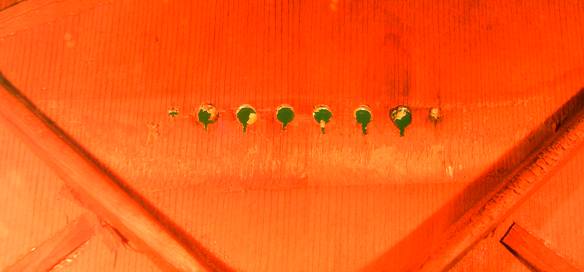
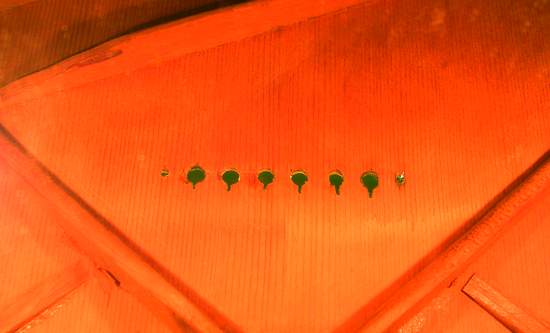
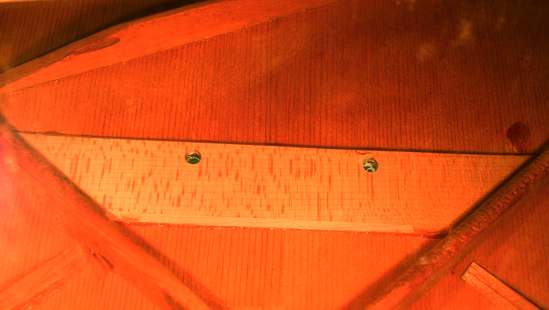
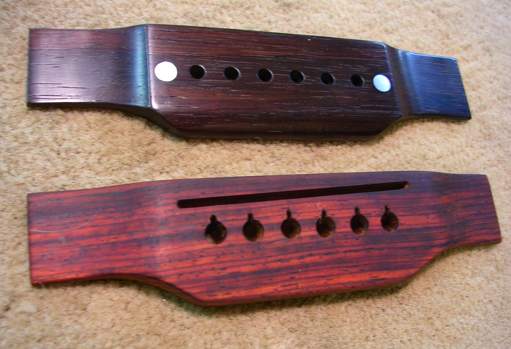
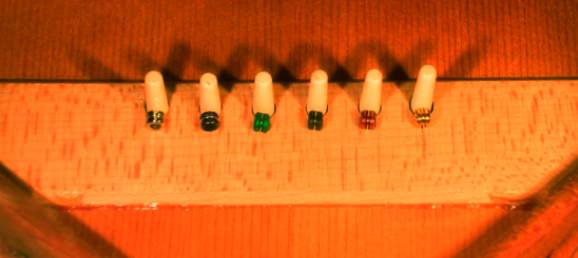
Thankfully through all this work, they left the original bridgeplate intact - well, intact and still glued on in front of the pins anyway. ![]() 
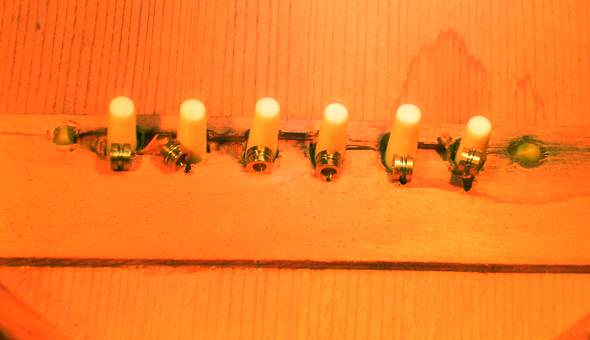
I'm quite thankful they didn't decide to pull the bridge plate, as there's no telling what damage that may have brought. So that's how it came in. Now though they did reset the neck at too high an angle, thankfully it wasn't as bad as it originally looked. They greatly overcompensated in the replacement bridge height. The action was quite high, though there was still quite a bit of buzz at a decent size hump at the extension. 
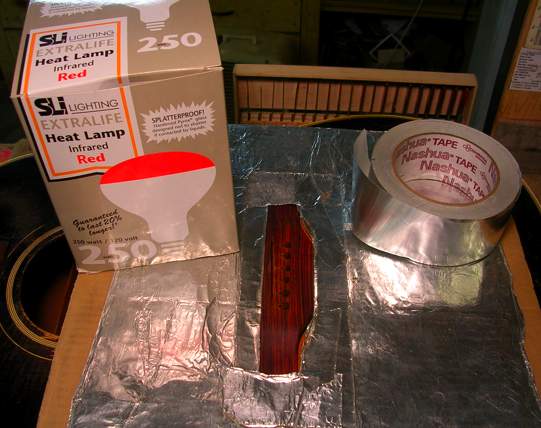
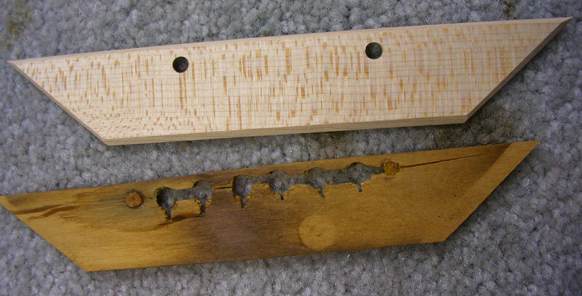
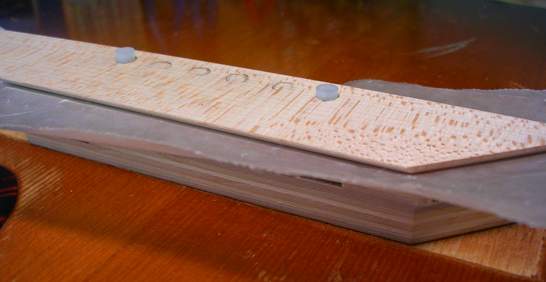
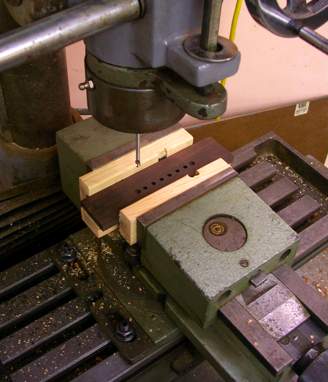
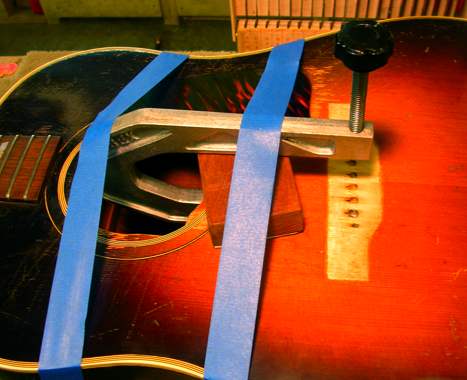
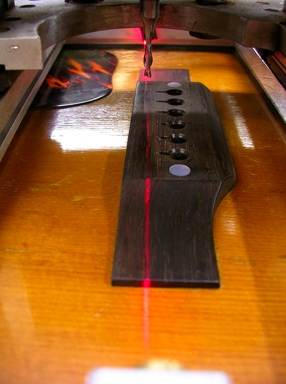
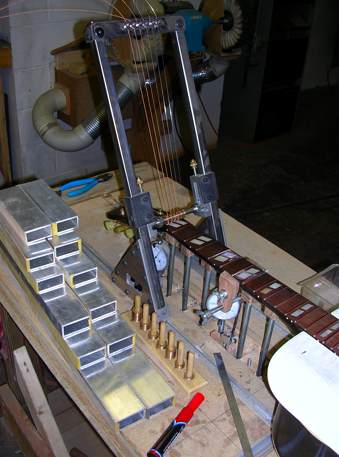
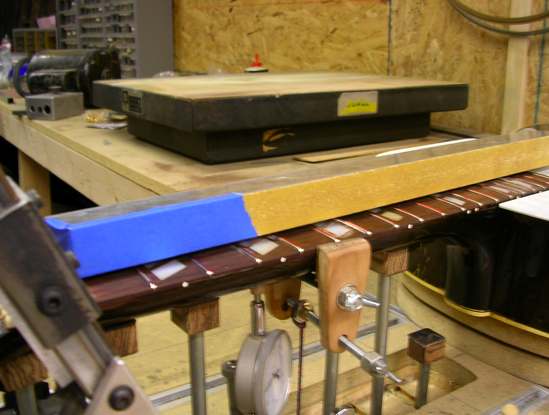
After discussing options with the customer, we decided that the neck angle and cosmetic damage is now what it is, and we weren't going to attempt to bring it back down. After leveling the frets, I felt I could get a bridge in the .300"-.320" range, with about .160" saddle clearance at the center, which I felt this top could handle just fine. So it's a new Brazilian bridge and saddle, new bridge plate, and fret leveling. I'll put an abbreviated summary of the repairs over a few more posts. |
Author: | Howard Klepper [ Mon Jul 14, 2008 11:43 pm ] |
Post subject: | Re: What Not To Do - '42 Banner SJ "Repairs" |
Hard to tell from the photos, David, but I'm wondering if you aren't looking at a head block reset rather than a neck reset. The separation of the heel cap and the sloppy back binding and purfling below the heel cap (which ought not to be touched by a neck reset) suggest it. Is the lacquer chipped along the heel/side junction, or is it otherwise clear that the neck has been out? Bridge--too bad the original is lost, but it could be replaced by a good copy. It probably needs to come off for repairing or replacing the plate, anyway. |
Author: | David Collins [ Mon Jul 14, 2008 11:50 pm ] |
Post subject: | Re: What Not To Do - '42 Banner SJ "Repairs" |
So first we're off to removing the bridge. Whenever I am removing a bridge that appears to have been previously removed (obvious in this case) it is important to appraise or estimate the skill of the previous repair tech, and look for complications they may have encountered. Obviously on this one, I'm quite afraid of what I'm going to find under the bridge when I pull it, so it must be approached with extra caution, anticipating a lot of tearout from previous repairs. I've worked with blocks and blankets for bridge heating, but am still more comfortable with the heat lamp. I feel I have a greater sense of control as to where heat is being applied, as well as excellent visibility of the bridge as it is being heated. It is also very ergonomic, and simple to stop and start repeatedly if necessary without any reheating of blocks or clamping of blankets to add more heat. Step one, cardboard, tin foil, and HVAC tape. ![]() Tape up on to the edges to cover all finish, screw in the heat lamp, and we begin. ![]() It's a thick bridge, so I know I'm really going to have to put a lot of heat to the middle section. After about 3+ minutes when the resins start bubbling and smoking, I try to work in a spatula. ![]() I get in through the bass wing easily, but start to feel resistance. So it's back for another minute or so of heat. ![]() Now it comes up nice and smooth, but unfortunately I broke a small chip loose where I hit resistance at the first try. ![]() But hey, I expected much worse than what I found, so I'm thrilled with this. There is certainly a good deal of tearout from the previous repairs, but most of the wood is still there, even if it's loose. So I chisel off the section of spruce from the bridge. ![]() Flatten it out.. ![]() Slather on a bit of hide glue, and rub it back in. ![]() Overall, this was less damaged than I anticipated, and I'm quite happy with it so far. Now on the the bridge plate. |
Author: | David Collins [ Mon Jul 14, 2008 11:56 pm ] |
Post subject: | Re: What Not To Do - '42 Banner SJ "Repairs" |
Howard Klepper wrote: Hard to tell from the photos, David, but I'm wondering if you aren't looking at a head block reset rather than a neck reset. The separation of the heel cap and the sloppy back binding and purfling below the heel cap (which ought not to be touched by a neck reset) suggest it. Is the lacquer chipped along the heel/side junction, or is it otherwise clear that the neck has been out? Bridge--too bad the original is lost, but it could be replaced by a good copy. It probably needs to come off for repairing or replacing the plate, anyway. Hi Howard - Good call - I hadn't thought of the head block / shoulder tuck, but actually there are a number of other details I didn't make obvious in the pictures. The finish is chipped away along the neck joint, the 15th fret was pulled and drilled for steam, and the binding / back joint is still original intact once you get immediately past the heel area. Of course none of that is in the photos I put up... Actually I just finished the repair this weekend, and am just putting some photos together. I did make a replacement bridge and bridge plate, and am actually very happy with how it came out. I'll probably put in another post or two tonight about it. |
Author: | Sam Price [ Tue Jul 15, 2008 12:19 am ] |
Post subject: | Re: What Not To Do - '42 Banner SJ "Repairs" |
Fascinating work! I have to be honest, I have never heard of a headblock reset before; sounds.....involved... |
Author: | David Collins [ Tue Jul 15, 2008 12:19 am ] |
Post subject: | Re: What Not To Do - '42 Banner SJ "Repairs" |
So now we're on the the bridge plate. First to make a template of the plate I pull out my trusty high-tech X-brace angle gauge. ![]() Then I make a quick cardboard template, grab a sheet of 1/4" aluminum, and make a heater plate. For jobs like this I use heater cartridges, and have a system set up to make it very easy. The cartridges I have mounted in aluminum blocks, and a little template to drill clearance holes in any plate I make to screw these blocks on. ![]() Here it is ready to go. From the time I took out the angle finder to this point where the heater is ready, took me maybe 10-15 minutes. ![]() For bridge plates like the 70's Martins I will go inside with a small, short hand saw I made with a depth stop to cut the plate in half without hitting the top. Then I will heat one side at a time, and remove the sides at different angles depending on runout. A little plate like this though is certainly a one-heater job. Notice in this pic that I do cut the plate short, so as not to touch the x-braces. I also go in with a damp rag and moisten the plate. I'm not sure if this small amount of water helps to soften hide glue, but I believe it at least aids in transferring heat to the joint. ![]() I keep the top open and well cooled. No cauls or plates. My goal is to heat aggressively from the inside to heat the glue joint sufficiently before heat has chance to really migrate to the top, and keep a fan on the bench to cool the top just in case. Here is a thermocouple probe stuck in to a bridge pin hole to monitor temp (though my hand on the top still has the final say). ![]() I use very high watt heater cartridges (600w if I remember), so 50-60 volts on the variac is pretty aggressive. I heat fast and heavy, hitting about 130℃-140℃ at the plate. On a plate this thin, it often takes less than a minute, but really heating the glue joint sufficiently makes all the difference in the world in pulling a bridge plate. I didn't take pics of my pullers, but I basically use putty knives, bend over in a U, and ground to various edges, usually preferring cut to an outer bevel. this plate came off like butter. ![]() Here's the inside. ![]() Next post, installing the new plate. |
Author: | David Collins [ Tue Jul 15, 2008 12:35 am ] |
Post subject: | Re: What Not To Do - '42 Banner SJ "Repairs" |
Clean the surface with yet another high tech gadget (plywood and sticky sandpaper). ![]() And with a few strokes it's pretty much ready ![]() Cut a new plate from good maple, about .090" thick, same as original. ![]() I kept the front line pretty close to the same, but did extend the back about another .080" behind the pins. The original I think was pushing the limits, and showed in that crack. Now a plywood caul and a few waxed plastic pins to hold it on the caul. ![]() I get the hide glue ready ![]() Warm the surfaces ![]() And glue it up. Now I'm not trying to correct any major bellying in the top - I'm replacing a cracked and loose bridge plate. The top was pretty good, though you'll see I did wedge a block under the clamps to push the clamping angle up a bit. If I were trying to correct a bad belly, I would be using a much larger plate on top, and probably spend a few days coaxing it before gluing. You should notice though, that I have leather under the 1/4" plexiglass plate. With all the spruce removed from under the bridge, I want a caul that will conform to it's unevenness and ensure a good clamped joint on the inside of the top to the bridge plate. ![]() And here it is with the clamps off. A small bit of squeeze out, one little glue smear, and a good new, appropriate sized bridge plate. ![]() Now on to the new bridge. |
Author: | David Collins [ Tue Jul 15, 2008 12:51 am ] |
Post subject: | Re: What Not To Do - '42 Banner SJ "Repairs" |
I won't get too much in to making bridges. I've always though of this as something you just "do". Here I cut the holes in a nice piece of brazilian on the milling machine because it's quickest and easiest for me, though it can just as simply be done on a drill press. ![]() Now off to the band saw, belt sander, spindle sander - grab a set of dial calipers and use whatever works. I've always done this freehand, and unless you're making many of an identical style I see no reason to jig up for this job. Here it is in the rough off the sanders. ![]() Glue in the pearl dots where Gibson's screws were, final shape, sand, and buff. The bridge on the top matches 40's Gibson facets, curves and contours. The one on the bottom does not. ![]() ![]() Then after cleaning and preparing the top, I route the ledge to match whatever recess there is in the top. ![]() When dry clamping I will block and tape at least the first clamp in place - takes a lot of pressure out of using hide glue. ![]() Then heat the surfaces with heat gun, lamp, hair dryer. Quick scrape on the bridge to clear any resins, apply glue, clamp, and cleanup. ![]() Drill holes, fit pins, slot bridge, etc. String up with brass dummy saddle to set saddle line. ![]() I also like to double check with actual measurements before cutting. ![]() Then it's off to route the slot. ![]() And the bridge and bridge plate are pretty much done. ![]() Next to the fret work and setup. |
Author: | David Collins [ Tue Jul 15, 2008 1:32 am ] |
Post subject: | Re: What Not To Do - '42 Banner SJ "Repairs" |
Now this is my latest twist to the neck jig - still under development, so don't ask too many questions on how it works. I'm sure that will be another discussion for another day. But here I am dressing the frets. I normally don't go to quite such lengths, but with a questionable neck angle and a non-adjustable neck, I like to take extra precautions. ![]() Since I'm also focusing on affecting a lower neck angle in the surface of the frets, I will often tape off one end of a leveling block as I start to manipulate the surface. Here I will be leveling primarily from the extension until I'm hitting maybe 80% of the frets. ![]() Lot's more to my fretting procedures, but that's another discussion. Now to the nut, which though was not worth shimming with the kinked and sloppy slots it had, nevertheless was. ![]() And though the footprint had been slightly enlarged from the Gibson .180"-.200" range, I was still able to get one in at about .215" at the base while coving the bare footprint. Now it's back to at least an approximation of the original trapezoidal Gibson style of the era ![]() I also replaced two cracked / partially missing fingerboard inlays. And though not part of any real restoration, I did pop the heel cap for a quick courtesy refit to eliminate the overhang. ![]() Then after making the final saddle, it's done for now. ![]() Here's the new bridge plate with pins and strings installed. ![]() And here's my new avatar (I'm a freak for 30's/40's Gibson flattops ![]() ![]() The neck angle is still a tad steep, and the bridge is about .070" taller than the original probably was. Still, the shapes and contours are right, and the body is sound. This thing sounds incredible. It lives it's life as a very active studio instrument, and is very worthy of doing so. The lesson here is obviously, know your limitations. The person who did these previous repairs was certainly in over their heads. I'll set a soundpost on a fiddle, but if you need work on your violin I know when it's time to refer you to someone appropriate. Even for guitars, while I may refinish a 70's Strat, if you have a 58 Les Paul I know people to refer that work to who can do it better. There may be some instruments that luthiers may take a bit of risk on to develop their skills, but it should not be with instruments like this. Ah well...... |
Author: | TonyFrancis [ Tue Jul 15, 2008 3:45 am ] |
Post subject: | Re: What Not To Do - '42 Banner SJ "Repairs" |
- |
Author: | Alexandru Marian [ Tue Jul 15, 2008 4:09 am ] |
Post subject: | Re: What Not To Do - '42 Banner SJ "Repairs" |
Great thread, thanks! |
Author: | Hesh [ Tue Jul 15, 2008 6:33 am ] |
Post subject: | Re: What Not To Do - '42 Banner SJ "Repairs" |
Wow David this is a fantastic thread!!! ![]() ![]() ![]() ![]() ![]() ![]() There is so very much going on here that I have a thousand questions but I will save them for the next lunch. ![]() As you know I am a big fan of old Gibsons too so I have to ask you how this one sounds now that it has been lovingly and respectfully put back in working order? One question that I have is what is the wisdom of slotting the bridge on the guitar when you made this bridge and it could have been slotted off the guitar? Is it just that you are jigged up to slot on the guitar? I liked the laser pointer on the slotting jig too - I think that has to be a world's first. |
Author: | Mitch Cain [ Tue Jul 15, 2008 6:53 am ] |
Post subject: | Re: What Not To Do - '42 Banner SJ "Repairs" |
David - you should seriously consider documenting some repairs like this and writing a book - I could read this all day! |
Author: | John Kinnaird jr [ Tue Jul 15, 2008 7:02 am ] |
Post subject: | Re: What Not To Do - '42 Banner SJ "Repairs" |
I am completely impressed with your work on this guitar David. Thanks for the show. Did you put cardboard under all of that foil that you show on the top when you removed the bridge? John |
Author: | John Kinnaird jr [ Tue Jul 15, 2008 7:04 am ] |
Post subject: | Re: What Not To Do - '42 Banner SJ "Repairs" |
One other question. Why does the fret leveling stick have tape on one end. Are you changing the angle of the fret grind below the fifth (or thereabouts) fret? John |
Author: | TonyKarol [ Tue Jul 15, 2008 7:05 am ] |
Post subject: | Re: What Not To Do - '42 Banner SJ "Repairs" |
THAT is incredible work David ![]() ![]() love your rig for heating/removing the plate with the cylinder plug heaters ... very cool (or hot, as it may be!!) |
Author: | Wes McMillian [ Tue Jul 15, 2008 7:25 am ] |
Post subject: | Re: What Not To Do - '42 Banner SJ "Repairs" |
Agreed. Awesome post. I'm always fascinated (and, I'll admit, more than a little intimidated) by this kind of vintage repair work. Guess that's a good thing, as it keeps my inexperienced hands away from them. I'd love to spend some time in the shop of a "Real" repair tech though. Fantastic work, David! Love those old Gibbys! |
Author: | LanceK [ Tue Jul 15, 2008 7:42 am ] |
Post subject: | Re: What Not To Do - '42 Banner SJ "Repairs" |
WOW! Nice work David! Thats a killer guitar too! |
Author: | David Collins [ Tue Jul 15, 2008 8:02 am ] |
Post subject: | Re: What Not To Do - '42 Banner SJ "Repairs" |
Thanks folks. I guess I should try and answer questions as they come - "Why did you choose not to keep the original nut?" -It wasn't original (very wrong shape), and the slots were crooked, poorly spaced, etc. It was just bad to begin with, and didn't look right. "Did you put cardboard under all of that foil that you show on the top when you removed the bridge?" - Yes, in the first bridge removal photo you can see it sticking out at the ends. I have a drawer that's filled with cardboard/foil guards for bridges and fingerboard extensions of all shapes and sizes. Usually a close one will do, then add a bit of metal tape to custom fit around the edges. ]"Why does the fret leveling stick have tape on one end. Are you changing the angle of the fret grind below the fifth (or thereabouts) fret" - Yes. I mention just above the photo that I want to lower the angle of the plane of the frets, so I make one end non-cutting and remove from the other to level it out.. My fret dressing schemes can actually get a bit complicated on their own, and this was just one very small point of it. One of these days I'll go in to more detail about my fret dressing approaches. "David - you should seriously consider documenting some repairs like this and writing a book Ugh, that sounds like work... ![]() ![]() And Hesh, yes I cut the slot with the bridge on, largely because that's the way I've always done it and how I'm set up for it. I toyed with the idea of using the table saw for the true Gibson style (you'll find the v-shaped bottom of the slot from a standard circular blade kerf on old Gibsons), but it's just easier for me to accurately cut the slot on the guitar. Thanks again folks. I'm off to the shop. |
Author: | Howard Klepper [ Tue Jul 15, 2008 8:04 am ] |
Post subject: | Re: What Not To Do - '42 Banner SJ "Repairs" |
David, I'd like to see more of your slotting system, with that cool laser pointer. I always slot on the guitar, with a simple jig that hasn't changed much in 30 years. Yours appears to be much better, or at least more fun. |
Author: | Terence Kennedy [ Tue Jul 15, 2008 8:08 am ] |
Post subject: | Re: What Not To Do - '42 Banner SJ "Repairs" |
Upper division stuff David. Keep it coming! Terry |
Author: | Mark Swanson [ Tue Jul 15, 2008 8:09 am ] |
Post subject: | Re: What Not To Do - '42 Banner SJ "Repairs" |
<bowing in reverence> Good job, David! A very complete job and I bet it sounds great. |
Author: | Evan Gluck [ Tue Jul 15, 2008 8:33 am ] |
Post subject: | Re: What Not To Do - '42 Banner SJ "Repairs" |
Awesome David. I love your photo shoots! Best, Evan |
Author: | jhowell [ Tue Jul 15, 2008 8:36 am ] |
Post subject: | Re: What Not To Do - '42 Banner SJ "Repairs" |
David-- Another thank you for a very informative thread! ![]() I'd second Howard's request to get a look at your bridge slotting jig. The laser pointer is just too cool! |
Author: | David Collins [ Tue Jul 15, 2008 9:09 am ] |
Post subject: | Re: What Not To Do - '42 Banner SJ "Repairs" |
Howard Klepper wrote: David, I'd like to see more of your slotting system, with that cool laser pointer. I always slot on the guitar, with a simple jig that hasn't changed much in 30 years. Yours appears to be much better, or at least more fun. Thanks Howard. I put up some photos a while back in this thread. It's certainly one of my favorite tools, and makes life so much easier. Now truing up a saddle slot for about any reason takes very little time to get accurate. And of course, there's no better way to make an otherwise good tool in to a great toy than to add a laser. ![]() ![]() Jim, I've always just used a piece of 1/8" brazing rod, slightly flattened on one side, bending it to match the bridge radius. Take good note though, of the guard taped in front of the bridge!. I've never had it slide off, but just in case.... I position it in the ballpark, then tune the open string and adjust the strobe to the 12th fret note. That will tell you how many cents it is off, and from there you can easily figure out where the intonation line needs to be. If you want the math using 1200th root of 2 to the whatever cent power, that will certainly be accurate, but it can easily be rounded to moving .007" for each cent on most guitars at the 12th fret. In final setup I use this same method for compensating the saddle. I put in a dummy saddle of appropriate height first, beveled all the way to the front. Then measure with the strobe how sharp each one is, and set the intonation lines on the final saddle accordingly. |
Page 1 of 2 | All times are UTC - 5 hours |
Powered by phpBB® Forum Software © phpBB Group http://www.phpbb.com/ |