Official Luthiers Forum!

Owned and operated by Lance Kragenbrink
It is currently Thu Feb 20, 2025 2:10 pm


All times are UTC - 5 hours


Forum rules


Be nice, no cussin and enjoy!


Post new topic Reply to topic  [ 19 posts ] 
Author Message
PostPosted: Sun Sep 07, 2008 1:27 pm 
Offline
Cocobolo
Cocobolo

Joined: Fri Nov 16, 2007 6:06 am
Posts: 329
Hi!

This is my first guitar/bracing. Please give me honest opinion as to way I braced and carved. I have not sanded yet so it's in some what of rough form.

Thanks, David

Image

Image

Image


Top
 Profile  
 
PostPosted: Sun Sep 07, 2008 1:35 pm 
Offline
Old Growth Brazilian Rosewood
User avatar

Joined: Fri Nov 02, 2007 9:49 am
Posts: 13512
Location: Ann Arbor, Michigan
First name: Hesh
Last Name: Breakstone
City: Ann Arbor
State: Michigan
Country: United States
Status: Professional
Hey David:

First off I am wondering how high the X-brace intersection is - it looks very high to me. You can safely take this down to 5/8" in height if it not already at 5/8th". Also the X-brace intersection needs to be capped, just a 1/16th" thick piece of quartered spruce from the brace stock will do nicely.

My biggest concern for now about your bracing is that they all look pretty square and don't have nice, smooth triangular profiles. It looks to me that before you even think about reducing height in places, and I would do that later too, get rid of some of the excess mass by carving the braces into triangular profiles. You probably could drop at least 30% more mass this way. This goes for the upper transverse brace too.

You are on your way though and this is when to think about further carving your braces - good job! [:Y:] [clap] [clap] [clap]


Top
 Profile  
 
PostPosted: Sun Sep 07, 2008 1:36 pm 
Offline
Old Growth Brazilian Rosewood
User avatar

Joined: Fri Nov 02, 2007 9:49 am
Posts: 13512
Location: Ann Arbor, Michigan
First name: Hesh
Last Name: Breakstone
City: Ann Arbor
State: Michigan
Country: United States
Status: Professional
Oh and I forgot - how thick is your top?


Top
 Profile  
 
PostPosted: Sun Sep 07, 2008 1:40 pm 
Offline
Mahogany
Mahogany

Joined: Sun Jun 29, 2008 6:36 pm
Posts: 58
Looks good generally, but I see gaps in your X joint. You profiled 'em before you glued 'em, didn't you? oops_sign 
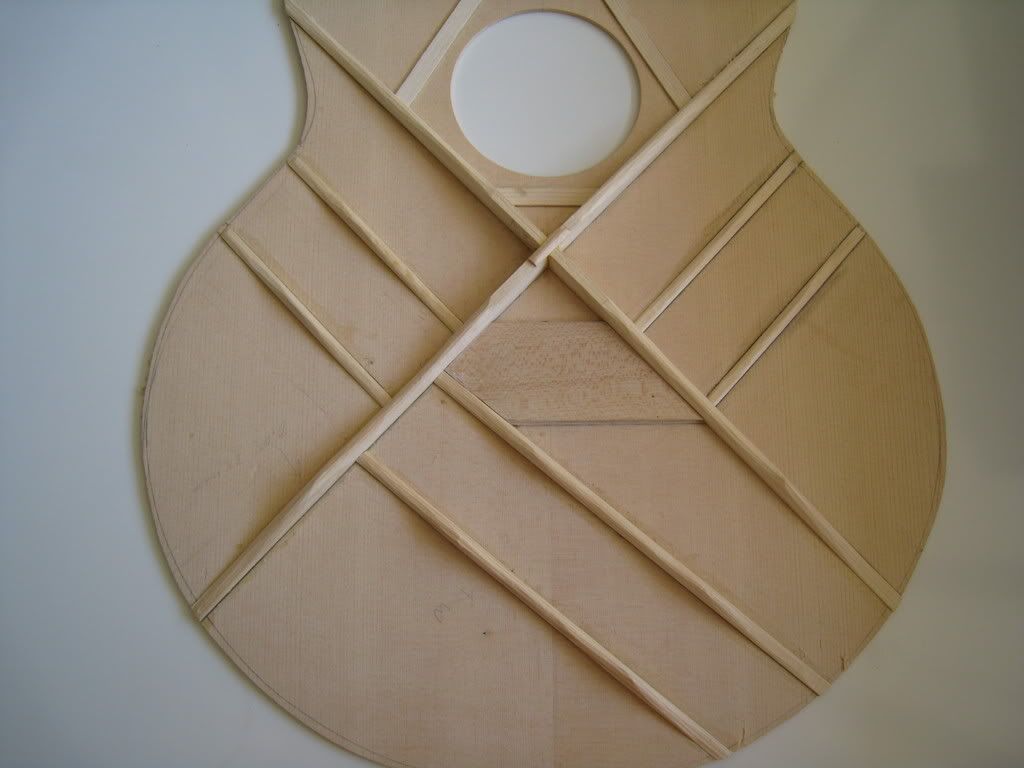
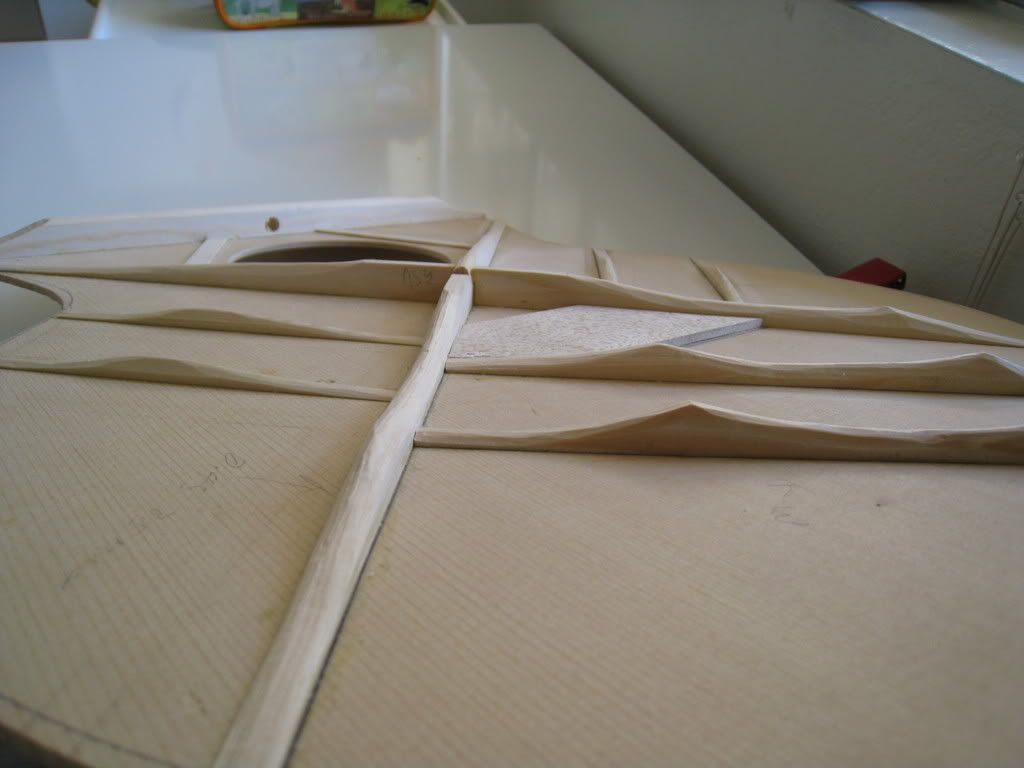
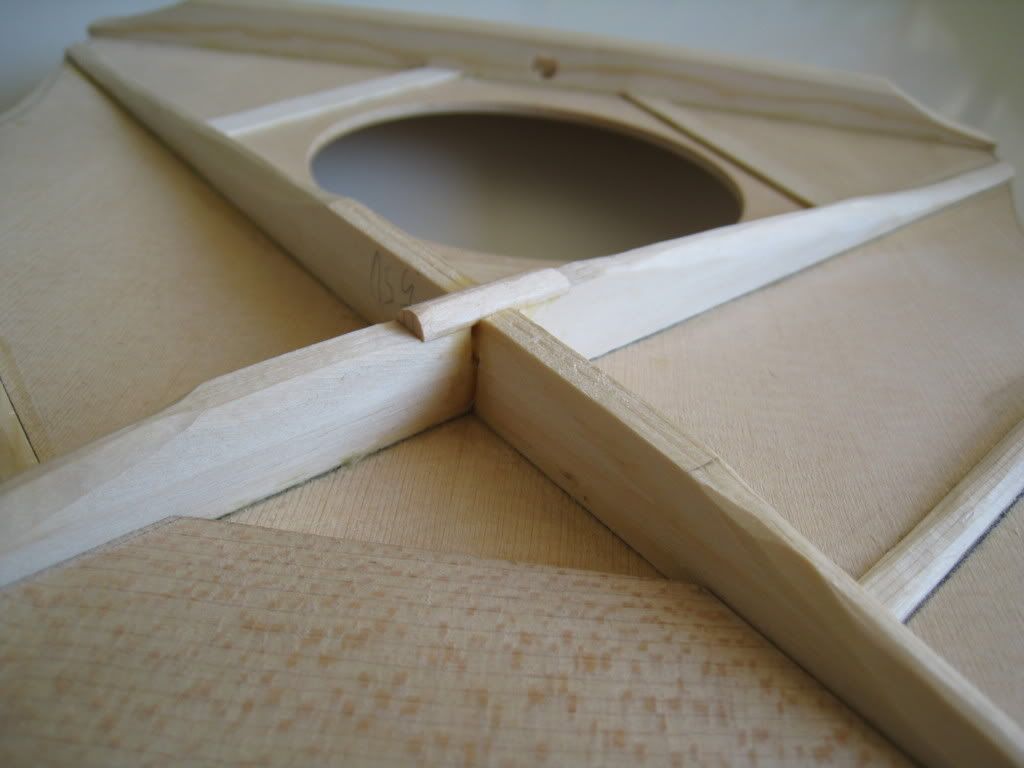
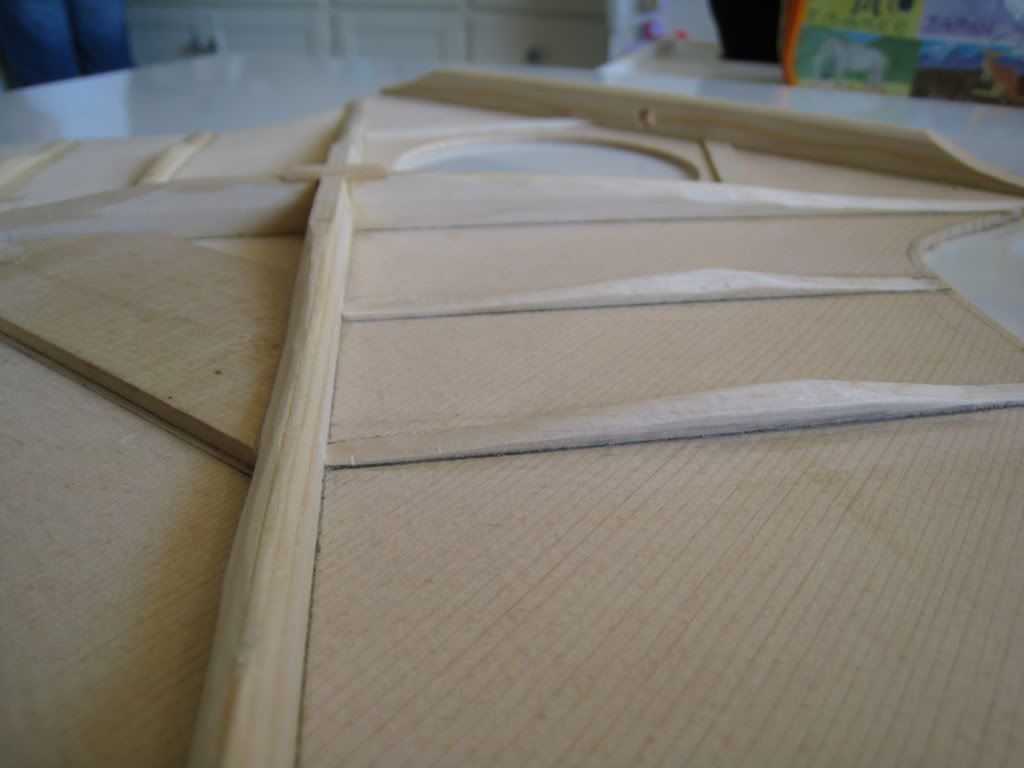
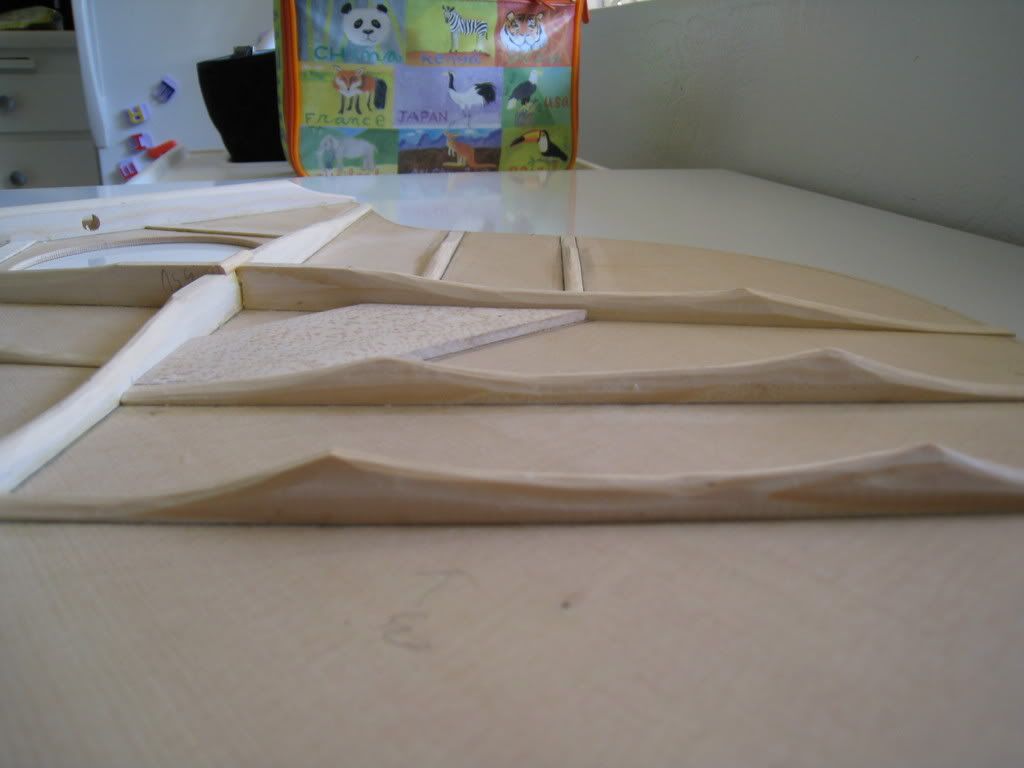
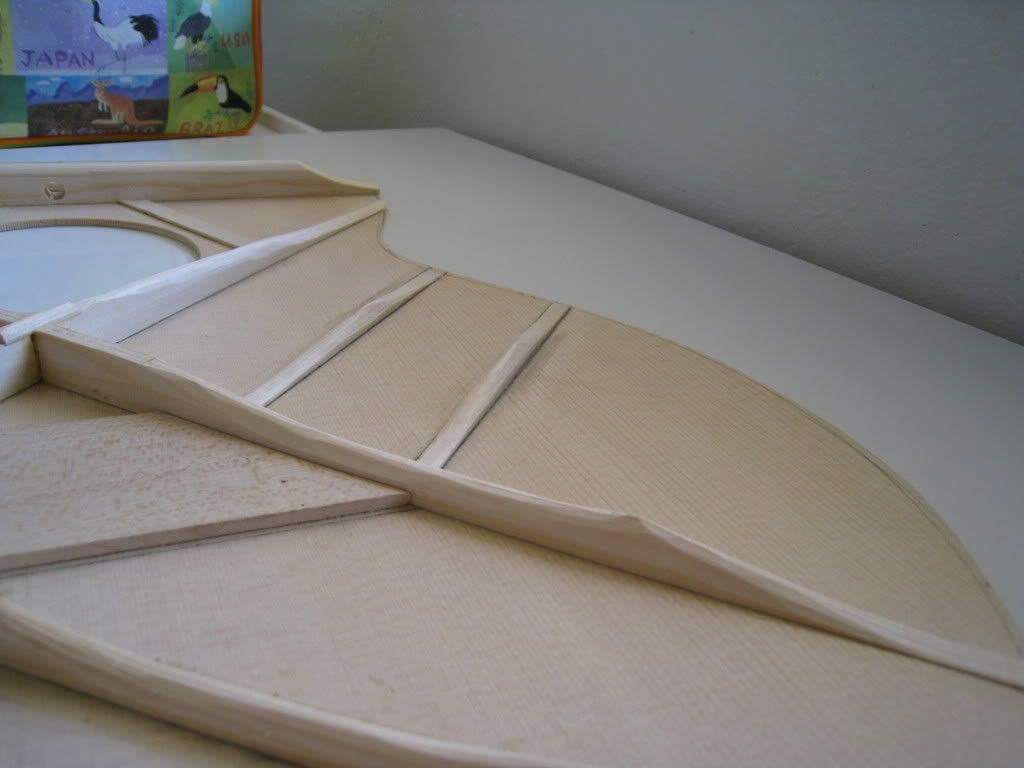
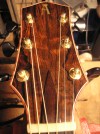
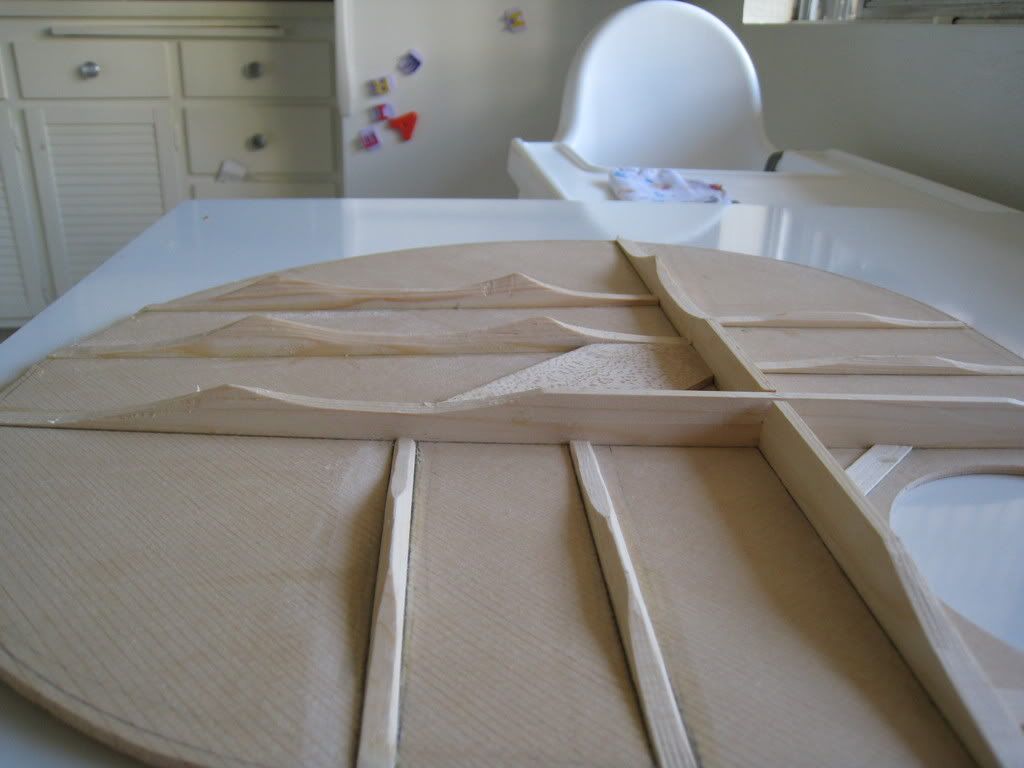
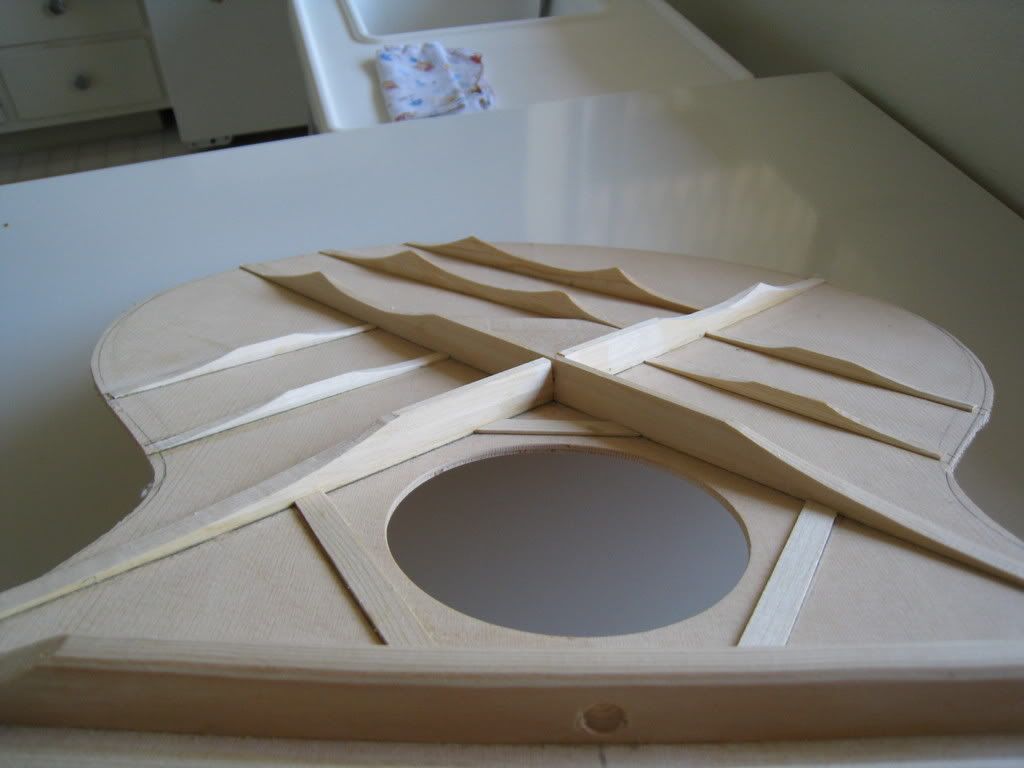
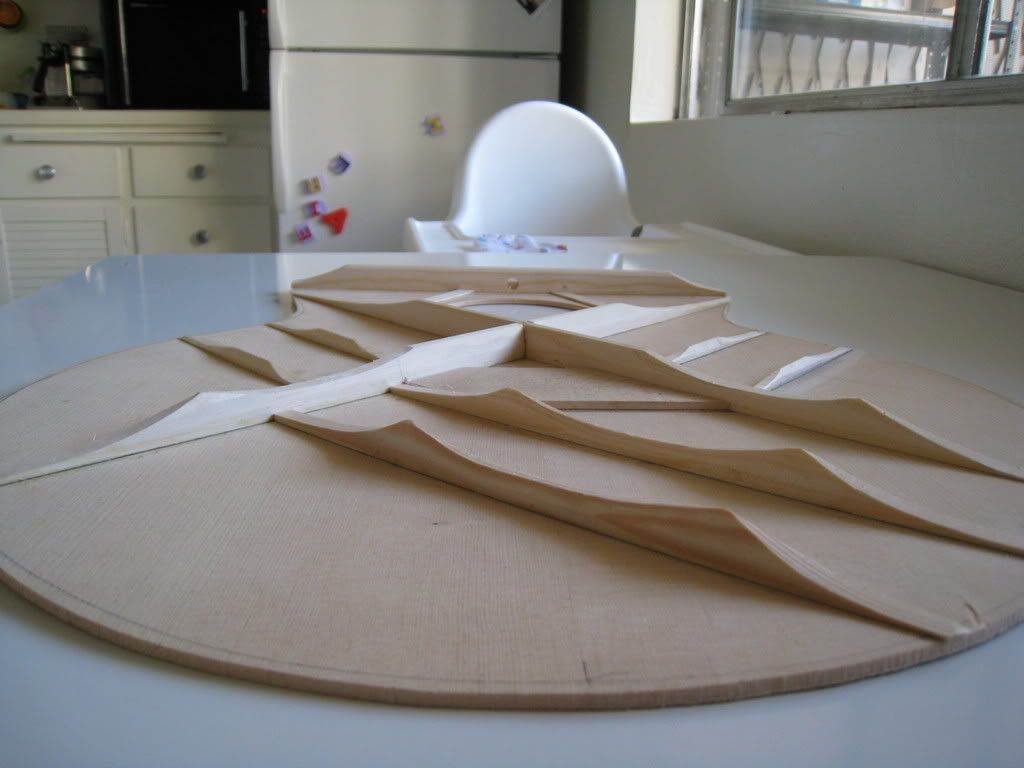
I'm not sure that just capping the joint will suffice. I hope that someone who's done this (I bet it's happened before!) will see this and join in.

_________________
Carlton Macksam
Muskegon, Michigan


Top
 Profile  
 
PostPosted: Sun Sep 07, 2008 1:56 pm 
Offline
Contributing Member
Contributing Member
User avatar

Joined: Sun May 29, 2005 7:17 am
Posts: 622
Location: Santo, TX
First thing I saw was the gaps in the X, too. Maybe someone can chime in with more experience, but that just screams "do-over" to me. I remember reading the article a while back (I think in AL?) about the L-00 simply being butted at the X and not lapped at all. Maybe a patch would help this area, but it wouldn't leave me very warm and fuzzy.

Aside from that, I see a good start. Still lots of mass that can be reduced. As Hesh said, start with reducing mass from the sides first, then slowly start reducing the height. Look at lots of bracing pics and critiques on this forum for ideas. Again, my only concern is the X.

Also, how thick is that bridge plate? Looks pretty thick to me. On my first, I put the bridge plate in full thickness as it came from StewMac, not knowing any better. Guitar still sounds real good, but I wish I'd realized it when I was at this stage and would have corrected it. I may still replace it now that the guitar is well played-in just to see the difference.

_________________
Wes McMillian
Santo, TX
http://www.wesmcmillian.com


Top
 Profile  
 
PostPosted: Sun Sep 07, 2008 2:15 pm 
Offline
Brazilian Rosewood
Brazilian Rosewood
User avatar

Joined: Tue Jan 25, 2005 6:16 am
Posts: 2692
Yeah, the X lap joint looks bad. The diagonal bars and finger braces can be tapered down closer to the top where they meet the X. I personally think there's no need for the scalloping to look like suspension bridges, but I have seen that kind of shape in guitars made by experienced builders. The X angle looks a little closed; are you following a plan? is this a 14-fret guitar? kit?

_________________
Howard Klepper
http://www.klepperguitars.com

When all else fails, clean the shop.


Top
 Profile  
 
PostPosted: Sun Sep 07, 2008 2:30 pm 
Offline
Cocobolo
Cocobolo

Joined: Fri Nov 16, 2007 6:06 am
Posts: 329
The top is .130
X- Brace where it joins, .613
Bridge plate is .125

I am going to cap the X-brace...heavily since I have a gap.

Thanks for sharing your thoughts and keep at it please.


Top
 Profile  
 
PostPosted: Sun Sep 07, 2008 5:32 pm 
Offline
Koa
Koa
User avatar

Joined: Tue Apr 01, 2008 8:51 am
Posts: 1310
Location: Michigan,U.S.A.
Focus: Build
Status: Professional
Is there a reason you made your top and bridge plate .005 thicker than normal.The x brace should be a tight fit. You can insert wedges before you cap it though, to make it tighter.Just wandering what your thickness is on the back and sides? Looks like a nice start so far.Mark


Top
 Profile  
 
PostPosted: Sun Sep 07, 2008 6:50 pm 
Offline
Cocobolo
Cocobolo

Joined: Fri Nov 16, 2007 6:06 am
Posts: 329
So I spent bit more time carving, measureing, taking pictures.

Tell me what I need to do please :)

.543 at the X-brace where it joins
.420 and .480 on the peak point of x brace where I scalloped. Yes, there is a difference I need to correct
.290 valley on X-brace
.225 average on the tallest part of finger braces
.485 on tonebar peak at the edge
.440 on tone bar peak closer to X- brace
.250 valley on tonebar

And yes, I still need to sand and clean up. Just holding it off since I still might have to adjust or carve.

Thank you, David

Image

Image

Image

Image

Image

Image

Image


Top
 Profile  
 
PostPosted: Sun Sep 07, 2008 6:56 pm 
Offline
Cocobolo
Cocobolo

Joined: Fri Nov 16, 2007 6:06 am
Posts: 329
slabmaster wrote:
Is there a reason you made your top and bridge plate .005 thicker than normal.The x brace should be a tight fit. You can insert wedges before you cap it though, to make it tighter.Just wandering what your thickness is on the back and sides? Looks like a nice start so far.Mark


I wish I knew what bridge plates were suppose to be. I guess now I know and my 2nd build will have thinner plate. btw, this is a kit so I didn't have choice on many things. Thanks for the input.

David


Top
 Profile  
 
PostPosted: Mon Sep 08, 2008 8:03 am 
Offline
Contributing Member
Contributing Member
User avatar

Joined: Wed Aug 31, 2005 7:30 am
Posts: 1792
Location: United States
You could try thinning the bridge plate a bit with a finger plane and sharp chisel for the corners. If anything feathering it out toward the rear will help. Around .100" is standard. Top seems very thick as well, unless it's real floppy. Doing quite a bit of perimeter sanding on the lower bout edges once the box is assembled may help a great deal as well.
If your rosette is inlaid well and deep you could try thinning your top with a mechanical sander from the outside, but it's tricky to keep a constant thickness. If the rosette is shallow I wouldn't attempt it.

_________________
Laurent Brondel
West Paris, Maine - USA
http://www.laurentbrondel.com/


Top
 Profile  
 
PostPosted: Mon Sep 08, 2008 6:44 pm 
Offline
Cocobolo
Cocobolo

Joined: Fri Nov 16, 2007 6:06 am
Posts: 329
Hmm...I have not gotten much response after posting 2nd set of pictures.
Is it that bad to a point beyond what can be salvaged?
wow7-eyes

I just want to be clear in terms of if it's ok to move on to next step or if I need to work on it bit more...or even start all over with new top. idunno

Any info would be greatly apprecited.

Thanks, David


Top
 Profile  
 
PostPosted: Mon Sep 08, 2008 7:57 pm 
Offline
Cocobolo
Cocobolo

Joined: Mon Sep 25, 2006 12:46 pm
Posts: 413
Location: Toronto, Canada
First name: Michael
Last Name: Lloyd
City: Toronto
Country: Canada
Focus: Build
Status: Amateur
Hi,

For your first build you're doing just fine. Remember it's your first build and one of the objectives is to understand the parts and how they go together. We naturally tend to over build on our first.

I would suggest that you sand the braces and clean things up for now and continue with the build. Hint, reducing the amount of lead use in outlining will greatly reduce your efforts in clean up.

This will be you best first guitar. Your next will be better and the next better again....

Enjoy the experience; learn lots and thanks for sharing.

_________________
Michael Lloyd

“I was born to ignorance, yes, and lesser poverties ...
I was born to privilege that I did not see ... I didn’t know it, but my way was paved” – John Gorka


Top
 Profile  
 
PostPosted: Tue Sep 09, 2008 6:34 am 
Offline
Cocobolo
Cocobolo
User avatar

Joined: Tue Feb 05, 2008 7:52 am
Posts: 434
Location: Sandwich, IL
First name: John
Last Name: Ressler
City: Sandwich
State: IL
Zip/Postal Code: 60548
Country: USA
The finger braces (small ones on the side) are typically not let into the kerf lining. So you'll want to cut those back so that they miss the kerf lining and feather the ends to nothing. Many builders also do not let the lower portion of the x-brace into the lining as well - some do, some don't.

The ends of the other braces that will be let into the kerf lining need to be flat so that it will fit nice and secure in the brace pocket that you will route into the kerf lining. You have the ends rounded right now. I generally make the ends about 1/8" high.

The Upper Transverse Brace scallop should be cut back more - you don't have much room right now for the kerf lining. You could cut it back twice as far as you have it now - again, keep the end flat.

As others have said - overall it looks pretty good for a first attempt - is a bit heavy all around- but you are on a good path. Take some time to clean it up, get the ends set properly and move on. It will sound good. I would also sand the top (after the back and top is glued to the sides) around the perimiter of the lower bout with a RO sander as suggested before. This will help free it up a bit.

Good luck - keep us informed of the progress!

_________________
John Ressler


Top
 Profile  
 
PostPosted: Tue Sep 09, 2008 7:26 am 
Offline
Contributing Member
Contributing Member
User avatar

Joined: Fri Sep 09, 2005 7:51 am
Posts: 3786
Location: Canada
others have given lots of great advice - if I can add to that, I would heat the bridge plate off and replace it with a new one ... no thicker than .090.

_________________
Tony Karol
www.karol-guitars.com
"let my passion .. fulfill yours"


Top
 Profile  
 
PostPosted: Tue Sep 09, 2008 8:15 am 
Offline
Brazilian Rosewood
Brazilian Rosewood
User avatar

Joined: Wed Jun 22, 2005 10:11 am
Posts: 2761
Location: Tampa Bay
First name: Dave
Last Name: Anderson
City: Clearwater
State: Florida
Zip/Postal Code: 33755
Country: United States
As Tony and Laurent have said - Replace or thin down your bridge plate.
Work on shaping your braces and feathering the ends on lower X ,tone bars,and
finger braces. And thin the lower bout around the edge after closing the box. Not bad
for a first,but needs a little work. Good Luck and have fun with the rest of your guitar.

_________________
Anderson Guitars
Clearwater,Fl. 33755


Top
 Profile  
 
Display posts from previous:  Sort by  
Post new topic Reply to topic  [ 19 posts ] 

All times are UTC - 5 hours


Who is online

Users browsing this forum: CraigG, Mike Franks, rbuddy and 52 guests


You cannot post new topics in this forum
You cannot reply to topics in this forum
You cannot edit your posts in this forum
You cannot delete your posts in this forum
You cannot post attachments in this forum

Jump to:  
Powered by phpBB® Forum Software © phpBB Group
phpBB customization services by 2by2host.com