Official Luthiers Forum!

Owned and operated by Lance Kragenbrink
It is currently Tue May 13, 2025 12:09 pm


All times are UTC - 5 hours


Post new topic Reply to topic  [ 29 posts ]  Go to page Previous  1, 2
Author Message
 Post subject:
PostPosted: Wed Nov 01, 2006 10:46 am 
Offline
Koa
Koa
User avatar

Joined: Sun Jun 12, 2005 11:46 am
Posts: 720
Location: Australia
G'day Colin,
                I gave a lengthy reply to this last night ,only for it to be wiped before posting 1000 curses. Don't you just hate that ?

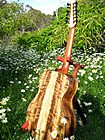
I see the top as a more important join than the back ,so glue it first . This way,I can ensure my A frame pockets into my head block and X brace ends all fit perfectly and are cleaned up nicely . Glueing the back first is usually done for cosmetic reasons, but I have that covered too ! ( read on )

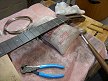
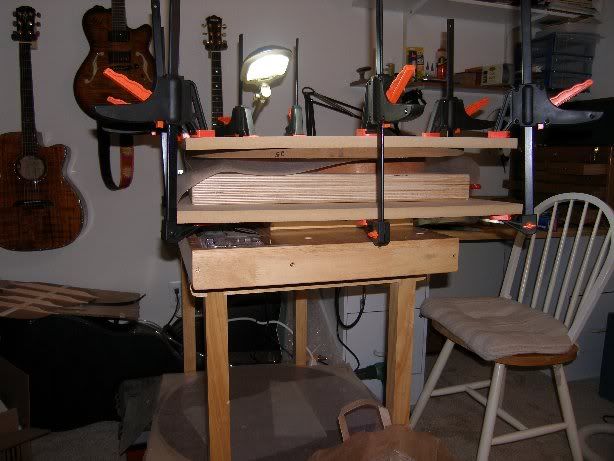
Firstly ,I ensure a perfect radius has been imparted on the rim . The (soundboard) dish is placed on the go bar deck and covered with posterboard. I place the glue round the sides lining , and hold it over the sound board at a slight angle so that the glue has not yet made contact . With my other hand I prop a go bar through the mold onto the middle of the X Brace . This brings the soundboard down to meet the dish snugly .I then lower the rim set,( still in mold ) . A few cam clamps straddled from the top of the rim set to under the deck is all that's needed . Cam clamps are a better method than go bars . They are just as quick, and don't get in the way while cleaning up any squeeze out that may be there . I have found that there only need be one go bar to hold the soundboard down to it's true radius .If there were any small irregularity on the sides radius , I'm sure the cam clamp's force would pull the join together , but I take no chances. The problem of joining the plates without this dish method is that the sound board has a certain amount of spring back after being braced and doesn't retain that perfect radius we are trying to impart . If you were to use other methods such as neoprene rope or spool clamping from the top , you are glueing down the top when it's not conforming to the radius wanted .

Glueing the back is much the same operation ,except that you now have the back dish on the deck . Place a go bar through the sound hole to bring the back plate down to meet the dish ,but place it through the rear part of the soundhole ( closest to bridge area) . This is very near the centre of the back's radius and still allows access through the soundhole to clean up any visable squeeze out .

Best regards Craig Lawrence

P.S. You'll need the long cam clamps for some areas , but that's cool, as you don't need a lot of force with the weight of the mold already doing a good job . As usual,,,, dry run first.KiwiCraig39022.815162037

_________________
CRAIG LAWRENCE of AUSTRALIA
_____________________________________________


Top
 Profile  
 
 Post subject:
PostPosted: Wed Nov 01, 2006 12:26 pm 
Offline
Koa
Koa

Joined: Sun Apr 24, 2005 4:05 am
Posts: 749
Location: Canada
Mike, the Cork caul is made from a scrap of ply I had lying around. It is designed so it can be used on My SJ, OM and L-00. I have a separate one for my size five. I've glued Top first and back first and really don't knowe which I prefer. Once I did top and Back in one step which worked but using HHG it was stressful and not worth the time saving.


Top
 Profile  
 
 Post subject:
PostPosted: Wed Nov 01, 2006 2:31 pm 
Offline
Koa
Koa
User avatar

Joined: Wed Mar 29, 2006 11:21 am
Posts: 805
Location: United States
First name: Jim Howell
I used a similar method. My stack consists of a wooden chisel box on the workbench to act as a riser, then a 24" square piece of 3/4" mdf, then the sides in the mold, then the sanding bowl. All of this is clamped with 6 to 8 clamps.

I didn't have access to the inside, but experimented with brushing LMI white glue on similar thickness scrap to get a good glue line without excessive squeeze-out.


edited for (and by) dyslexic fingers jhowell39022.9410532407

_________________
Jim Howell
Charlotte, NC


Top
 Profile  
 
 Post subject:
PostPosted: Thu Nov 02, 2006 10:13 am 
Offline
Brazilian Rosewood
Brazilian Rosewood

Joined: Sun Dec 25, 2005 6:32 am
Posts: 7774
Location: Canada
Great thread and tips guys, thanks!


Top
 Profile  
 
Display posts from previous:  Sort by  
Post new topic Reply to topic  [ 29 posts ]  Go to page Previous  1, 2

All times are UTC - 5 hours


Who is online

Users browsing this forum: No registered users and 18 guests


You cannot post new topics in this forum
You cannot reply to topics in this forum
You cannot edit your posts in this forum
You cannot delete your posts in this forum
You cannot post attachments in this forum

Jump to:  
Powered by phpBB® Forum Software © phpBB Group
phpBB customization services by 2by2host.com