Ok here is a tutorial - it's a little longwinded on paper as i'm describing
from a beginners point of view - once up to speed you should be blasting
out the rosettes!
1.Open a new document in Adobe Illustrator and turn on 'Show
Grid' & 'Snap to Grid in the view menu.
You can adjust the grid size and subdivisions in the Illustrator /
Preferences menu.
2. Select circle tool from the menu.

3. Draw out your first circle taking care to align the the center with a grid
intersection. On a mac if you hold down the shift key while sizing your
ellipse it will stay perfectly circular. Holding Alt+Shift while dragging
starts the circle at the center instead of the top right hand edge which can
be helpful. After drawing the circle I find it helpful to set the stroke color
to black and the fill color to red with a transparency of 50% so you can
keep track of the layers.


2. Draw a second circle over the first with centers aligned.
3. Select both circles by clicking and dragging from a blank space outside
the largest to a blank space inside the smallest (now the edges should be
highlighted in blue and a blue square should surround the design).

4. Open the pathfinder menu (Window/Pathfinder) and press this button

it will cut a hole in the larger disc using the smaller one as a template.
For this demo i'll add another shape to the design another ellipse. Like
the previous stage i will cut another hole and for fun i'll make it star
shaped.

Before cutting the hole i want to merge the smaller ellipse with the larger
ring (we want to cut through them both with the star) so i use the merge
button in the Window/Pathfinder palette.

5. Select the smaller ellipse and the larger ring making sure the star is not
selected and press the merge button.
6. Select the merged ring and then the star and press the cut button this
is what you'll end up with.

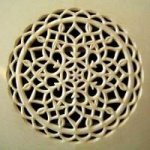
This is then end of the design stage and next comes the fun part adding
the patterns!
7. Select the design (it should all be one 'Path' now) and get rid of the
colour fill by clicking on the fill colour (1) this will bring it in front of the
stroke colour if it's not already. Then press the clear button (2).

8. Reselect the design put the transparency opacity back up to 100% and
open up the brushes palette (Window/Brushes) and click and hold the tiny
arrow here:

Still holding go down to 'Open brush library' after a moment a list of all
you brush libraries will appear. Select one of the Libraries and the
brushes contained within it will open in a new palette. By clicking
on the different brushes you can see what they look like on the design.

Try changing the stroke width to change the scaling of the design or
double click on the brush in the brush palette to alter it's options.
You can also make your own brushes but i'm not going to explain that
process - it's in Illustrator's help files!

here's a quick OLF design with the 2 segments used to create it shown at
the top left:

Good luck and let me know how you get on!
john.


 .
.