Official Luthiers Forum!
http://w-ww.luthiersforum.com/forum/

TazTigMyrt Construction Pics
http://w-ww.luthiersforum.com/forum/viewtopic.php?f=10102&t=12252
Page 1 of 2

Author:  Steve Kinnaird [ Wed May 30, 2007 3:01 pm ]
Post subject: 

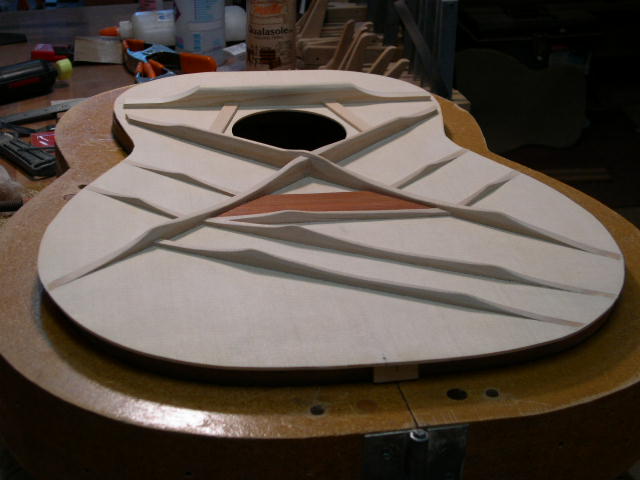
As threatened, here's a few more pics of the Tasmanian Tiger Myrtle SJ. First is a shot of the bracing pattern. The lighting is such that you can get a feel for the contours:


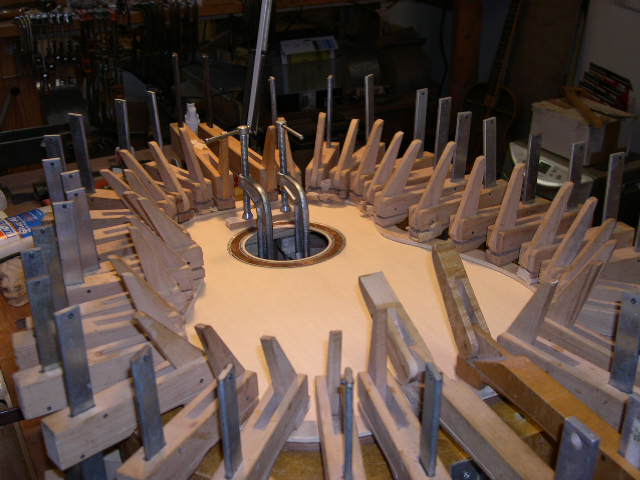
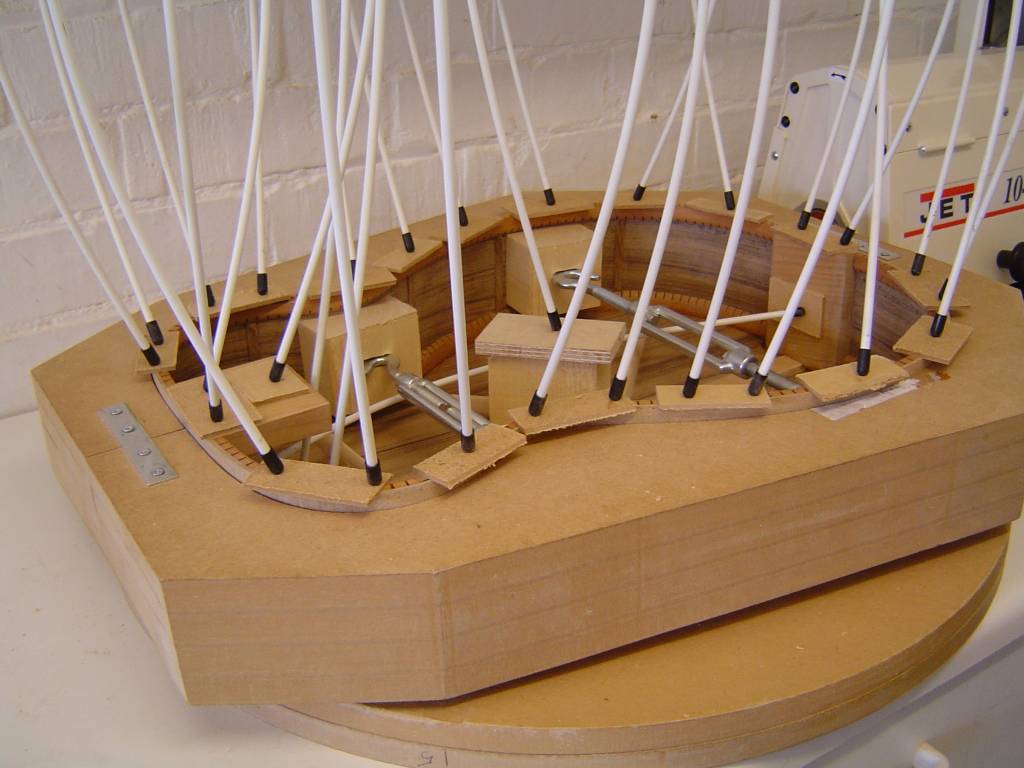
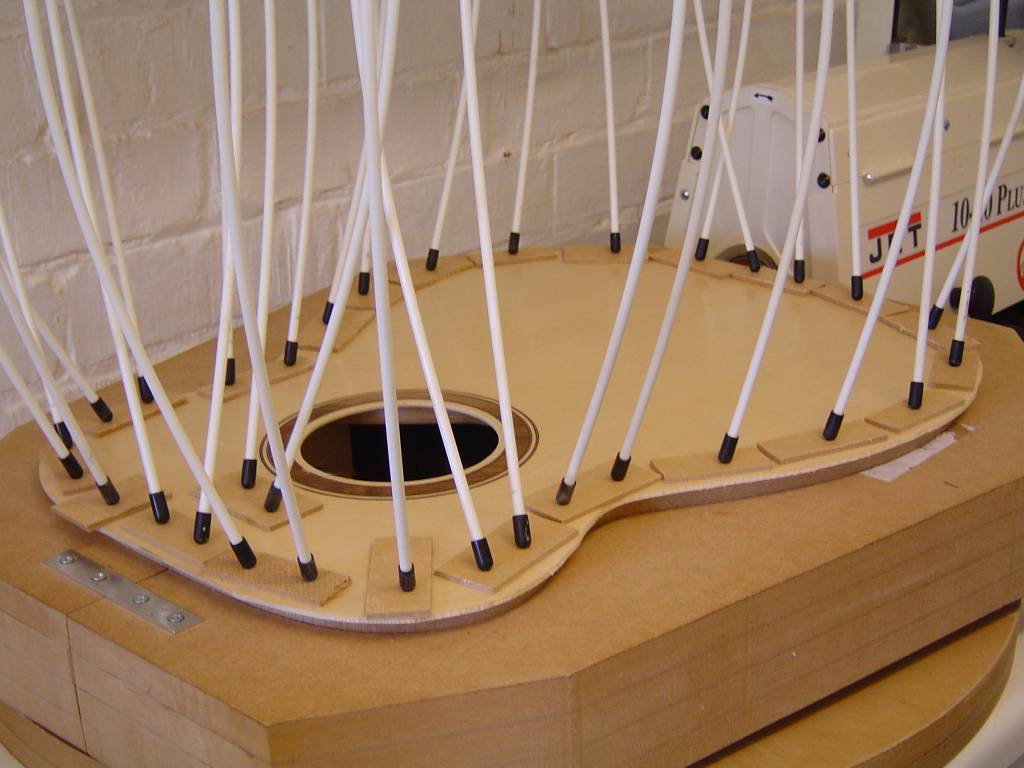
Next, gluing on the top...


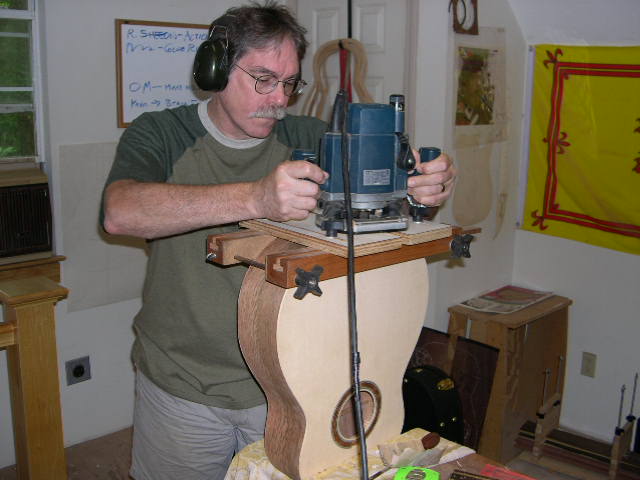
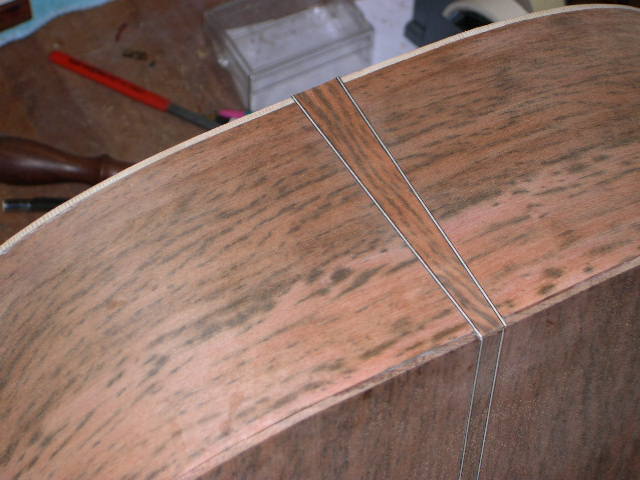
Routing for the tail wedge:


Gluing in tail inlay w/ band clamps:


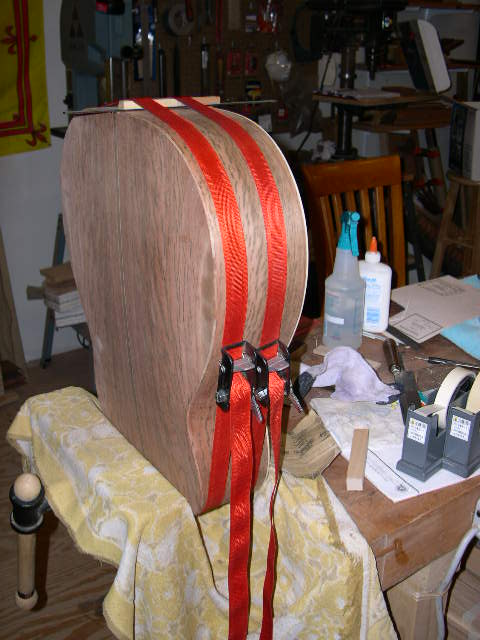
Wedge installed-- it is also Tiger Myrtle, as will be the bindings and back strap:


Thanks for looking, and thanks again to Tim Spittle for such a fine material to work with.

Steve

Author:  matt jacobs [ Wed May 30, 2007 3:10 pm ]
Post subject: 

Dang Steve, thanks for the pics. Now I know how to copy you . Any tips on working with the Taz.

Author:  D Stewart [ Wed May 30, 2007 3:21 pm ]
Post subject: 

Very cool Steve! I like the band clamps fot the wedge. Learn more every day. That box is going to be beautiful.

Author:  Colin S [ Wed May 30, 2007 7:47 pm ]
Post subject: 

NIce work Steve, always interesting to see another's methodology. Very neat transition from the tail wedge to the back strip. I believe that the potential of the Aussie woods is only just being tapped, interesting to hear how this one sounds. I assume this is a sitka top?

One thing though, do you think you've got enough cam clamps? I glue my plates on with the go-bar deck and find it much quicker than my old clamping method.


Colin


Author:  Colin S [ Wed May 30, 2007 7:48 pm ]
Post subject: 

Sorry, if I still had the EDIT facility I'd reduce those pictures down in size, but apparently I'm not to be trusted to edit my own intellectual property.

Colin

Author:  robertD [ Wed May 30, 2007 9:25 pm ]
Post subject: 

Steve,

Very fine execution of your technique! The results are obvious. I can see in the pics that the edges
are true and the tailpiece is cut in superbly! Excellent job!

I’m curious though, to what the “C” clamps are being used for in the sound hole?

Also, I like that, you use a caul between your clamps and top. What material is it made of?
Looks like it could be made of 1/4" ply. Can’t really tell.

Anyway, beautiful workmanship!

Colin,

I like your technique too!

This thread reminds me of something my Grand-pappy used to say.

“The method is not as important as the results”

Robert

Author:  Steve Kinnaird [ Wed May 30, 2007 9:31 pm ]
Post subject: 

Ah, gotta love the British wit! Colin, your last post made me chuckle.
You remember what Aristotle said?
Something like "Wit is educated insolence".
But I hear you about the edit button.
Ohh, dat Wee haaad it bcak!

Ok, answers: Matt--you don't need any tips. You'll do fine. This stuff is easy to work with.

Donovan--thanks. If that tip is worth anything to you, I'm glad! I'll send you my bank acct. number for direct deposit.

Colin--thanks, mate. I hope you are sitting down, so that when I say NO, this isn't Sitka, you won't feel too light-headed. This is some of Shane's famous Lutz, and I can tell you this is some promising tonewood. What a tap it's got! I'm really anxious to hear what it sounds like w/ strings attached.
And yes, I'm a bit concerned about the number of cam clamps myself. I've got them spaced as close as they will go, but still worry about insufficient pressure.

Steve

Author:  Steve Kinnaird [ Wed May 30, 2007 9:37 pm ]
Post subject: 

Robert, we were typing at the same time.
Thanks for your kind words!
Now--the "C" clamps are clamping the top to the "L" part of the head block.
And yes, that caul is a 1/4" donut of plywood.
There is one on the underside as well, that is not shown in the pic.
I like the idea of spreading out the pressure evenly,
as well protecting the fragile wood.

Thanks again,

Steve

Author:  KiwiCraig [ Wed May 30, 2007 10:04 pm ]
Post subject: 


Very very COOL Steve . I like every thing I see in the pics . The Tiger trim is a real winner with that purfling .Your workmanship looks immaculate !

The bracing has my vote also.

I didn't realise you are so short on cam clamps . Maybe some of us can chip in and get you some

Great work as always Steve.

Cheers , Craig

Author:  Steve Kinnaird [ Wed May 30, 2007 10:11 pm ]
Post subject: 

Hesh and Craig, many thanks, buds.
Craig, I think you've got a grand idea, and hope that we can start a drive to "get Steve a few more cam clamps".

Author:  Steve Kinnaird [ Wed May 30, 2007 10:15 pm ]
Post subject: 

One more thing. Hesh, when taking 2 horses spinning at 30,000 rpm to irreplaceable wood, I bet YOU look serious too?

Steve

Author:  KenH [ Wed May 30, 2007 11:12 pm ]
Post subject: 

WOW great pictures. Your workmanship is flawless. Thaks for sharing your technique with us.


I have always been curious how one would use a gobar deck to attach the tops and backs to a guitar and I now know. Does this take shorter bars or are all of the bars the same length?  Also, how do you go about keeping the top from slipping on the glue when you apply pressure? It seems that since the gobar is bent to apply the pressure, the top would want to slip in the direction of the bend??


Thanks again for the picture tutorial!


Author:  KiwiCraig [ Wed May 30, 2007 11:14 pm ]
Post subject: 

[QUOTE=Steve Kinnaird]
Craig, I think you've got a grand idea, and hope that we can start a drive to "get Steve a few more cam clamps".
[/QUOTE]

O.K. Steve ,old buddy . I hear you loud and clear.

So, what about ralling around all you folk and help out here. Although Steve is probably too embarrassed to say it,,,, I hear from reliable reports that he is indeed down to his last 168 cam clamps . Don't know how he can possibly cope

It's truly is a pitiful situation folks Lets help out where we can huh ? ,,, Give till it hurts !

This is going to be a great ,great guitar mate.


Cheers, Craig


Author:  Todd Rose [ Thu May 31, 2007 2:47 am ]
Post subject: 

Looking great, Steve!

Author:  Steve Kinnaird [ Thu May 31, 2007 4:28 am ]
Post subject: 

Ken, Hesh is basically correct. (Did I just type that?! ) But if you are like me, glue a little block of spruce, or what ever you like, at the neck zone and tail area right at centerline, flush with the linings. Drill a small hole through the excess top or back material into the block and use that for your register. (The drill bit works just fine for this.) This helps if your brace sockets aren't Lance Kragenbrink-tight. Be sure to keep those small holes outside the guitar's outline, or else you will have to use wider purfling that you first planned.

Thanks again for the kind words guys.
Hesh, I'm really working for five clappers on this guy.

Steve

Author:  Steve Kinnaird [ Thu May 31, 2007 4:30 am ]
Post subject: 

Oh, and Craig, let's do it!
However, if a cam clamp is too painful a donation, we'll consider a set of Koa, or perhaps more wood from Aussie land!


Author:  Dave Rector [ Thu May 31, 2007 5:11 am ]
Post subject: 

Steve, looks like you will just about have her ready for me to take home when I come down for a visit.

Dude, that is some awesome looking wood and the workmanship is no less amazing!

P.S. I prefer light guage strings.

Author:  Bruce Dickey [ Thu May 31, 2007 5:47 am ]
Post subject: 

Steve I learned something here I think? Did you cut for bindings before adding the tail wedge with purfling?

That gets the guitar ready for side purflings correct?

Author:  Steve Kinnaird [ Thu May 31, 2007 10:59 am ]
Post subject: 

Dave, come on down. And bring lots of those little slips of green paper.
Bruce, no, the binding ledges have not been cut at this stage. I like to cut over the tail wedge for the bindings...less chance of blow-out, and it makes the cut of the wedge nice 'n clean.

Thanks again,

Steve

Author:  robertD [ Thu May 31, 2007 8:57 pm ]
Post subject: 

Steve,

That’s ingenious! An “L” shaped neck block! I’m assuming that adds a lot of stability to the upper
bout, in relation to the neck and fretboard connection?

If I may ask. Do you make the block from 1 piece of wood, or two?

Also, it’s kind funny about the 1/4" ply caul, in that, I was thinking of doing the same thing on my
next build for exactly the same reasons you mentioned. Just goes to show ya, not much you can
think, do, or say, that hasn’t been thought of, done, or said before!

Robert

Author:  Steve Kinnaird [ Fri Jun 01, 2007 4:11 am ]
Post subject: 

Robert, like you point out, if that "L" shaped headblock seems ingenious, be sure I didn't think of it. It's been done before, by many others. My approach is to do a two-part block. The horizontal piece is both glued and screwed into place (for long term stability) onto the vertical block. Now, my brother has a clever approach. He will bend, and laminate, several layers of thin wood into the "L" shape. It is material-efficient, strong AND stable. Something like this:


Thanks, Steve


Author:  John K [ Fri Jun 01, 2007 10:14 am ]
Post subject: 

That block was a lot of trouble to make. I now do a finger joint between the two legs of the "L".

Good looking sequence of construction photos bro.

BTW, I have been looking at those clamps and I think I recognize some of my clamps in the mix. I thought your bags looked stuffed when you left last Christmas.


Page 1 of 2 All times are UTC - 5 hours
Powered by phpBB® Forum Software © phpBB Group
http://www.phpbb.com/