I saw a couple of questions in another thread about how to recess a ledge on a bridge. For those that finish the top without masking the bridge, this is sometimes done so they don’t have to scrape off the finish to the edge of the bridge outline and risk a chip out near the edge.
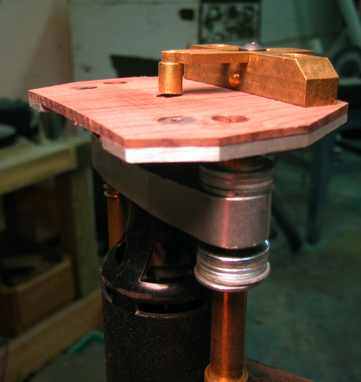
For those of us without access (for one reason or another  ) to a CNC shop that will put ledges on your bridges for you, here’s a jig I made to do this. This jig was meant to be as simple as I could make it, so I’m sure there are improvements that can be suggested.
Basically, I made a highly specialized mini router table. I didn’t think at the time I made this to take pictures during the build, so you’ll see the completed jig during the explanation of the build.
Materials needed: ?” plywood, 1/16” router bit (or up to 1/8”, according to the size of ledge you wish to end up with), six inches of ?”-3/8” dowel material, glue.
Time: 15 minutes
I started with a ?“ piece of Baltic birch that I cut to about 7” x 15”. This will form the base of my “router table”. I wanted it to be small, but it needs to be able to support the bridge completely. I then chose a small plunge router and removed the base. Using the base as a template, I centered it (roughly) on the plywood after which I marked, drilled and counter sunk the holes to be able to mount the “table” to the router.
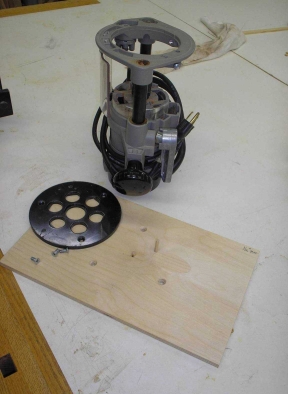
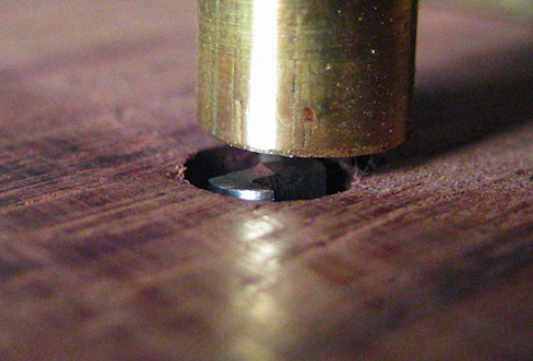
I chose to have only a 1/16” edge. I then mounted a 1/16” down cut bit in the router, attached the plywood "table", and plunged it through the top. I had ?” wooden doweling available to make my guide. I carefully marked a center point for my dowel so it was 1/8” (1/2 the dowel diameter) from the EDGE (not center) of the plunged hole. I drilled the hole though and glued in the dowel so that it stuck up about 1/4”. I went all the way through the top and kept the dowel short so it would be as rigid as [possible. The bridge will bear directly against the guide. Since the dowel is at the edge of the plunged hole, the result is a 1/16” ledge. An extra dowel was placed about 1-1/2” to the right of the guide. Its exact location is flexible
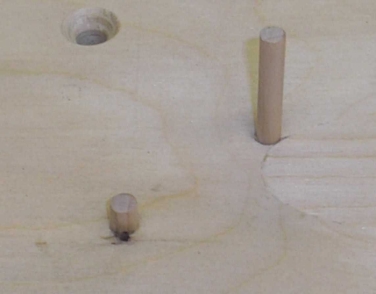
This is a safety feature I borrowed from my full size router table. It is a brace that you feed the bridge into and against first, before it reaches the guide and router bit. It helps you resist kick back from the spinning router bit. Granted the 1/16” bit sounds small, but it has a surprising amount of power.
You can set the bit height using feeler gauges to get the right height to:
1) ensure a solid fit between the scraped wood and the bottom of the bridge
2) but not so high that you have a large gap between the ledge and the finished top.
When routing the bridge, I clamp the router in a vice to hold it steady.
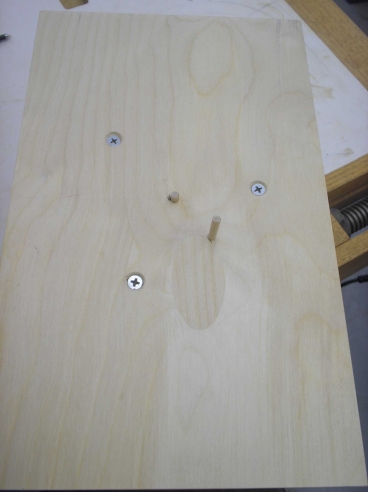
Note that my guitar top braces start their arch away from the bridge, so the area around my bridge (and the bridge itself) is flat and I can use a flat table in this jig. If you use arched bridges, you could mount a convex arched domed base to the router instead of the flat table. This should allow you get a ledge on your arched bridge.
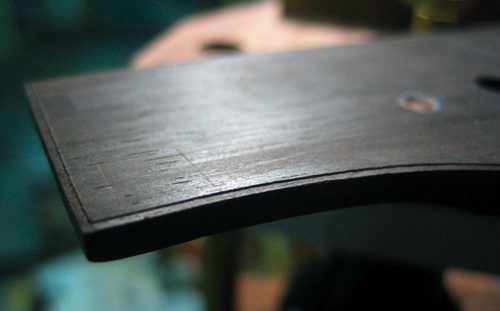
I’ve routed a bridge below and highlighted the recessed ledge with yellow pencil so it shows up a little better.
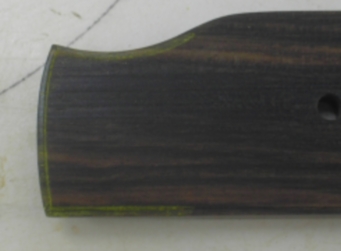
Hope this is clear (even if some of the pictures aren't!) and is a help.
Joe
 just kidding! joe, a great big welcome to the OLF. i agree, dont be a stranger.
