Official Luthiers Forum!

Owned and operated by Lance Kragenbrink
It is currently Tue Apr 22, 2025 4:47 pm


All times are UTC - 5 hours


Post new topic Reply to topic  [ 7 posts ] 
Author Message
 Post subject:
PostPosted: Sun Jul 17, 2005 7:48 am 
Offline
Koa
Koa

Joined: Wed Dec 29, 2004 3:25 am
Posts: 886
Location: United States
Brock and others have asked that I post a how to on my fanned frets, so here it is in all it's glorious simpleness

First things first....

* The wood I'm using here is some of Brad Goodmans snakewood, I don't know where he gets it from but it's the best I've ever seen, period. Had we not been forced to move I would have bought every single piece he had

* I like to bind my fingerboards and especially with expensive snakewood, I want to keep all that glorious figure so part of my process is to do that, it makes the process more intricate by quite a bit. However if you skip that step cutting a fanned fret is pretty easy.

* The jig I'm using is inspired by Harry Fleishman, I'm actually designing a newer version of this jig using better materials, while this one works it's too easy to screw something up with it. The new version will use a laser and aluminum for stabiliy...

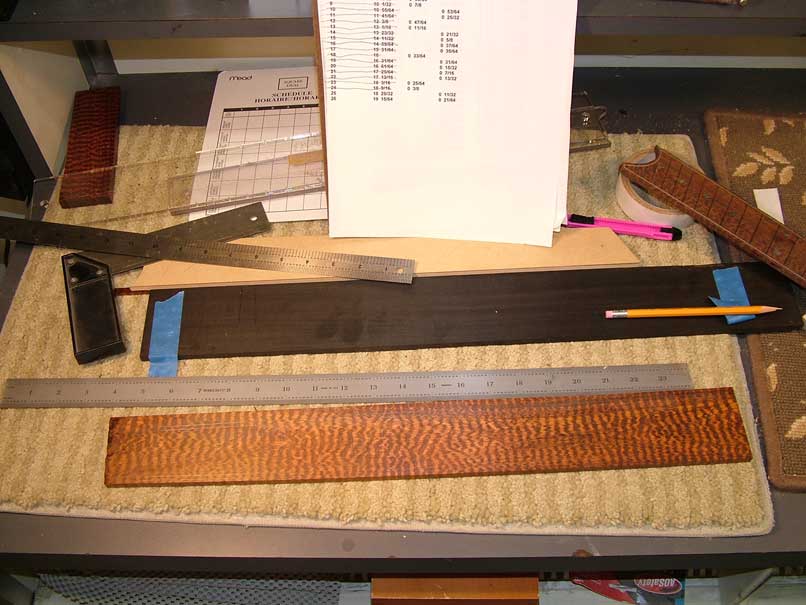
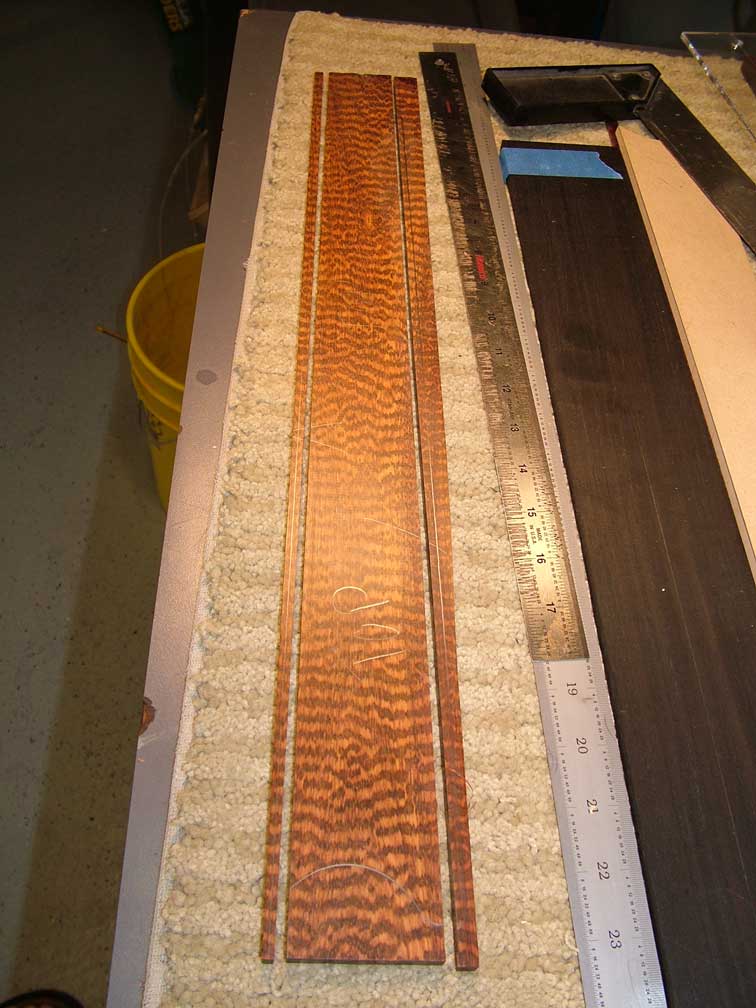
Ok now down to business, the first thing you need to detemine is your two scales, mine are 27" and 24.75", I printed out a chart of 64's for each scale and use a starret with 64's and a sharp exacto to make my markings. It's very important to remember that a fanned fret's scale 'slides' based on the the width of the fingerboard, so you need to *know* your width before you start, and mark at the outer edges of the fingerboard.

I lay out my fingerboard pattern on each side, marking one as the top and one as the back, since I'm going to cut the frets on the top I'll mark the back with the fret positions. To mark each position I tape my ruler along the drawn edge and use my exacto to make a small mark at each postion, it's important to remember that you are doing this upside down so be sure to double check you have the right scale on the right side. After the positions are marked I use a sharp pencil and lay out my marks, they look like this:


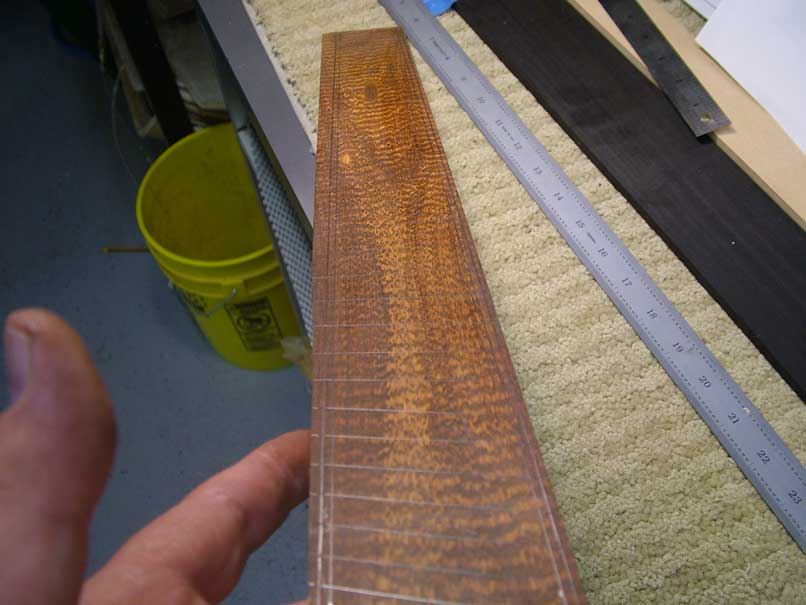
Now I double check everything, I actually had one of these off and had to remark it, it's easy to do this now and it's easy to see if they are right, trust your eyes here, if one looks out then check it to be double sure, you get one chance to cut this so nows the time to be nervous.

Here is my blank ready for cutting:


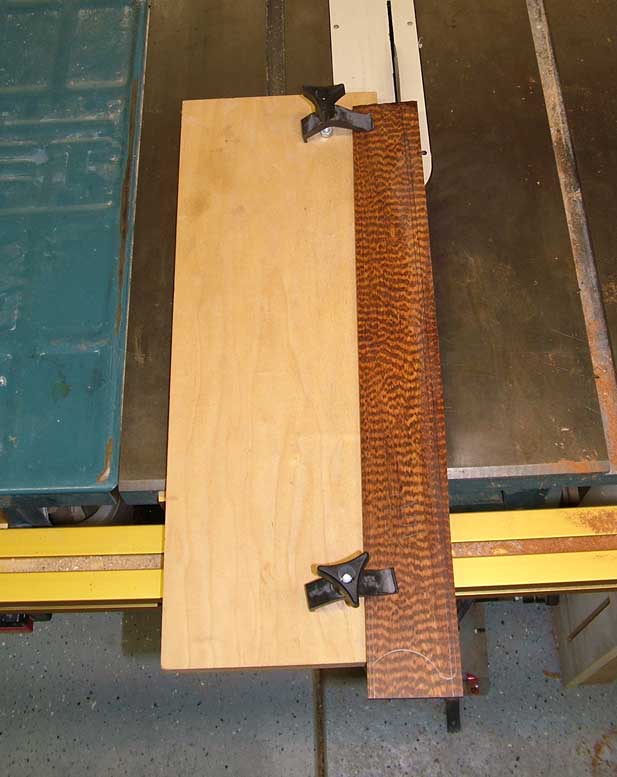
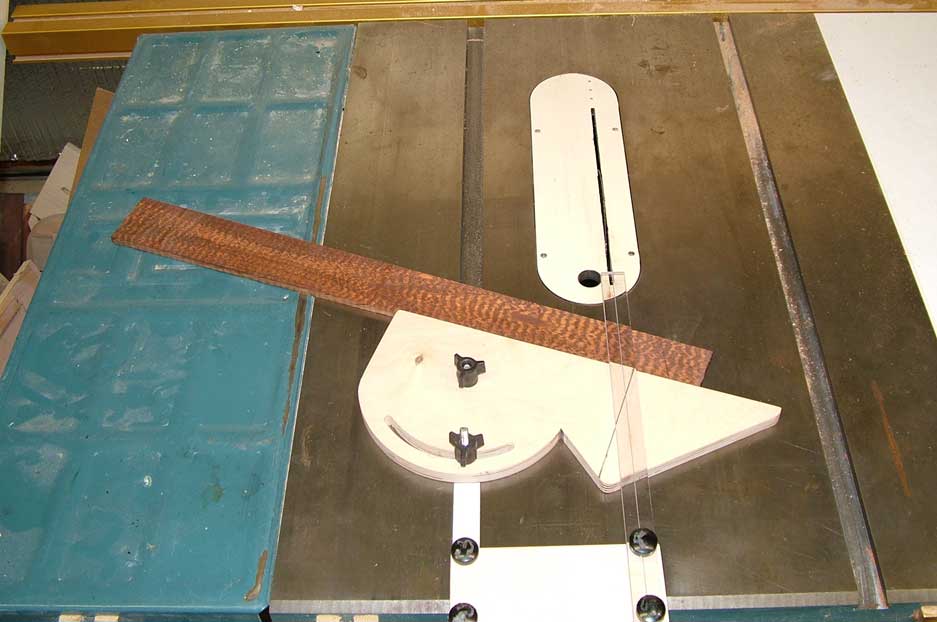
Now I'm going to take off about 1/8" of the edge of the fingerboard so I can glue it back on when I've cut the frets, to do this I have a little sled that the fingerboard rides on allowing me to cut it precisely, also note for this cut I use the fret saw because I want to remove as LITTLE as possible to try and keep the figure in one piece, here is the fingerboard in the sled:


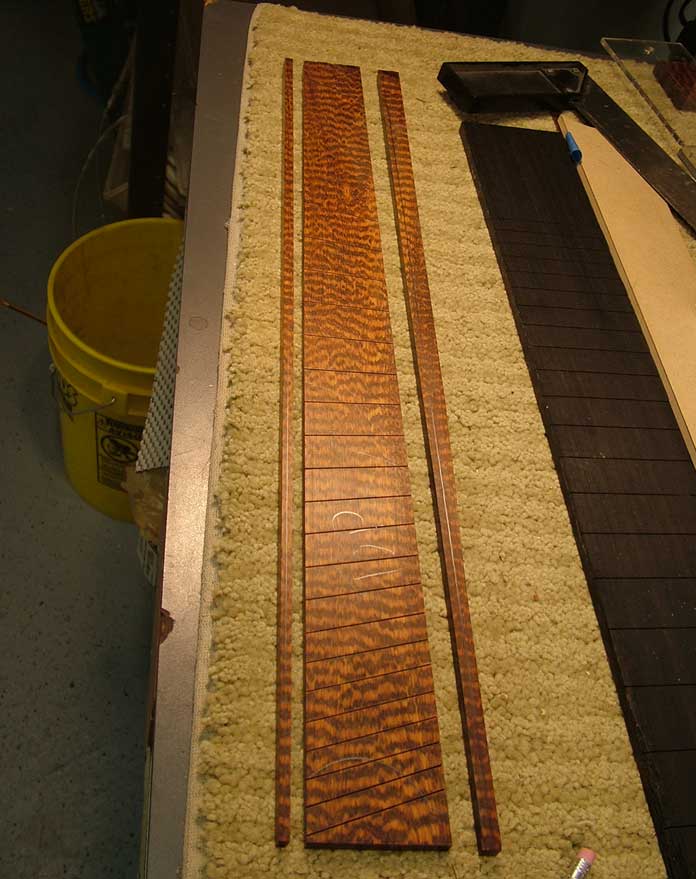
I cut off each side based on my markings and end up with a fingerboard like this:


Now we can cut the slots, for this I have a special jig as mentioned before, I set my slot depth and layout the first cut:


A couple of VERY CRITICAL notes here:

1. Make sure you have a light source directly overhead so you don't get parallax when cutting.

2.When I line up my cuts I actually take the mark on the fingerboard back and the one on the jig and align them by eye with the fingerboard mark off to the side, then I move it under the line. This assures that I am aligned (trust your eyes), and I repeat this exact step for each fret.

When done this is what I end up with:


Now I need to glue those edges back on, I have a workboard bolted to my workbench for this and it looks like then when all clamped up:


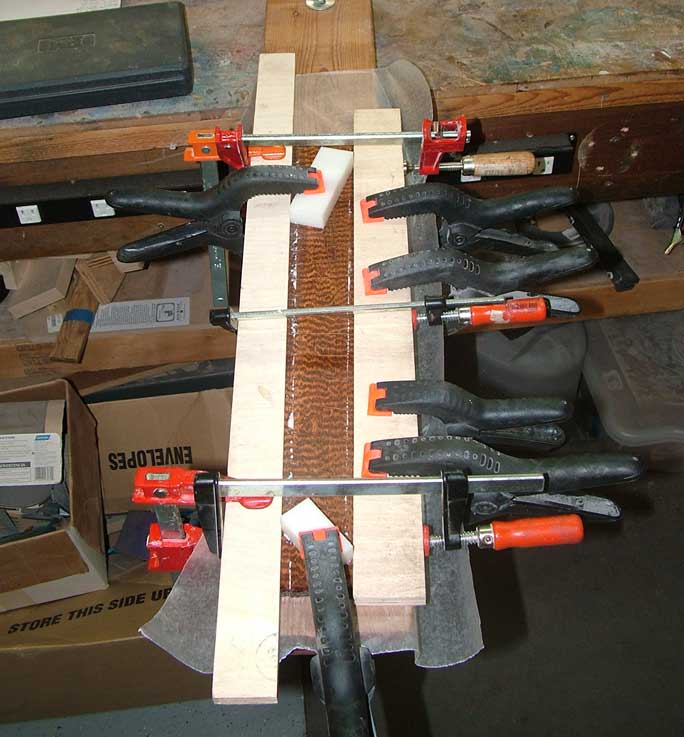
From here I let it dry, scrape it clean and then cut the fingerboard down to it's final width. Please keep in mind that ANY blade will remove some of the material so you need to make sure you have extra to compensate for this or your fingerboard wiill come out skinny (don't ask how I know

I'll be inlaying violin purfling into this one with Paua fingerboard dots, I use the SM violin purfling cutter to do that after I have the fingerboard all cut and ready.

Let me know if you have any questions.

Cheers

-Paul-

_________________
-Paul-
Image
Patriot Guitars


Top
 Profile  
 
 Post subject:
PostPosted: Sun Jul 17, 2005 8:15 am 
Offline
Koa
Koa
User avatar

Joined: Wed Dec 29, 2004 3:48 pm
Posts: 1478
First name: Don
Last Name: Atwood
City: Arlington
State: Virginia
Country: USA
Focus: Build
Status: Amateur
Paul thanks for all the details. Between moving and getting ready for Healdsburg, I'm surprised you found the time. I'm not planning on trying this anytime soon but the pics will come in handy if I ever do try a fanned fret guitar. Be sure and get Lance to post this in the jigs section. Thanks again.

_________________
Don Atwood
Arlington, VA


Top
 Profile  
 
 Post subject:
PostPosted: Sun Jul 17, 2005 10:30 am 
Offline
Old Growth Brazilian Rosewood
User avatar

Joined: Mon Dec 27, 2004 1:20 pm
Posts: 5915
Location: United States

This is awesome. THANKS!!


_________________
Brock Poling
Columbus, Ohio
http://www.polingguitars.com


Top
 Profile  
 
 Post subject:
PostPosted: Sun Jul 17, 2005 10:36 am 
Offline
Old Growth Brazilian Rosewood
User avatar

Joined: Mon Dec 27, 2004 1:20 pm
Posts: 5915
Location: United States

Reading through this though.... I am curious. Why do you install the violin purflings after you have everything glued up? Why not just install full height purflings before cutting your fret slots? (and before glueing the binding back on)?

Thanks a lot though. This really looks pretty straight forward.

If you get a few minutes to discuss how you lay out the bridge location and compensation issues that would be helpful too.   

_________________
Brock Poling
Columbus, Ohio
http://www.polingguitars.com


Top
 Profile  
 
 Post subject:
PostPosted: Sun Jul 17, 2005 11:14 am 
Offline
Koa
Koa

Joined: Wed Dec 29, 2004 3:25 am
Posts: 886
Location: United States
The reason I do the violin purfling after for this is because there is a litle tip at the end of the fingerboard and the purfling bends around that, the ONLY way I have found to do something that intricate is to route the channel after the fingerboard is cut to shape.

I do inlay purfling the other way when doing things like ebony fingerboards without the little tip, I have found it's just easier to use the dremel and a 1/32" bit to do this.

Compensation.... now that's a fun subject for fanned frets, I have a jig that I lay out the length from and get it close from there, I always set my saddles a bit sharp so I can file them into tune. For fanned this is really painful to do, so I use a jig that allows me to string up the neck and figure out the 1st and 6th lengths and work from there. Remember that even if you have a scale length of 27" it changes as you in from the edge so I think a jig is the only way to get really close.

I'm going to try something new on this one, I'm going to set my string width and measure my scale from there, then I have this little program that calcs compenstation and I'm going to see how close it is, if it's on or close I'll switch to using that.

I'll post some pics when I get to that point in final construction...

Cheers

-Paul-Sprockett38550.8442013889

_________________
-Paul-
Image
Patriot Guitars


Top
 Profile  
 
 Post subject:
PostPosted: Sun Jul 17, 2005 12:54 pm 
Offline
Koa
Koa

Joined: Sat Feb 12, 2005 6:20 am
Posts: 1437
First name: Bob
Last Name: Johnson
City: Denver
State: CO.
Zip/Postal Code: 80224
Country: USA
Focus: Build
Status: Amateur
VERY COOL Paul. Beautiful snakewood. That **** wood has some kind of spell over me. Is it as tough to work with as I have read. Would love to use on the L-00-Honduran curley, adi bind.
I am curious about this fretting. I certainly makes logical sense to bar this way. should have more ease and strength in barr finger. I suppose to many of our members who have been playing for years, and years, and years, that playing this way is like trying to eat through your ear. I would love to hear about the experiences of every one who has tried or is using. Stay COOL


Top
 Profile  
 
 Post subject:
PostPosted: Sun Jul 17, 2005 12:57 pm 
Offline
Koa
Koa

Joined: Sat Feb 12, 2005 6:20 am
Posts: 1437
First name: Bob
Last Name: Johnson
City: Denver
State: CO.
Zip/Postal Code: 80224
Country: USA
Focus: Build
Status: Amateur
PS, it also might make it easier to play for my weakened .left hand


Top
 Profile  
 
Display posts from previous:  Sort by  
Post new topic Reply to topic  [ 7 posts ] 

All times are UTC - 5 hours


Who is online

Users browsing this forum: No registered users and 24 guests


You cannot post new topics in this forum
You cannot reply to topics in this forum
You cannot edit your posts in this forum
You cannot delete your posts in this forum
You cannot post attachments in this forum

Jump to:  
Powered by phpBB® Forum Software © phpBB Group
phpBB customization services by 2by2host.com