Official Luthiers Forum!
http://w-ww.luthiersforum.com/forum/

Finished rosette part 2--lots of pics!
http://w-ww.luthiersforum.com/forum/viewtopic.php?f=10102&t=5252
Page 1 of 2

Author:  John Elshaw [ Wed Feb 22, 2006 10:50 am ]
Post subject: 

Some of you may remember the thread from a couple weeks ago where I made some homemade rope and tiles for a classical rosette. Well I finally got around to finishing the rosette and inlaying everything. Posted below are a few pics and the process I use.


This first pic is the quick solution I came up with to make all the tiles fit a 4 inch circle. I basically routed a channel the correct size and then inserted each tile one at a time. A couple swipes with the file on each side and the tiles were ready to go. Although simple, there has to be an easier way than this for the next time...


Using my Dremel and circle cutter jig from LMI, I carefully route out the channel for the tiles


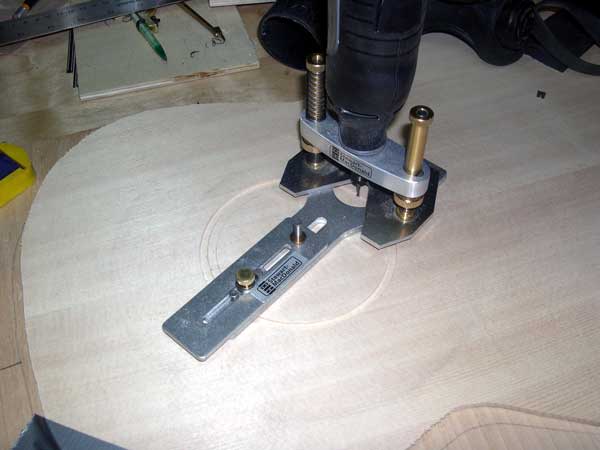
Next I dry fit all the tiles into the channel to make sure everything fits tight


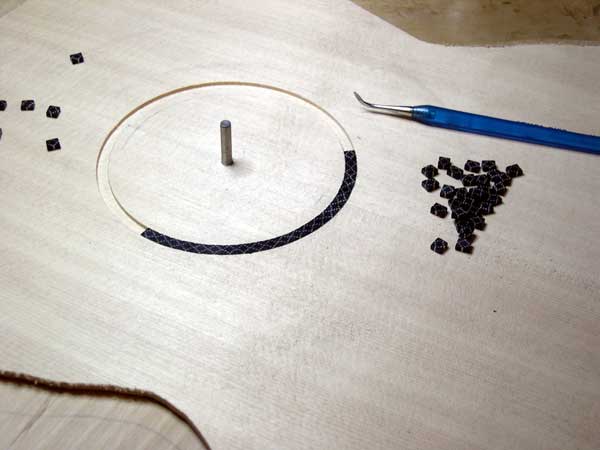
Once everything fits, I wick CA between all the tiles in the channel, and then give it a quick shot of accelerator. You'll also notice in this pic that there is a channel routed on the inside and outside of the tiles. Once the tiles are secure, these channels are routed taking off just a sliver of material so the inside and outside of the tiles have a good radius instead of flat surface.


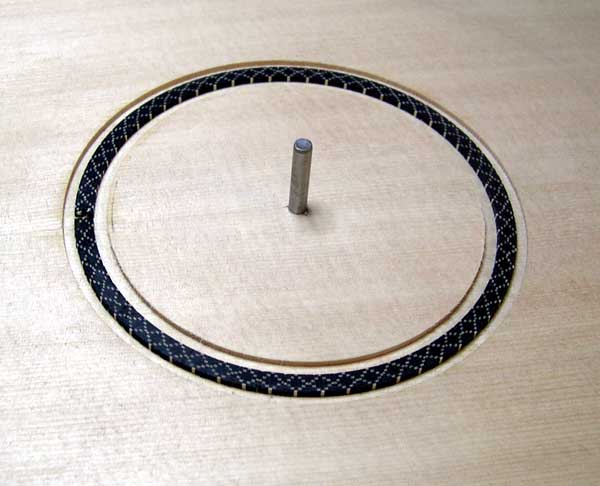
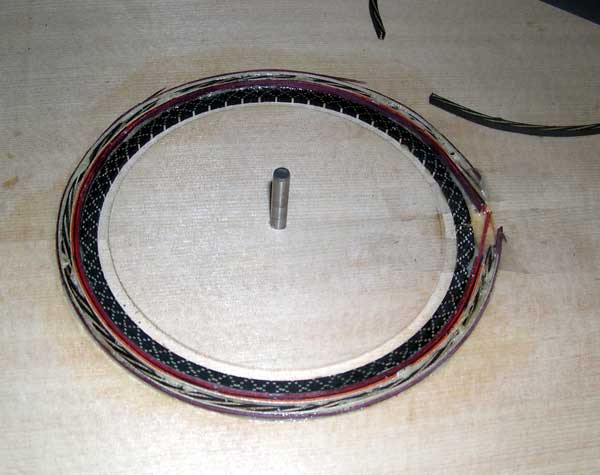
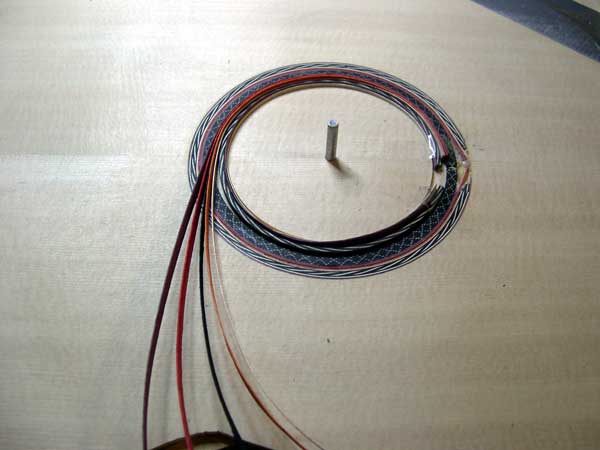
Next I take the rope and all the veneer layers and dry fit into the channel.


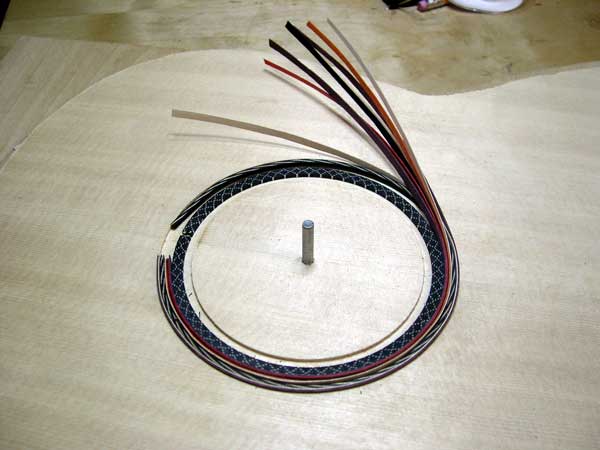
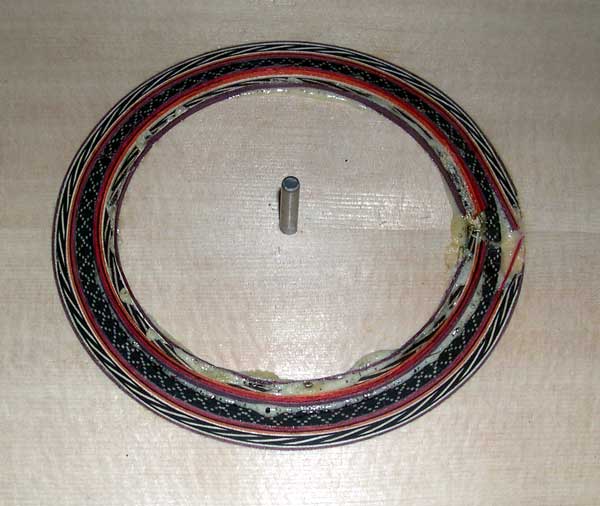
I next apply a layer of Gorilla glue and inlay all the layers. I dampen the top with a sponge so all the purflings will swell a bit and fit nice and tight.


Once it all dries I scrape the outer layer flat, and then repeat the process with the inner layers.


Inner layers glued up and drying. I like the Gorilla glue because it foams up between everything and makes a very tight and secure fit.


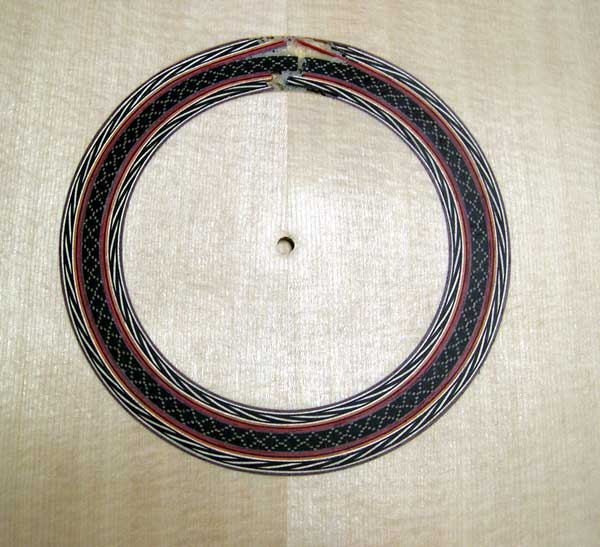
Once it's all dry I plane and scrape the entire rosette flush. You need to be very careful so your plane doesn't tear out the tiles. The tiles are the equivalent of planing endgrain. The final rosette is a total of 21 layers as follows starting from the outside working in:

rosewood/maple/ebony/rope/ebony/maple/orange/ebony/red/rosew ood/tile/rosewood/red/ebony/orange/maple/ebony/rope/ebony/ma ple/rosewood.


Enjoy!

John

Author:  Alain Desforges [ Wed Feb 22, 2006 10:55 am ]
Post subject: 

Wow John, that is fantastic... Superbly done...

Author:  Anthony Z [ Wed Feb 22, 2006 11:05 am ]
Post subject: 

WOW #2

Author:  1bordeaux [ Wed Feb 22, 2006 11:21 am ]
Post subject: 

Excellent work!!!!

Author:  Don Williams [ Wed Feb 22, 2006 11:27 am ]
Post subject: 

WOW #3 !

Author:  jfrench [ Wed Feb 22, 2006 12:09 pm ]
Post subject: 

John,

Great work! You should be very proud.

I do mine in much the same manner (3 steps like that), but I use titebond and water, and take advange of the swelling effect it has. I also both bottom glue and top glue, and then when finished and levelled I run CA over the entire things careful to not hit the soundboard.

Congrats!

Author:  Bobc [ Wed Feb 22, 2006 12:15 pm ]
Post subject: 

Simply Awesome!

Author:  John How [ Wed Feb 22, 2006 12:22 pm ]
Post subject: 

John,you are a genius !!!

Author:  Tom Dowey [ Wed Feb 22, 2006 12:25 pm ]
Post subject: 

Nice job!! Very nice!

Author:  JJ Donohue [ Wed Feb 22, 2006 12:40 pm ]
Post subject: 

Terrific job, John and a beautiful result!

Author:  Dave Anderson [ Wed Feb 22, 2006 12:42 pm ]
Post subject: 

Oh Yeah...Very Nice, Beautiful!

Author:  Brock Poling [ Wed Feb 22, 2006 12:43 pm ]
Post subject: 


Very cool. :-)

Author:  crich [ Wed Feb 22, 2006 12:51 pm ]
Post subject: 

Man, that's nice! ..........i bought my rossette Clinton

Author:  old man [ Wed Feb 22, 2006 2:39 pm ]
Post subject: 

Way to go, John, beautiful work and beautiful result.

Ron

Author:  Steve Kinnaird [ Wed Feb 22, 2006 2:39 pm ]
Post subject: 

John, that's really nice. Doing it the way you did, you solved the problem of the flat inner and outer edges of the tiles. Great idea. This alone makes want to change my technique.

Steve

Author:  Bruce Dickey [ Wed Feb 22, 2006 3:15 pm ]
Post subject: 

John Elshaw, Master Rosette Maker. There is no end to your talent.

Author:  Daniel M [ Wed Feb 22, 2006 8:46 pm ]
Post subject: 

Double WOW!!!

Author:  KiwiCraig [ Wed Feb 22, 2006 9:10 pm ]
Post subject: 


Triple WOW ! Thanks for sharing John . I have learnt a heap ! . It looks magnificent . Man, your good !

Regards KiwiCraig

Author:  Colin S [ Wed Feb 22, 2006 9:50 pm ]
Post subject: 

John, excellent stuff. This is going to be a great help for a rosette I'm shortly to do on a Torres copy. Tour system of chamfering the tiles, though time consuming has an ellegant simplicity that appeals. Oh and the end result is superb.

Colin

Author:  Robbie O'Brien [ Thu Feb 23, 2006 1:49 am ]
Post subject: 

Thanks for sharing with us!! Beautiful job!

Author:  BruceH [ Thu Feb 23, 2006 1:51 am ]
Post subject: 

Awesome, wow, incredible, etc...
Thanks for posting this.

Author:  LanceK [ Thu Feb 23, 2006 1:55 am ]
Post subject: 

All of the above John! SUPER

Author:  Don A [ Thu Feb 23, 2006 2:06 am ]
Post subject: 

Very nice John. Thanks for taking the time to document the whole process for us.   

Author:  RichB [ Thu Feb 23, 2006 2:14 am ]
Post subject: 

That is one seriously stunning Rosette...Great Job!

Author:  Roy O [ Thu Feb 23, 2006 3:01 am ]
Post subject: 

Very impressive.

Seeing all the work that goes into making a rosette like that make one appreciate the cost o them all the more.

Page 1 of 2 All times are UTC - 5 hours
Powered by phpBB® Forum Software © phpBB Group
http://www.phpbb.com/