My fave is the Taylor guitar making jig .. you put raw wood in one end, push 14 buttons, and a guitar (slightly out of tune) comes out the other end.

| Official Luthiers Forum! http://w-ww.luthiersforum.com/forum/ |
|
| Do a little Jig.... http://w-ww.luthiersforum.com/forum/viewtopic.php?f=10102&t=7397 |
Page 1 of 1 |
| Author: | gibson355 [ Wed Jul 05, 2006 2:00 am ] |
| Post subject: | |
ok.... there have been quite a few posts lately on Jigs, (which I'm sure there always will be,) and I think it's a topic that interests all guitar builders.... so.... what I'd like is for you to post a picture, and explain your favorite, self conceived jig. Something that you came up with yourself, created and works like a knife through butter. Maybe give us new builders an idea or two... Cheers, |
|
| Author: | TonyKarol [ Wed Jul 05, 2006 3:18 am ] |
| Post subject: | |
My fave is the Taylor guitar making jig .. you put raw wood in one end, push 14 buttons, and a guitar (slightly out of tune) comes out the other end.
|
|
| Author: | letseatpaste [ Wed Jul 05, 2006 3:27 am ] |
| Post subject: | |
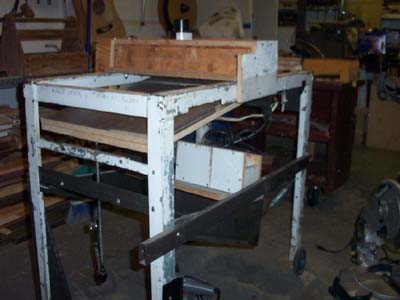
I'm kind of a noob, but this is my favorite jig so far. 
For real, though, I stole this nifty idea from Harry Fleishman for profiling neck and tail blocks. 
|
|
| Author: | LanceK [ Wed Jul 05, 2006 3:32 am ] |
| Post subject: | |
Jon, I really like that jig! Is that paper under the wood an outline of the body? |
|
| Author: | TonyKarol [ Wed Jul 05, 2006 3:33 am ] |
| Post subject: | |
nice Jon - I want one .... |
|
| Author: | letseatpaste [ Wed Jul 05, 2006 3:43 am ] |
| Post subject: | |
Yeah, that paper is just a photocopy of the plan I'm working from. Now that I look at it, it probably would have been a better idea to remove the paper and glue down some sandpaper to hold everything in place securely. Had to make up a new table for the disc sander and fasten that metal lip on it so I can sand patterns. One thing that I haven't seen done (though I'd imagine it's not a new idea): I have a Ridgid oscillating spindle sander. Has anyone ever machined a collar to fit around the bottom of the spindle (in place of the flat washer that's usually there), so similar pattern sanding could be done for inside curves? I've kicked around the idea of getting one machined to try this. |
|
| Author: | Serge Poirier [ Wed Jul 05, 2006 4:08 am ] |
| Post subject: | |
My DRUM SANDER! I'd say homebrew by i only drink soda!
That is my favorite because it was the first time i built a power tool from scratch and for how it helps in the shop! The table lifts or lowers from a 1/2" threaded rod passing through 2 welded bolts on the frame, 1/4 turn at a time and it sands a hair thick!! the motor is 1/2 hp and the drum is made with black ABS pipe with 3" dia ply discs through which passes the shaft. The shaft is inserted in 2 pillow block bearings and at one end of the shaft, there is a pulley and the belt linked to the motor! |
|
| Author: | Brock Poling [ Wed Jul 05, 2006 5:03 am ] |
| Post subject: | |
[QUOTE=letseatpaste] One thing that I haven't seen done (though I'd imagine it's not a new idea): I have a Ridgid oscillating spindle sander. Has anyone ever machined a collar to fit around the bottom of the spindle (in place of the flat washer that's usually there), so similar pattern sanding could be done for inside curves? I've kicked around the idea of getting one machined to try this.[/QUOTE] THAT!!!!! is a good idea. 
|
|
| Author: | TonyKarol [ Wed Jul 05, 2006 7:10 am ] |
| Post subject: | |
One of my students has a lathe and I have the osc sander ...hmmm ... it really never ends does it. |
|
| Author: | Dave Rector [ Wed Jul 05, 2006 8:02 am ] |
| Post subject: | |
Wouldn't the collar just drop below the table with every up/down stroke? |
|
| Author: | Mark Tripp [ Wed Jul 05, 2006 8:10 am ] |
| Post subject: | |
Not if it was machined to fit the washer space. The collar would be stationary and not move with the spindle... -Mark |
|
| Author: | letseatpaste [ Wed Jul 05, 2006 8:16 am ] |
| Post subject: | |
I wonder if it would have to be fastened down so it wouldn't tip up when you pressed a pattern against it. I suppose if you machined it so it was just about perfectly flush with the table, then that wouldn't be an issue. |
|
| Author: | Dave Rector [ Wed Jul 05, 2006 8:19 am ] |
| Post subject: | |
Thanks Mark! I thought they were talking about the washer that goes under the sanding drum, didn't even think about the table insert. More coffee please. 
|
|
| Author: | TonyKarol [ Wed Jul 05, 2006 10:09 am ] |
| Post subject: | |
As for fastening - perfect application for rare earth magnets - make the collars from steel, epoxy magnets underneath. Done. |
|
| Author: | Rod True [ Wed Jul 05, 2006 1:31 pm ] |
| Post subject: | |
I've stollen preaty much every thing in my shop. Wait.... that sounds realy bad. What I realy mean is that I have used many designs from other builders for most everything I've built (jig wise that is) What I like the most may be the simplest. This is for drilling the counterbore for the truss rod nut in the head stock. It works great. 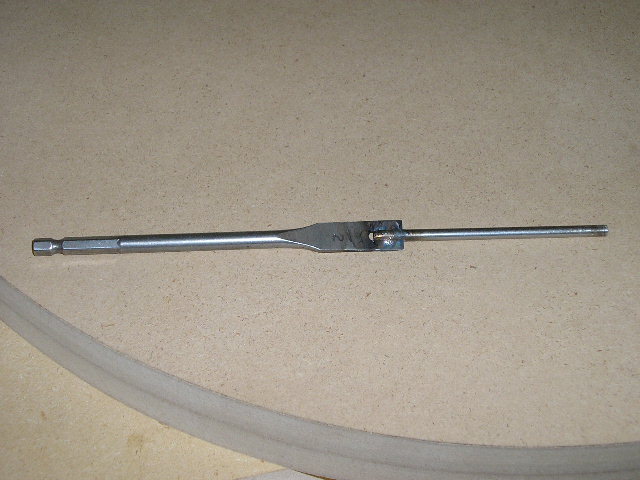
The other jig that I like (needs a little work though) is my cut away bending form. It uses a heat gun for the heat source and bends the part perfectly (well, I just need to remake the shape, than it will be perfect). 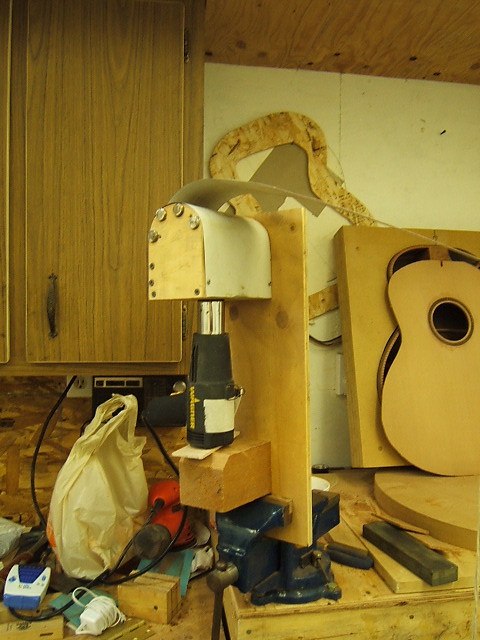
|
|
| Author: | Scott McKee [ Wed Jul 05, 2006 1:36 pm ] |
| Post subject: | |
For oscillating spindle sander collars, have a look at your local plumbing supply store. Plumbing fittings come in many diameters and are some have substantial wall thickness. End caps work particularily well. Easy enough to fit one into a table insert. |
|
| Author: | Serge Poirier [ Wed Jul 05, 2006 3:10 pm ] |
| Post subject: | |
Terry, one more fine jig bud! Thanks! 
|
|
| Author: | TonyKarol [ Thu Jul 06, 2006 4:41 am ] |
| Post subject: | |
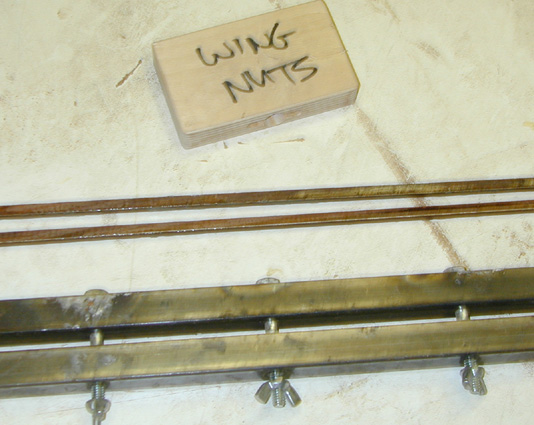
Here's another - doesnt get used all that often, because I usually make binding by laminating the binding and purf together in 1 inch wide pieces, then slicing up all in one on the table saw. But, every once and a while, you need to separately glue purf lines to a single piece of binding. My friend Scott Sheppard has a jig like this, he made his from aluminum tube, I figured steel would be just as good. So, the bolts give you something to set the bind and purf against inside the jig, to keep them lined up - the wing nuts tighten her all up,and away you go, one at a time. The bolt heads are welded so they wont turn. Heres a couple pieces of cocobolo, with braz/maple as the purf added on. I glued them wide, at about .140, so I can easily trim them on the table saw to final size - about .085 or so. I also made a small handle for tighening and loosening the wing nuts. You can them pry the tubes apart with a stright screwdriver balde easily. 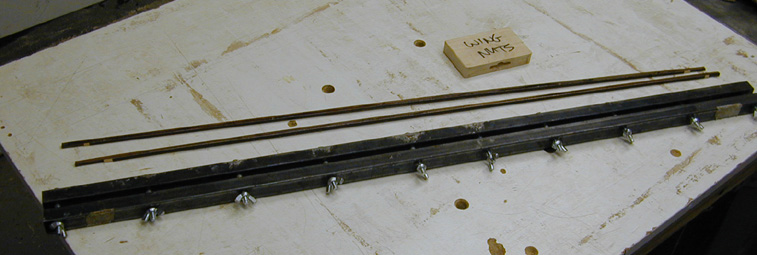
|
|
| Author: | Serge Poirier [ Thu Jul 06, 2006 7:47 am ] |
| Post subject: | |
WOW Tony, you're on a mission for us Newbs! Thanks again my friend!
Serge |
|
| Page 1 of 1 | All times are UTC - 5 hours |
| Powered by phpBB® Forum Software © phpBB Group http://www.phpbb.com/ |
|