Okay, I'm cheap but I wanted a gritty surface to represent Red Rocks (which the inlay is supposed to look like). So I used super glue and baking powder to fill in the cavity I dremeled out. Easiest thing I've ever done. I'm considering it for more elaborate things. It is not nearly as fancy as pearl, but it is gritty, looks tough and I personally enjoyed doing it.
So, you want to know how I finished it? I must disclose that I am as green as it gets when it comes to finishing. I aspire to greatness, but I am far from it. But, here is how I did it:
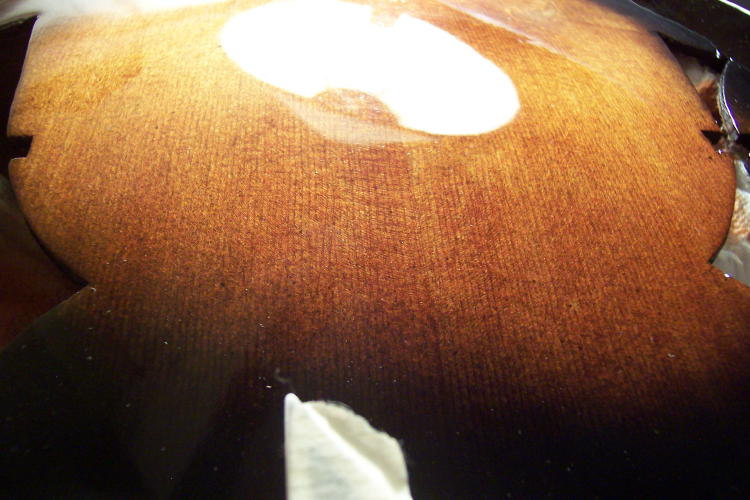
1) base dye of amber, then the orange. Both water based stains. had to sand back because the grain rose, even though I did raise the grain with distilled water and sanded back before staining.
2) Sealer coat of ultra-blonde shellac (I used a pre-val "spray gun" where you can mix your own finish and use an aerosol attachment to spray it. It worked, but it is something I'm going to have to mess with and get better at. Found that at ACE for pretty cheap)
3) Sprayed the sunburst (using black shellac and the pre-val spray gun)
4) another sealer coat of ultra-blonde shellac
I let that sit for a day and should have lightly smoothed the surface and re-sprayed the black portions if I sanded through. More later...
5) put on 4 coats of Hope's tung oil Varnish, straight from the bottle, letting the first coat dry for 2 days, then 1 day inbetween subsequent coats. Lightly sanding with 320 between coats to help with adhesion, since varnish doesn't "burn in"
6) Did a flat sand with 320, then had to go back and touch up some black spots where I sanded through (just to clear shellac, luckily didn't go through to the wood). I had to touch up some fairly big spots (~1cmx1cm), but after 3 more coats of varnish you can't tell at all (not sure how kosher that is, but like I said, I'm learning). In the future I will make sure the finish is flat once the sunburst has been applied, so that the varnish top-coats won't eat through high colored spots.
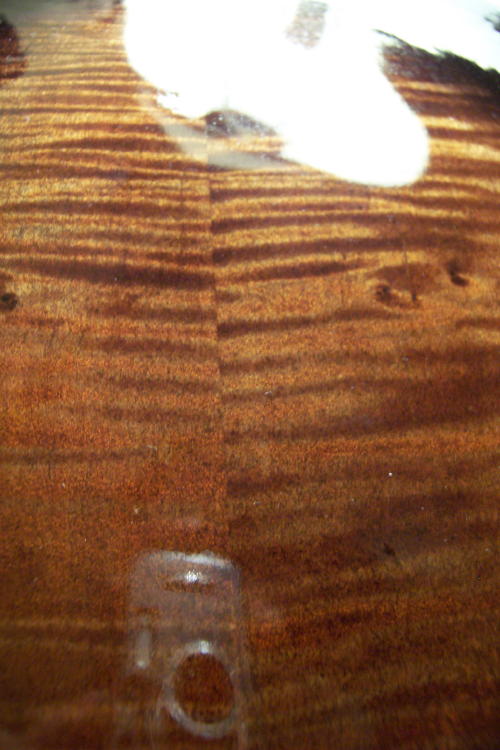
7) Right now I'm letting it cure for probably 3 weeks. There is very little left to flat sand as the varnish goes on with brush marks, but they level out before it dries. I was very pleased with that. I'm not sure if I'm going for a high shine, or if I want satin. The varnish is pretty stunningly shiny!
What I learned: well, to get the sunburst finish pretty flat before applying clear top coats. Also, the varnish took much longer to dry on the plastic bindings than the rest of it, but after a coat, it was usually pretty dry in 12 hours.
In the future I"d like to try the Behlen's rock hard table whatever varnish. Apparently it dries quicker, but I was very pleased with this varnish, especially since I was pretty busy this last week and brushing is fairly quick and most of the time spent is just waiting, or in my case going crazy with school work.
A last comment, the finish *looks* pretty thick, but in reality is very thin. It didn't take much at all to sand through 4 layers with 400 grit paper. Maybe I was being careless, but never-the-less, the finish is as thin as I've ever gotten. If someone knows how to measure that I'd sure like to find out. Do you have to chip a piece off?
I've heard a lot about the beauty of a good french polish, or just shellac in general, but I must say that varnish has my vote for bringing out all the pretty things the wood has to offer, and also, all the places where you messed it up.
Thanks everyone!
|