Official Luthiers Forum! http://w-ww.luthiersforum.com/forum/ |
|
Introduction and latest custom build PICS http://w-ww.luthiersforum.com/forum/viewtopic.php?f=10123&t=45273 |
Page 1 of 1 |
Author: | Ryanpg [ Wed Mar 04, 2015 11:28 pm ] |
Post subject: | Introduction and latest custom build PICS |
Hi all, I'm pretty new here and have gotten some great advice from members on a Melody Maker project. I thought it might be fun for me to share (one variation) of my process for a custom build. I'll let the pics do the talking as much as I can. Hope you guys/gals enjoy! African Mahogany Body ![]() Cross cutting on the old Craftsman Radial Arm ![]() Glued up. ![]() Nice grain pattern. ![]() Walnut cap glued up. ![]() Nice figuring! ![]() Not shown, routed a channel in the mahogany for wiring, cap glued on. Sanding and shaping the body template. Inspired by the Ibanez PF series. ![]() ![]() 
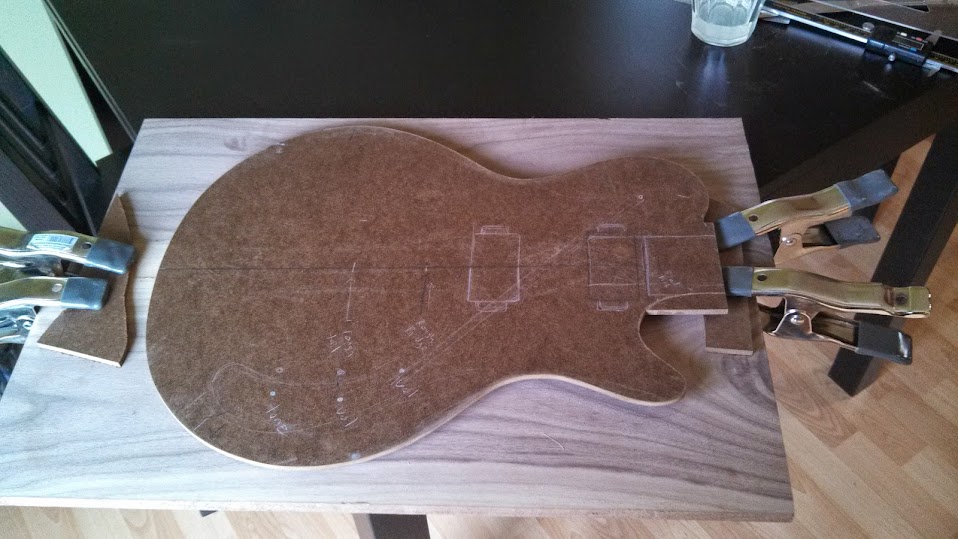
Cut the body, used the radial arm as an overarm router. Not the best way (spindle too slow really) but it works. I'm doing my favorite control route: telecaster plate in back. ![]() ![]() More routing. ![]() Scored the recess for the metal plate. ![]() Oops! No big deal, will still thickness sand it. ![]() Carving the belly cut with the angle grinder and an 80 grit disc. ![]() ![]() ![]() Worst possible way to do a switch cavity. ![]() ![]() See what I mean! Talk about bit bite! Again, will disappear with final thickness sanding. Time to carve the top. I like this 70s style "furniture" detail! ![]() Grind away! This is the fun part! ![]() ![]() On to the neck. Cut the truss rod channel. Decided on a scarf "luthier's joint" for the headstock. ![]() ![]() Roughed in the shape on the band saw. Then attacked with the angle grinder again! ![]() ![]() ![]() ![]() Volute for the win! ![]() ![]() Finished roughing and routing the back. That's just a "relief" idea I had. Love the upper fret access. AND this is a 24 fret guitar, it's LONG! ![]() Decided this would be all wood and metal, so maple inlay fret markers. ![]() Routing the neck angle tenon. See how scientific I am about angles and stuff! ![]() ![]() Routed for humbuckers. ![]() Offset mortise and tenon routed. ![]() ![]() Blending the neck joint. ![]() My "fret press." ![]() My trick for quickly trimming fret ends. ![]() ![]() Almost ready to glue it all up! ![]() ![]() Glued and waiting for finishing! ![]() Almost final pics! I glued a walnut veneer on the headstock. I've since installed chrome hardware including covered pickups and metal rings and metal knobs as seen in the last few pics. ![]() ![]() ![]() ![]() ![]() ![]() ![]() ![]() ![]() ![]() |
Author: | Freeman [ Thu Mar 05, 2015 10:00 pm ] |
Post subject: | Re: Introduction and latest custom build PICS |
Lots of really nice detail touches. Thanks |
Author: | dzsmith [ Fri Mar 06, 2015 10:00 am ] |
Post subject: | Re: Introduction and latest custom build PICS |
Ryan, Wow! Very nice! I like your design. The fret end trimmer is a clever idea. What finish did you use? Dan |
Author: | Chris Pile [ Fri Mar 06, 2015 10:55 am ] |
Post subject: | Re: Introduction and latest custom build PICS |
I like it! |
Author: | Ryanpg [ Fri Mar 06, 2015 12:33 pm ] |
Post subject: | Re: Introduction and latest custom build PICS |
Thanks Dan, Chris and Freeman! Dan, it's. . . complicated. (-: the body back and sides were grain filled by French polish, then tru-oil over that, and tru-oil on the neck for a "natural feel." The walnut cap was cyanoacrylate pore filled and clear acrylic lacquer, just for extra depth and gloss. Re: fret ends. I love to "make do" with the tools I have when I can. This method worked really great with the fretboard not attached. I adjusted my "depth" and just pushed the board back and forth. The fence made it almost error-proof. I could have gotten a nice rolled edge, or a really nice bevel if the neck were bound. Will definitely use this method again! |
Author: | sdsollod [ Fri Mar 06, 2015 1:59 pm ] |
Post subject: | Re: Introduction and latest custom build PICS |
Ryan, Very nicely done! What hardware (bridge) are you using? Steve |
Author: | Ryanpg [ Fri Mar 06, 2015 2:09 pm ] |
Post subject: | Re: Introduction and latest custom build PICS |
Steve, since this build was very much an homage to 70s import guitars, I chose a harmonica style bridge (and added tusq saddles). I had to fabricate the saddle screws and nuts myself, which is why they may look a little funky. (Used brass rod, tapped on my metal lathe.) If you would like the exact model, and where I got it, I'll have to dig through my notes - let me know! |
Author: | Alex Kleon [ Fri Mar 06, 2015 11:30 pm ] |
Post subject: | Re: Introduction and latest custom build PICS |
Beauty! The walnut looks great! Alex |
Author: | cphanna [ Sat Mar 07, 2015 1:07 am ] |
Post subject: | Re: Introduction and latest custom build PICS |
Hey, Ryan, I honestly don't know much about solid body guitars, but every now and then I see one that fascinates me. Yours is one that I really like. Lots of nice details and I especially like the way you chose and joined the walnut top so that the grain seems to conform to the body shape. That's pretty cool. Also, I appreciate the fact that you uploaded lots of process photos. I'm always interested in the way other people do their processes. I think you've made a very nice instrument here. Looks like your poor dog is plumb tuckered out from supervising you in the shop! Patrick |
Author: | Jason Rodgers [ Sat Mar 14, 2015 1:06 pm ] |
Post subject: | Re: Introduction and latest custom build PICS |
Nice! Great documentation. And I'm totally stealing the fret end grinder jig! Just gotta be careful not to heat em up too much. |
Author: | rlrhett [ Sat Mar 14, 2015 2:58 pm ] |
Post subject: | Re: Introduction and latest custom build PICS |
Love the fret end dressing/beveler. What is that grinding wheel? It looks bull nosed from the picture. Is that right? Sent from my iPhone using Tapatalk |
Author: | Beazy [ Sun Mar 15, 2015 10:34 pm ] |
Post subject: | Re: Introduction and latest custom build PICS |
I really like the look of the walnut cap. I hope your dog wasn't too critical of the build. He's looking at it pretty intensely out there on the deck! |
Author: | Ryanpg [ Sun Mar 29, 2015 4:13 pm ] |
Post subject: | Re: Introduction and latest custom build PICS |
rlrhett wrote: Love the fret end dressing/beveler. What is that grinding wheel? It looks bull nosed from the picture. Is that right? Sorry it took SOOO long to get back to you. It's not exactly a bull nose. The tip is straight and conical. No Rounding. I think any flat edge wheel would work in this setup, just have to adjust the angle properly. Thanks! |
Author: | JimO [ Sun Mar 29, 2015 5:01 pm ] |
Post subject: | Re: Introduction and latest custom build PICS |
My old angle grinder died. I forgot how useful they are. Need to get another one. Had a sanding disk that would chew thru wood. Nice build. |
Page 1 of 1 | All times are UTC - 5 hours |
Powered by phpBB® Forum Software © phpBB Group http://www.phpbb.com/ |