Official Luthiers Forum!
http://w-ww.luthiersforum.com/forum/

Dave's Daft Experimental ESJ-2 Build
http://w-ww.luthiersforum.com/forum/viewtopic.php?f=10133&t=37353
Page 1 of 5

Author:  Dave Fifield [ Sat Aug 04, 2012 7:56 pm ]
Post subject:  Dave's Daft Experimental ESJ-2 Build

Running Tally of Costs:
*************************
1. Back and sides - local Claro Walnut - I got several big slabs of the stuff, plus several more of wonderful figured Honduran Mahogany (!) in exchange for an old lathe. I figured the lathe value divided by the number of back and side sets I'm going to get from the stash and came up with $25 for the walnut back and sides set.
2. Soundboard - uses two sets of Shane's 2A lutz spruce dealeo - box of 10 sets for $10 a set, so just $20 for the soundboard!
3. Rosette redwood burl offcut - FREE from a kind wood vendor at the recent American Association of Woodturners symposium
4. Blue-Red-Blue homemade purfling - $2.75 for the whole guitar, including around the rosette
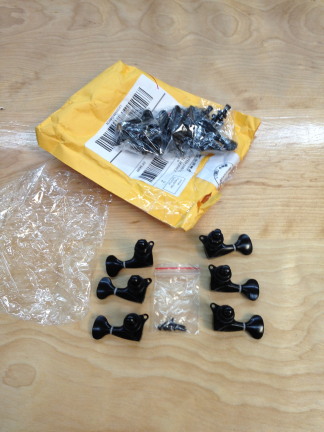
5. Two sets of "Gotoh Style" black tuners 3R3L from Hong Kong - $9.99 a set - great deal
6. Honduran mahogany neck blank (like LMI WNHMHL2, 30" x 3" x 1", 2nd grade) - $15.75
7. Two sets of D'Addario PB Lights - OLF dealeo - $2.50 a set = $5.00
8. Neck block - couple bits of mahogany from the scrap bin - $0
9. Tail block - piece of birch ply from the scrap bin - $0
10. A4 kerfed lining (8 pieces) made under license from Kevin Ryan, so just the cost of the wood, which was a 7/8"" x 1.25" x 30" offcut of Spanish cedar from my scrap pile = $0
11. Back brace wood, part of a lump that cost $5. Let's say $2 for the four back braces.
12. Bloodwood scrap for the guitar label from a pile of stuff I bought at the annual LMI sale for $5 a pound. Cost $0.04 (rounded up!)
13. Carbon fiber rod - two 10.5" long pieces of 3/8"OD pultruded tube from Dragon Plate (cut from a 48" long piece) = 21"/48" x $8.50 = $3.72 - not as much as I thought!
14. Grizzly 3086 truss rod - $12.95
15. Two 1/4-20 hanger bolts from Woodcraft, with nuts and washers from Home Depot - $0.85
16. 3" of 1/2" hardwood dowel - $0.30
17. Rear headplate redwood burl slice - $2
18. Fretboard - Streaky ebony from a LMI $5/lb. sale - $5
19. Two rectangular pieces of my homemade blue-red-blue purfling veneer glue up for the headstock - $3.56
20. Medium fretwire from Stewmac - 4 pieces - $4
21. Fretboard side dot material - thin white plastic rod - dirt cheap - let's say 30 cents, fair?
22. Fretboard dot inlay material - little 0.2" circles of scrap beech = $0
23. Bridge blank - streaky ebony from my stash of wood bought at an LMI $5/lb sale a few years ago - about 1/4lb = $1.25
24. Extra cross brace spruce - $0.50
25. Bone nut - from LMI - $3.60
26. Bone Saddle - from LMI - $3.55

FINAL COST = $136.60

So, I have $13.40 left over for afternoon tea and cakes....woohoo!! [:Y:]

**************************************************************************************************


This challenge I'll try to get my entry done in time, promise! (I'm nearly done with my first challenge build!!)

I'm making another OLF-SJ style guitar, but with a different soundboard structure than last time. You'll see.
Materials will come in waaaay lower than $150. I'll keep a running tab of the costs. E.g. just ordered some of those $10 eBay "Gotoh Style" tuners from China.....


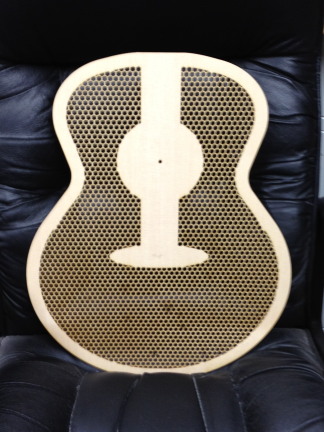
So far I have thickness sanded the sides and bent them (local claro walnut, cost estimate $10), and joined a set of 2A spruce tops from Shane ($10 a set!), then thickness sanded to 0.090" and laser cut about 2,100 1/4" hexagons (and partial hexagons) out of it to form the center piece of the "triple top" that I'm experimenting with. Laser cutting took 31m7s.

Here's a short video showing highlights of the laser cutting:


And here's what it looks like now with all the little hexagons removed:
Image

More to come very shortly....

Cheers for now,
Dave F.
Author:  Jaybird840 [ Sat Aug 04, 2012 8:19 pm ]
Post subject:  Re: Dave's Daft Experimental ESJ-2 Build

Amazing!! I'm still using hand tools.... Can't wait to see the outcome. Dunno if you hire yourself out, but I'd love to talk about some laser cutting... Beautiful work there.

Author:  Dave Fifield [ Fri Aug 10, 2012 3:57 am ]
Post subject:  Re: Dave's Daft Experimental ESJ-2 Build

Thanks for your comments JayBird [:Y:]
I'd be more than happy to help you with some lasering stuff - PM me with what you have in mind.

So, I needed a top and a bottom skin to go with the center bit for the soundboard.
I decided to keep things on the cheap and use one half of a good top set (from Shane's $10-a-set specials) and re-saw it for the top skin, and one half of a poor top set re-sawn for the bottom skin.
Thus, my top cost is $10 + $5 + $5 = $20 not including the rosette.

Here's a video showing how I (carefully) re-sawed the soundboard halves:


And here's a video showing the soundboard halves getting put through the wide-belt sander:


Next, the soundboard skin halves are glued together, as shown in this video:


More tomorrow - I have several more video logs in the raw - just need to minimally edit then upload them....

Cheers for now,
Dave F.

Author:  SteveSmith [ Sat Aug 11, 2012 9:18 am ]
Post subject:  Re: Dave's Daft Experimental ESJ-2 Build

I'm enjoying watching this one come along. Be interesting to see how that triple top works out.

Author:  Dave Fifield [ Sat Aug 11, 2012 6:53 pm ]
Post subject:  Re: Dave's Daft Experimental ESJ-2 Build

My internet service went out for late night maintenance just before I could post yesterday’s update!
We continue with a video that shows the gluing up of the soundboard sandwich in a 28' radius dish in a vacuum press:


After I took it out of the vacuum bag a couple of hours later, it curled up a bit at the edges as it still wasn't completely dry on the underside. I left it in the 28' radius dish overnight (with a few weights on it to hold it down) and it uncurled nicely to just about the right shape/curve and has been stable ever since.

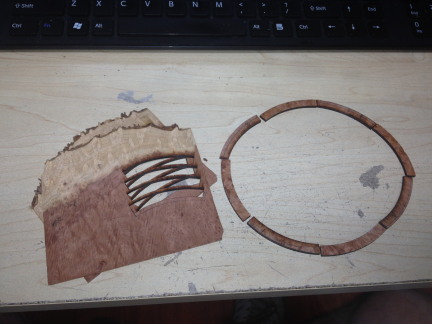
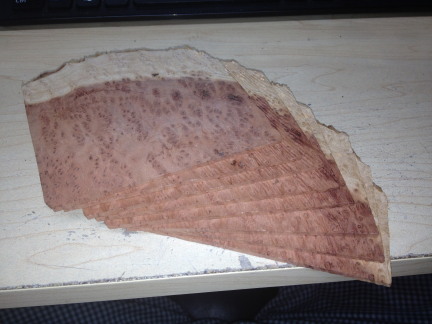
Next I took on the rosette. At the recent American Association of Woodturners symposium in San Jose, I got chatting with a vendor who was selling huge spalted and burl turning blocks but who had a bunch of small offcuts that he didn't know what to do with. I persuaded him that they might be perfect for making my rosettes, so he gave me a slack handful of them gratis and told me to try them out and send him a picture or two when I used them. Well, I picked out a nice lump of redwood burl from his generous gift pile - here it is after I sliced it up on my small bandsaw:

Image

I laser-cut 8 segments out of a couple of slices of it to form a nice 1/4" wide wood rosette ring. Here's the segments:

Image

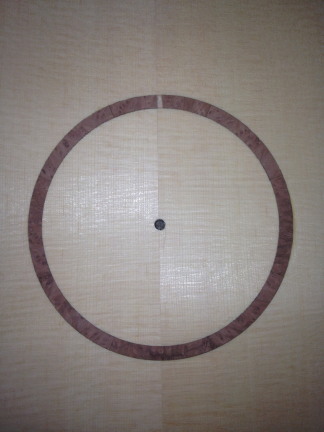
I laser engraved (using raster mode) a channel into the soundboard for the rosette ring. After lasering, you have to clean up the channel a little with a small chisel as the hard winter growth rings do not get cut so deeply as the softer summer growth – only takes a few seconds to do though. After the channel was prepared, I glued in the 8-piece redwood ring and set it aside to dry. Here's what it looked like after it was dry and sanded down flat with the soundboard:

Image

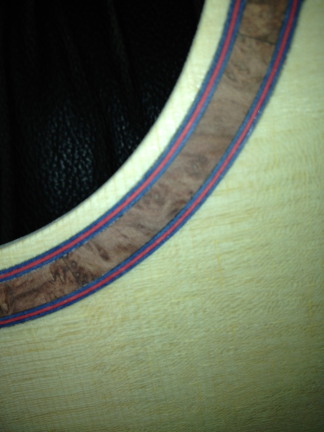
I now needed to add some purfling rings around it. After checking my stock and the prices I paid for it, I decided that for this build, I would need to make my own purfling and bindings!! I wanted it to be different (as usual!) so chose to make B-R-B purfling - that is, Blue-Red-Blue :)

I had some large sheets of dyed veneer in stock (from my marquetry work) that would do very nicely. I bought it from Herzog (eBay store) many years ago. They still sell the stuff at $4 a square foot. I'm sure I paid about half that, but never mind, I'll go with the current pricing. The veneer sheets were about 4' x 1' x 0.023", so 12 square feet total. At $4 a square foot, that's $48 for the whole bundle. However, that makes enough purf for many many guitars. Per guitar, I will need 9 lengths of 36” x 0.1" x 0.069", or 32.4 square inches. Four square feet is 4 x 144 = 566 square inches, so my cost per guitar is going to be about (32.4/566)*$48 = $2.75. Pretty reasonable I'd say :) Still with me? Eat Drink Try to keep up....

I glued up the three veneer sheets and dried them flat in my vacuum press. Then I laser-cut a bunch of 1/10” wide strips:


Next up will be bending the purfling for the rosette, then cutting the channels and fitting the purf.

Cheers for now,
Dave F.

Author:  Dave Fifield [ Sun Aug 12, 2012 7:20 pm ]
Post subject:  Re: Dave's Daft Experimental ESJ-2 Build

So, here's the purf bending and fitting into channels around the redwood burl rosette video:


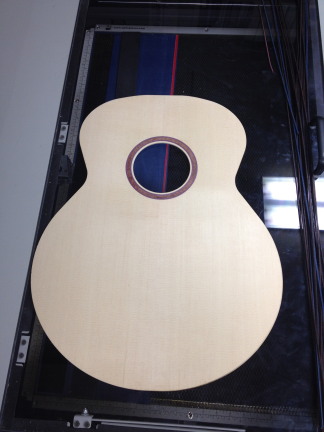
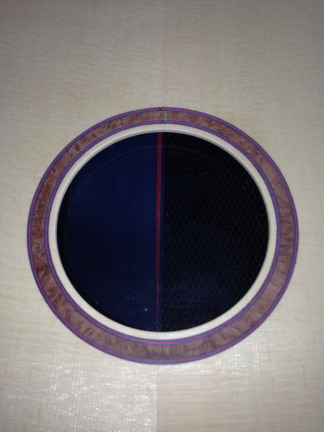
After what you see in the video above, I cut the soundboard hole out and rounded over the edges a bit:

Image

Image

Image

What do you think? Not too shabby for such low cost IMO.

My "Gotoh Style" tuners arrived from Hong Kong....they're not bad considering the price ($9.99 a set!):

Image

More later.

Cheers for now,
Dave F.

Author:  Dave Fifield [ Tue Aug 14, 2012 12:51 am ]
Post subject:  Re: Dave's Daft Experimental ESJ-2 Build

Hmm, not many people reading the challenge threads....is it worth the time and effort to vlog/blog I wonder?? idunno
I'll keep going for now....I suppose.....

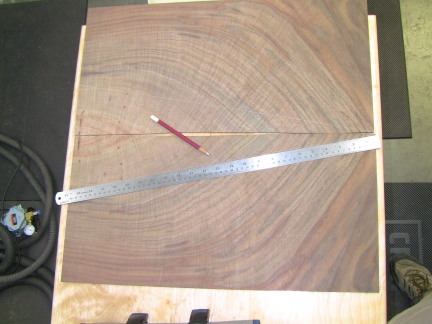
I needed to prepare the back and joint it. There were some nasty knotty inclusions in the back pieces, so I decided to re-cut the joint line to exclude the nasty bits:

Image

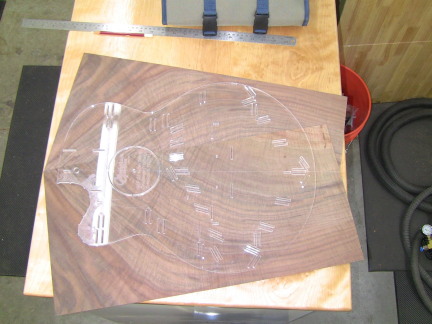
Checked with the OLF-SJ template (that I drew up and laser-cut) to see if it would still fit.....it did, just:

Image

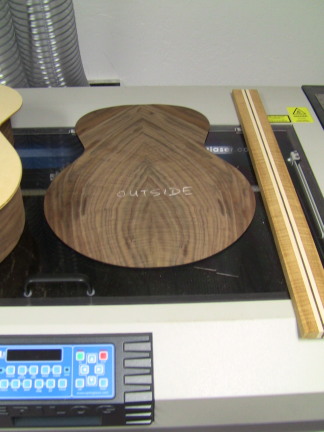
Then glued the two bookmatched pieces together and cut the oversized SJ shape out using my laser and wide-belt sanded the back to 0.091":

Image

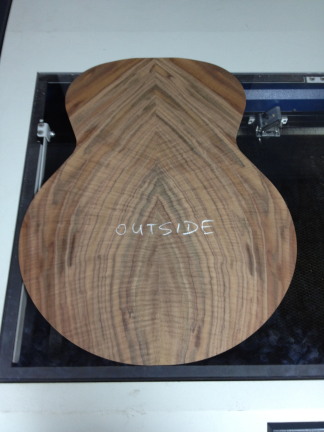
I love the claro walnut figure in the back and sides - it's got color and flame! (BTW, the neck blank shown in the picture above is NOT for this build)

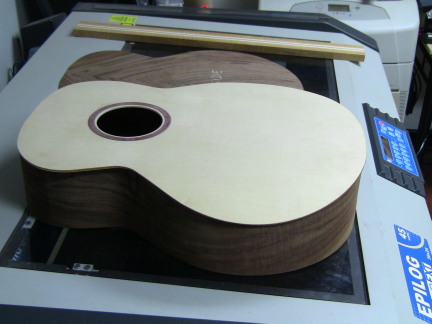
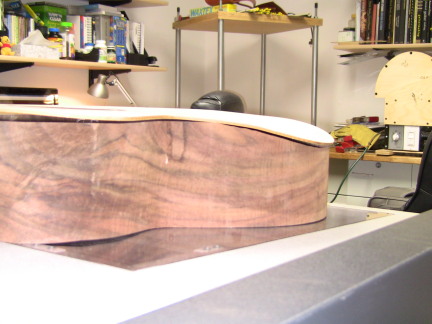
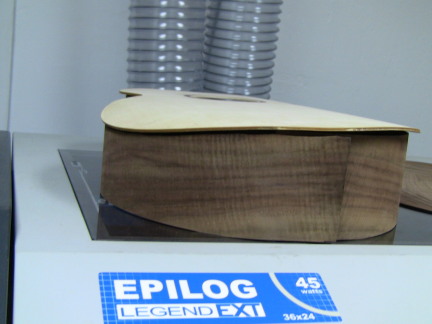
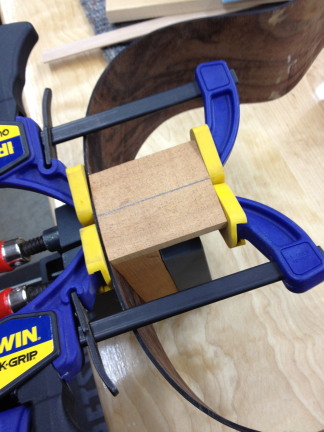
I also decided that since this was an experimental guitar, I should do some more experiments with it! To that end, I decided to have a go at bending the lower bout of the soundboard to form a nice smooth arm-rest bevel thingy (not sure what the proper name is?). Unlike most people's arm-rest bevel thingumyjibs, mine will be all smooth like a Fender Strat and should be very comfortable as well as not taking anything away from the tone of the guitar (well, apart from reducing the air volume inside the box a little, which will raise the primary air resonant frequency, but which should be of little consequence IMO). Since the soundboard is one of my "triple tops", I simply used a small heating blanket and a single metal slat, heated it up to re-flow the LMI Luthier's Glue and bent it down in a smooth curve. It came out well.

I then had to shape the side to take account of my "smooth bevel" (I guess I've found a name for it after all!). I offered the top up to the sides and scribed the cut line on the inside of the upper side with a white pencil, then cut it on a small bandsaw. Got it almost perfect first time:

Image

Image

Image

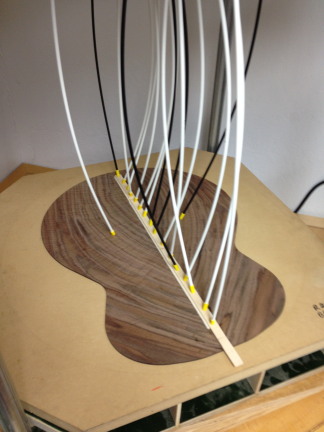
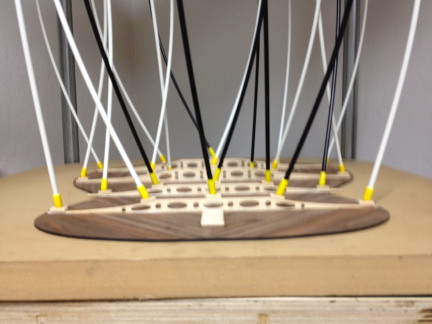
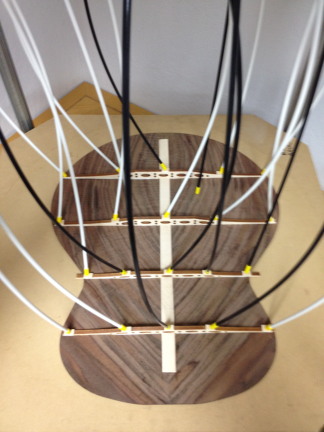
Next up is to make the neck, tail, and waist blocks - yes, waist blocks - there's going to be some carbon fiber buttressing to direct most of the string tension into the waist of the guitar (a la Rick Turner, who gave me his blessing to copy his idea).

Cheers for now,
Dave F.

P.S. I'll keep a running tally of the cost in my first posting at the top of this thread, if anyone's interested that is.....

Author:  WudWerkr [ Tue Aug 14, 2012 6:46 am ]
Post subject:  Re: Dave's Daft Experimental ESJ-2 Build

Pstttttt Dave , there is a big low spot in the lower bout of your guitar and the tops all kattiwonkus ..... thought I would mention it before someone else see's it . :D

Author:  SteveSmith [ Tue Aug 14, 2012 7:06 am ]
Post subject:  Re: Dave's Daft Experimental ESJ-2 Build

I like the smooth bevel idea - looks a lot easier to execute except for one thing and that would be gluing the braces on - at least for me since I use a radius dish and a go-bar deck. Be interested to see how you handle that. Cause I'm doing an experiment too, and mines a dread, and I get tired of the edge digging into my forearm and ... :?

I also really like the way that back looks.

Edit: BTW if you look at the counters you'll see a fair amount of people are looking, they're just not posting.

Edited edit: Ok, so sometimes I miss the sarcasm - idunno

Author:  Jaybird840 [ Tue Aug 14, 2012 10:46 am ]
Post subject:  Re: Dave's Daft Experimental ESJ-2 Build

Please don't stop the Vlogging... I, for one, am following it. I'm amazed at what you can accomplish with that laser. I still intend to PM you in reference to some laser work. I'm watching this build with great interest....

--Jaybird

Author:  Tony_in_NYC [ Tue Aug 14, 2012 4:17 pm ]
Post subject:  Dave's Daft Experimental ESJ-2 Build

Nice bevelthingamabob!

Author:  weslewis [ Tue Aug 14, 2012 5:26 pm ]
Post subject:  Re: Dave's Daft Experimental ESJ-2 Build

[:Y:]

Author:  Dave Fifield [ Wed Aug 15, 2012 2:02 am ]
Post subject:  Re: Dave's Daft Experimental ESJ-2 Build

Shoot, so it is Wud! I'd better glue it down to something solid (like a side) before it droops any more..... :D

Braces?! It don't need no steekin' braces!! Well, it does on the back, but none planned for the soundboard Steve.
That's how I get around the problem of gluing them in [:Y:]
The "triple top" is very stiff and stable, and acts more like a drum skin that a standardly-braced soundboard (probably end up sounding like a banjo wow7-eyes )
I'm going to splash out and fit some carbon fiber stiffeners (buttresses) between the neck block and the waist that will help also. You'll see.

I'll keep going then....

Tonight I found some scrap birch ply for the tail block and some offcuts of mahogany just big enough to make a neck block.
I'm going to count the cost of these as $0, since they all came from the scrap box, which I could just have easily have thrown out.

Anyway, I sawed em to size, sanded em, glued up the neck block, then glued em both onto the ends of the sides. Here's some pics:

Image

Image

Image

Image

Image

Oh, and I found a better picture of the back on my iPhone:

Image

Tomorrow, I'll make some A4 Kerfed Lining using my laser.....and before y'all jump down my throat, yes, I know Kevin Ryan has a patent on the stuff.....
......I have a license from Kevin to make it and use it just for my guitars [:Y:]

Cheers,
Dave Fifield

Author:  WudWerkr [ Wed Aug 15, 2012 8:34 am ]
Post subject:  Re: Dave's Daft Experimental ESJ-2 Build

That is a Beautifull back . Looking forward to more of this build [:Y:]

Author:  Dave Fifield [ Thu Aug 16, 2012 1:33 am ]
Post subject:  Re: Dave's Daft Experimental ESJ-2 Build

Cheers Wud! I think I got the better end of the deal with all the lovely figured claro walnut and mahogany that I got for my old lathe!

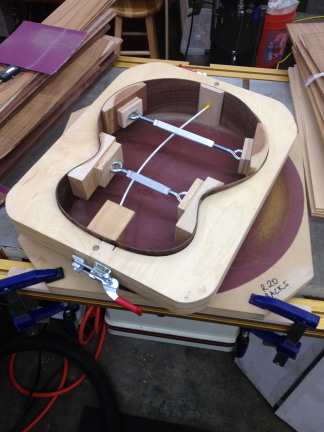
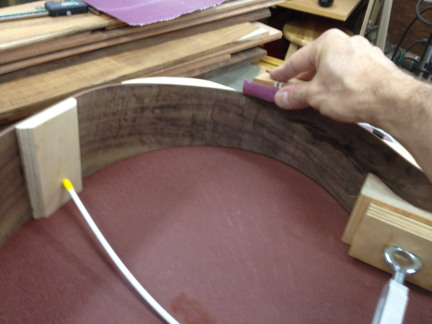
First thing I did on the build tonight was to sand the sides (now glued on to the neck and tail blocks solidly) in dishes (20' radius for the back edges and 28' radius for the front edges):

Image

The smooth bevel cutout had to be hand sanded to match the curve of the droopy soundboard:

Image

Then I got busy with the A4 kerfed lining. I found a nice offcut of Spanish cedar about 7/8"" x 1.25" x 30" in my scrap box....woohoo....perfect for making the kerfed lining.
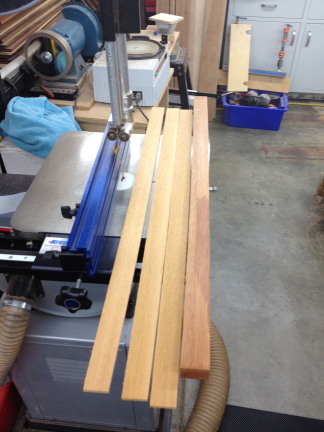
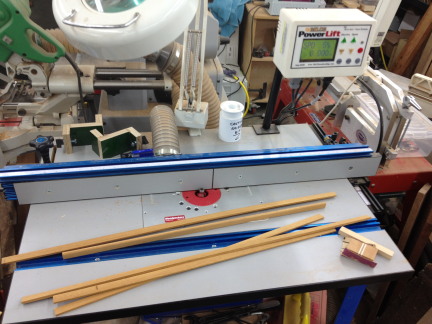
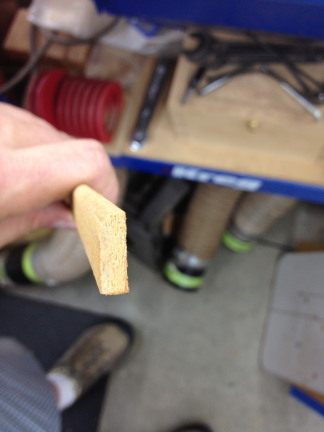
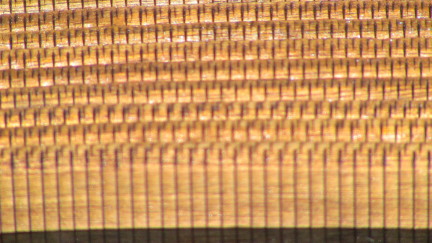
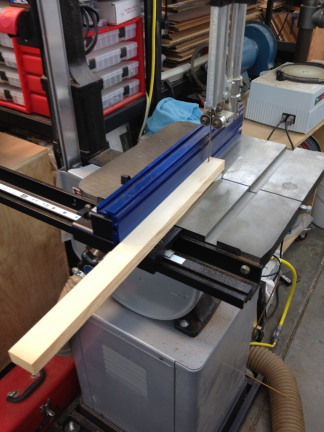
It was a bit of an odd shape as it was an offcut from a classical guitar neck. I straightened up two adjacent sides, then cut strips of about 3/16" wide on the bandsaw, truing up the cut edge on the jointer between each slice from the bandsaw. Then I split the pieces both ways to end up with 10 sticks each 3/16" x 5/8" x 15"(ish). Then I ran them through my router table with a roundover bit set at table height to create a nice rounded-over edge on each piece prior to making the laser cuts on both sides.

Here are the long sticks off the bandsaw:

Image

And here they are undergoing the roundover operation:

Image

And here's what they look like prior to laser cutting:

Image

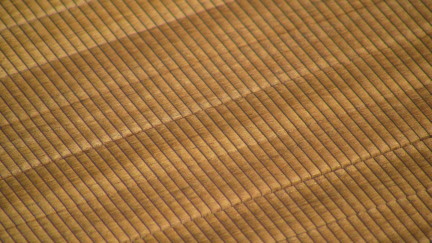
I'll post a short video of the laser cutting operation soon - don't have time to do it tonight. Here's a couple of photos of how they came out:

Image

Image

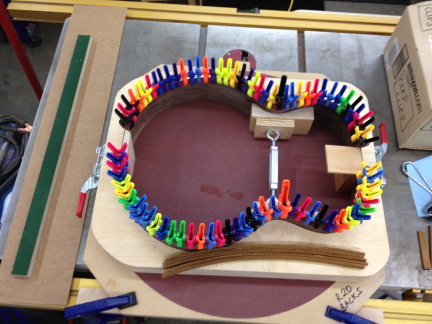
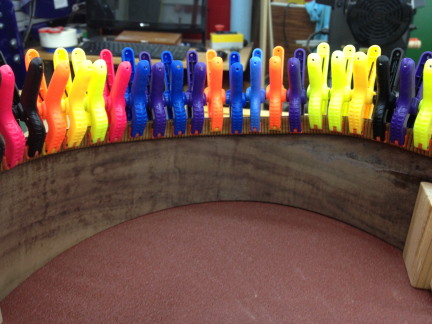
Then it was on to gluing in the A4 kerfed linings. They are VERY flexible indeed and don't need any soaking or spritzing with water to soften them up like normal kerfed lining does:

Image

I left them very high around the smooth bevel area, since the droopy soundboard will meet the side at quite an angle, so more meat is needed on the inner edge of the linings. Comprende?

Image

That's it for today. I'll glue in the back set of A4 kerfed linings later tonight before I go home, then it's more dish sanding and finesse sanding by hand for the smooth bevel area, and then it's on to the carbon fiber buttress rods (between the neck block and the soon to be added waist blocks), the anti-split side vertical pieces, then on to closing the box!

Cheers for now,
Dave F.

Author:  SteveSmith [ Thu Aug 16, 2012 5:39 am ]
Post subject:  Re: Dave's Daft Experimental ESJ-2 Build

I'm really liking some of the stuff you're doing with the laser cutter, now I want one gaah

Author:  Dave Fifield [ Thu Aug 16, 2012 4:00 pm ]
Post subject:  Re: Dave's Daft Experimental ESJ-2 Build

They are not cheap Steve! If I had to amortize the cost of my toys...er tools...into the challenge build, I'd not come even close to the budget. I often tell people that I make the most expensive guitars in the world!....

You can usually find good units for sale second hand. Reckon on having to find another $1.2K or so to replace the laser tube though (they only last a few years)!
The most common bed size is probably 24" x 12", which you will not be able to fit a guitar back or soundboard into. Look for a 24" x 18" model or bigger (mine's 36" x 24").
You can find cheap foreign laser engraving machines (VERY cheap in fact) but they will not give you the same service/accuracy/features/etc. as an American-made machine like Epilog IMO.

Cheers for now,
Dave F.

Author:  Dave Fifield [ Thu Aug 16, 2012 4:00 pm ]
Post subject:  Re: Dave's Daft Experimental ESJ-2 Build

Dupe....I only hit "Submit" once, I promise!!!

DF

Author:  SteveSmith [ Thu Aug 16, 2012 6:14 pm ]
Post subject:  Re: Dave's Daft Experimental ESJ-2 Build

Dave Fifield wrote:
If I had to amortize the cost of my toys...er tools


I can identify with that. I just love the precision and the capabilities it adds to the shop. Maybe I could come up with something to build and sell that would let me justify it, kind of 8-)

Author:  StevenWheeler [ Thu Aug 16, 2012 7:02 pm ]
Post subject:  Re: Dave's Daft Experimental ESJ-2 Build

Dave,

I'm not sure which I like more. All your cool machines or what you accomplish with them. Too bad WudWerkr has already bought my vote.

Steve

Author:  Dave Fifield [ Fri Aug 17, 2012 1:01 am ]
Post subject:  Re: Dave's Daft Experimental ESJ-2 Build

I strive to work to 0.001" precision in most (but by no means all) of my woodworking :)

I figured there would be some pretty hard canvasing by some of the "candidates", but not THIS early on.... idunno [headinwall] :D

Here's some of what I did today.

Sawed a piece of bracing material off a piece from the huge pile of the stuff I have....I'm guessing the 4 braces for the back came to about $2 total (I get a whole chunk of split bracewood for $5 when I buy soundboard material, and that's enough for 2 to 3 guitars).

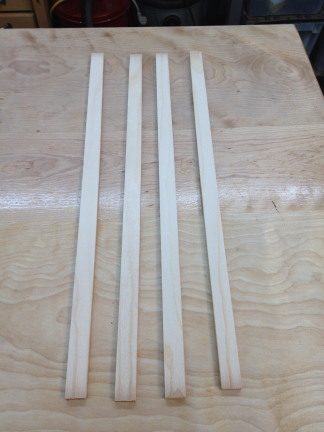
Milled the bracewood into 4 pieces 0.25" thick, then set them aside ready to cut out on the laser:

Image

Image

Then used the top of the center soundboard piece to form the internal back strip and glued it up in the go-bar deck:

Image

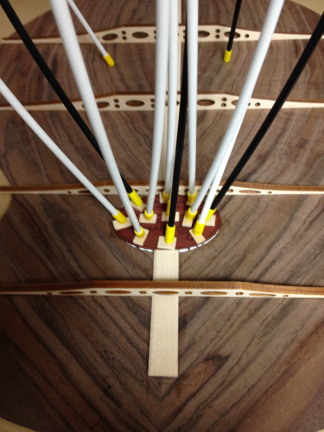
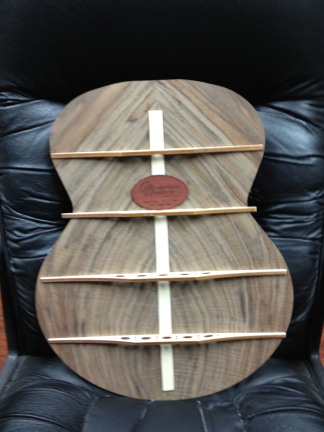
While the back strip was drying, I lasered out the 4 back braces. Laser cutting them allows me to cut some weight reduction holes in them, fully shape the top of them, and put a 20' radius on the bottom of them. They only require a light sanding on the bottom before gluing onto the back in the go bar deck. I have some video of the brace laser cutting, but it will have to wait until tomorrow, sorry!

Image

Image

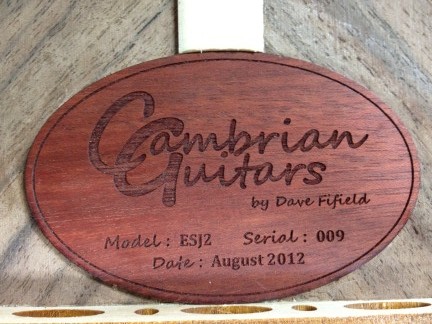
While the braces were drying, I made a small laser-engraved and laser cut label to go on the inside-back of the guitar. The wood for this came from LMI's annual sale where they sell stacks of stuff for $5 a pound. The label weighs just under 0.5oz so let's make that (0.5/(5*16))*$5 = $0.03125, so rounding up, let's say 4 cents :D

Here's the label being glued in:

Image

And here's the finished back:

Image

The carbon fiber buttress rods and the anti-split side vertical pieces will be fitted first tomorrow, then the back will be fitted and glued to the sides, yay!

Cheers for now,
Dave F.

Author:  Jaybird840 [ Fri Aug 17, 2012 7:58 am ]
Post subject:  Re: Dave's Daft Experimental ESJ-2 Build

Dave,
Can you post a clean shot of the label? Thanks!!!
--Jay

Author:  WudWerkr [ Fri Aug 17, 2012 9:03 am ]
Post subject:  Re: Dave's Daft Experimental ESJ-2 Build

StevenWheeler wrote:
Dave,

I'm not sure which I like more. All your cool machines or what you accomplish with them. Too bad WudWerkr has already bought my vote.

Steve


eek shhhhhhhhhhhhhhhhhhhhhhhhhhhhhhhhhh gaah

Author:  SteveSmith [ Fri Aug 17, 2012 10:20 am ]
Post subject:  Re: Dave's Daft Experimental ESJ-2 Build

Did I miss the vote auction? :o I would really like to have that chisel.

Author:  Dave Fifield [ Sun Aug 19, 2012 1:45 am ]
Post subject:  Re: Dave's Daft Experimental ESJ-2 Build

Here you go Jay - Enjoy!!

Image

Click on the picture (any of the pictures in my thread for that matter) to see the full resolution version.

Cheers,
Dave F.

Page 1 of 5 All times are UTC - 5 hours
Powered by phpBB® Forum Software © phpBB Group
http://www.phpbb.com/