Official Luthiers Forum!

Owned and operated by Lance Kragenbrink
It is currently Thu May 22, 2025 6:37 am


All times are UTC - 5 hours


Post new topic Reply to topic  [ 13 posts ] 
Author Message
 Post subject:
PostPosted: Sun Mar 25, 2007 2:20 pm 
Offline
Mahogany
Mahogany

Joined: Thu Nov 16, 2006 9:21 am
Posts: 97
Location: Australia
Someone asked the question a couple of weeks ago about how fellow OLFers made their guitar molds, so here's a short essay on how I make my external type molds.
Same principle works if you build using dovetail neck assembly or Spanish style construction.

I make mine by cutting half guitar shapes out of 14mm thick mdf and laminating them together to build up a deeper mold.

I'm assuming, if you're a newbie like me, you don't know how to use a router. So I'm going to be really pedantic with how I describe this. It's a bit complicated but if you read and follow the pics it should become a bit clearer.

Feel free to add comments :)

1) You need a router with a template guide.
2) You'll need to measure the distance between the outside of the collar on the template guide and the widest part of the cutting bit.
Use a straight cutting bit.

That distance, on my set up, is 5mm, which you'll need to compensate for later.(Insert your own measurement here when you're making your own.)


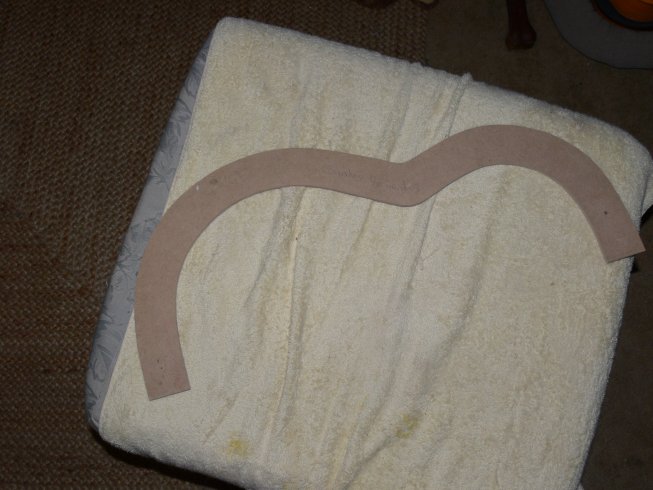
3) Select a body shape, or plantilla.

4) Make a card board template of your half guitar shape and draw it out onto a piece of 5mm mdf.
Thats your basic shape.

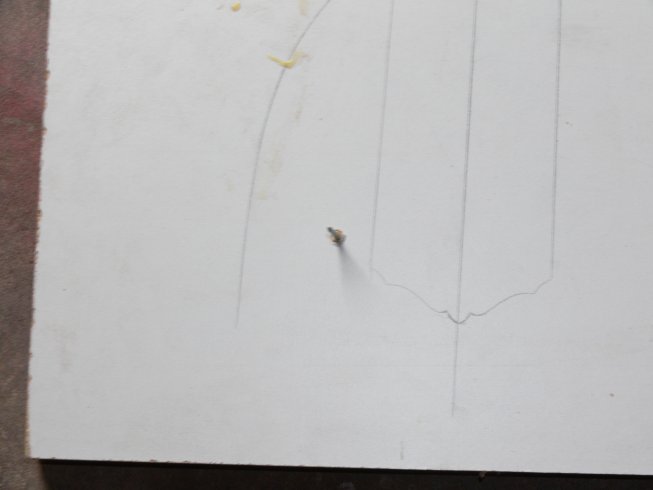
5) As mentioned, my template guide/router bit has a 5mm gap, so I used a compas, like a set of calipers to measure out and draw a 5mm line around the outside of my basic guitar shape.
So it looks like you're drawing a guitar shape that is 5 mm all round larger than what you want your final shape to be.
This new line represents the inside line of the template.
(sorry I didn't take pics of this bit)
What you're going to end up with is a template that's inside edge is 5mm bigger than you want the final guitar shape to be. That's how you compensate for the 5mm gap between the router's template guide and the actual cutting bit. When you cut the mold it will be an exact match with the guitar shape.

Some people's guitar molds have straight outside edges.
but the outside edges on my molds are also guitar shaped so that I can fit clamps around the mold to clamp the sides into the guitar when I'm assmenbling.

6 Decide what shape you want the outside of your mold to be and draw it on. You don't need to be too acurate with this, so long as its neat.
The outside shape of my guitar mold is 50mm larger again than the original shape of the guitar.

7)Cut out your template.
I cut mine out with a coping saw, and then sanded to shape.


8) Select the material you want to make your mold from
and fix your template on. (I tacked mine on with brads)
I used MDF.
Whatever material you use, make sure the boards are flat.
They often aren't flat when you buy them and you end up with a wonky mold, so pay attention when selecting materials.

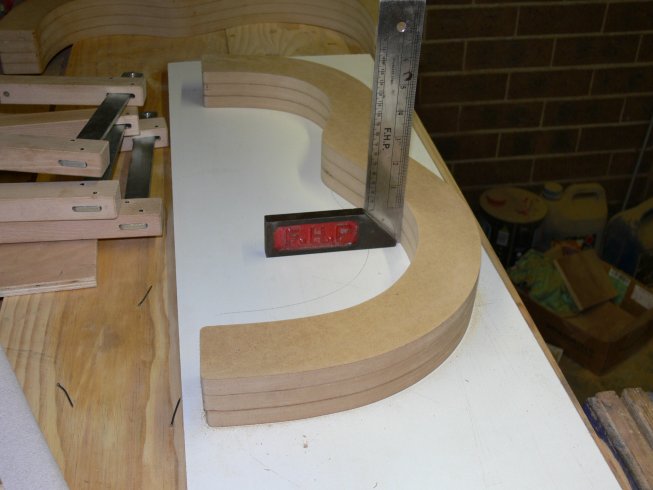
*important* You want the router cut to be perfectly square to the surface of the finished mold.
If its not square, the mold will be wonky.

8) When you cut out the template keep the waste pieces. Tack them around the template on the board your'e cutting the mold from, to balance the base of the router so that it doesn't wobble, and stays square to the surface of the job.


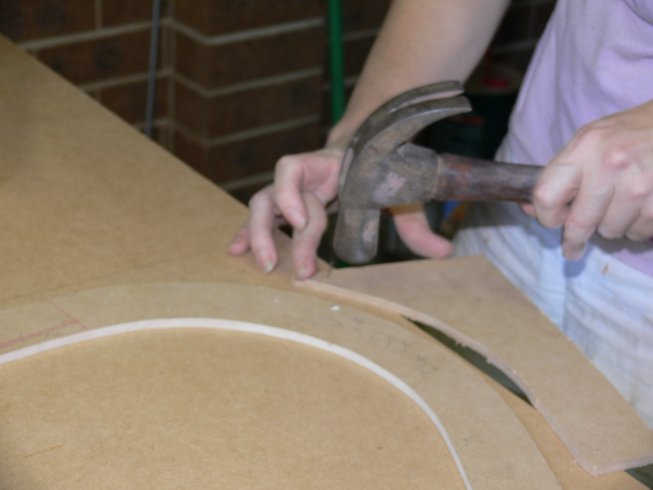
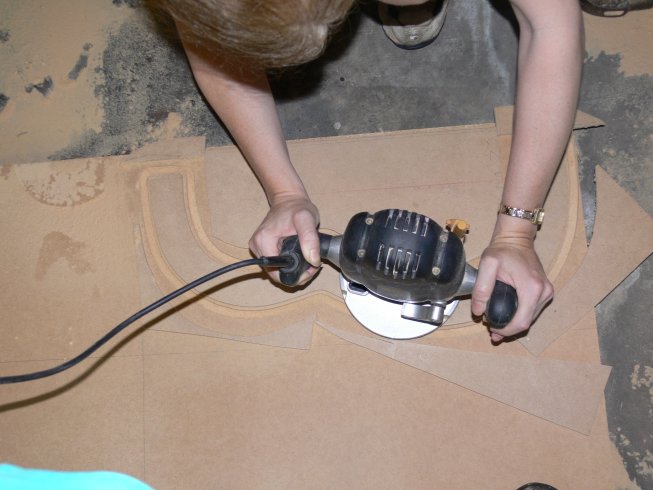
9) Do a couple of dry runs to make sure your router doesn't bind anywhere and, when you're satisfied, cut it out by doing small cuts, no larger than 5mm deep on each run.


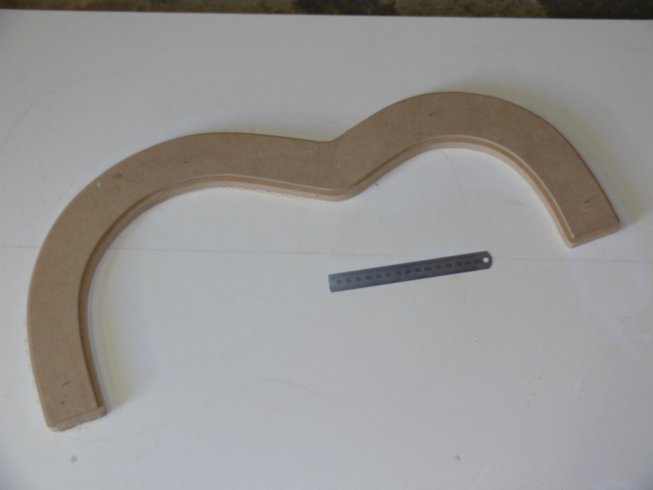
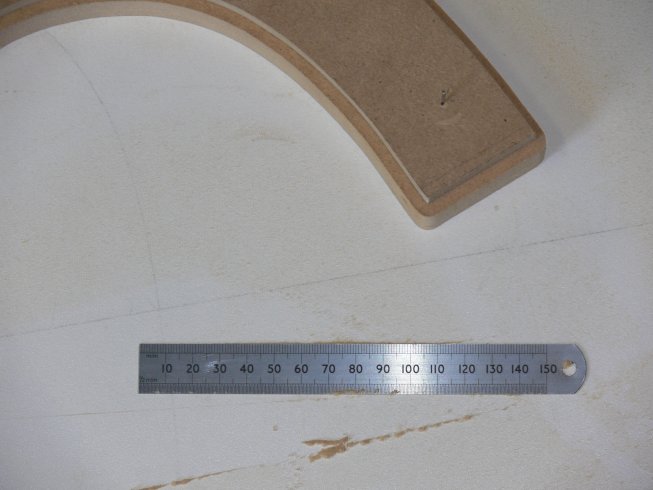
Heres what you end up with


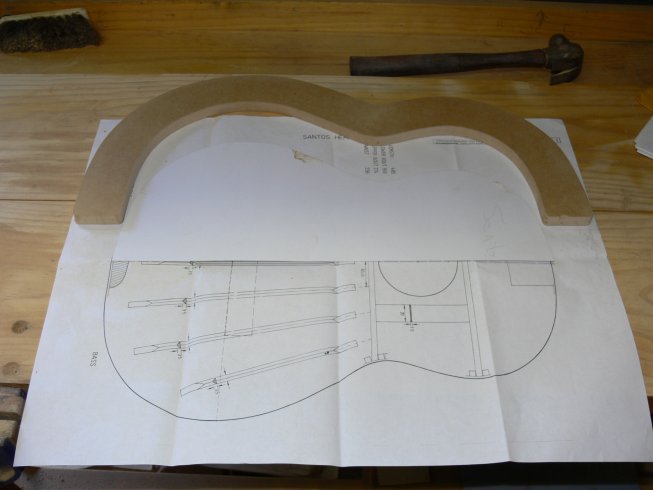
What I then do is to use the routed out part to draw up a final guitar shape on a piece of cardboard, just to make sure everything looks right before I continue.

10) if you're satisfied with the result, repeat the process of tacking on the scrap cutouts, doing a dry run and rout out several more guitar half shapes as needed till you have 6, or 8 of them. However many you need to build up a deeper mold.

11) The next part of the process is to glue the cutouts together in two stacks.
Drive a couple of brads into a piece of board and then turn the board up so the brads are sticking up.
Drive one of your guitar shapes onto the brads just to temporarily locate it and so you can check it with a square.
The sides need to be square with a working surface.
(actually they wont be square with the working surface of a solera because soleras are dished, but for the purposes of buliding a mold, keep the sides of the mold square with an imaginary flat working surface)
You can remove the mold from the board later without nails being stuck in it.


12) Build up layers of routed out shapes by glueing them together.
I drill a pilot hole in each new shape and do to dry fit before glueing each layer.
I then temporarily tack it on so it doesn't creep when glueing.
double check regularly with a square.


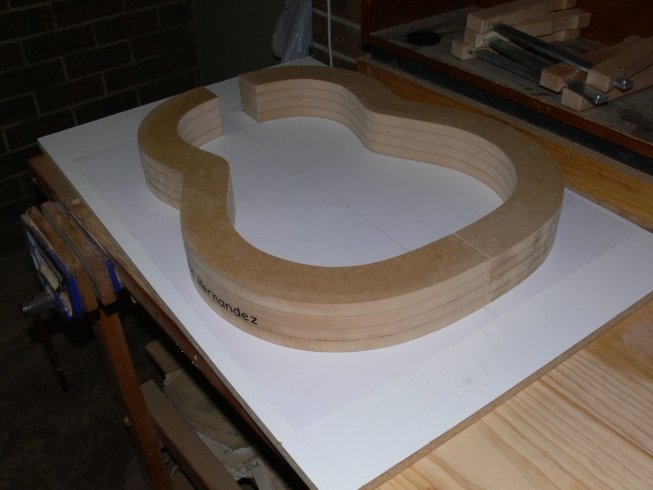
You'll end up with with a mold deep enough to build a guitar in.
Don't make it too deep or you won't be able to get lining clamps on the sides during guitar assembly

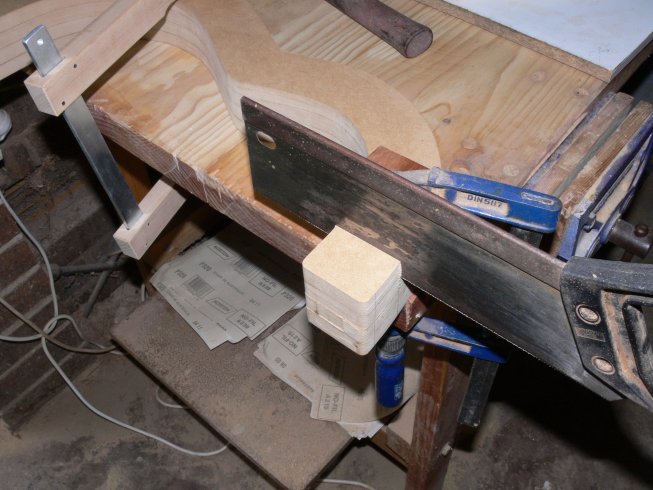
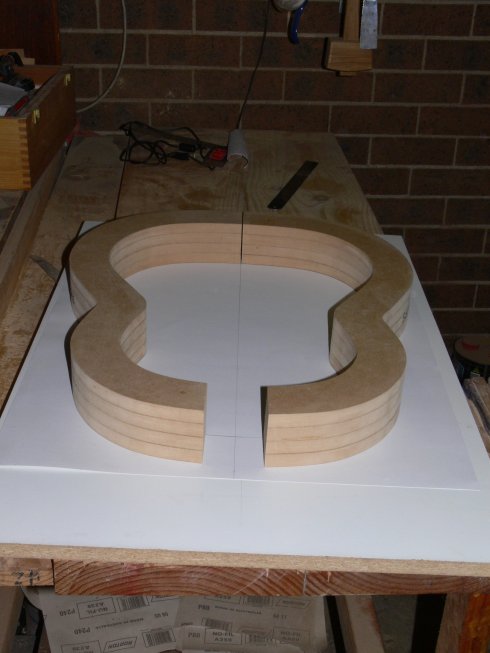
13) The ends of my routed out shapes are rounded, because of the routing process.


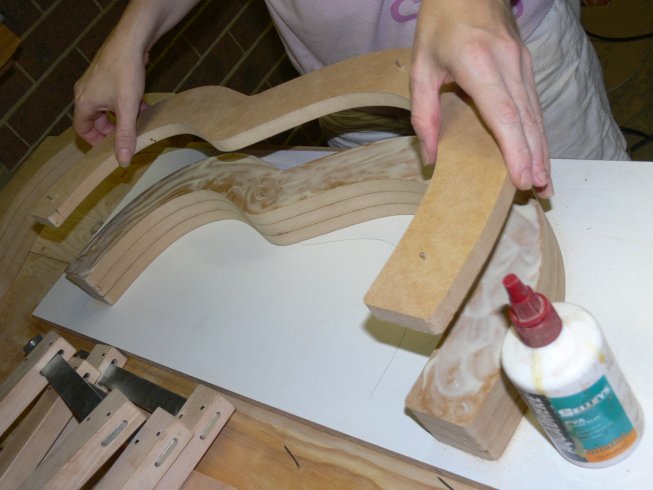
14) Cut off the rounded ends AFTER you've laminated them together.
In the picture below I'm cutting off a large piece so as to make way for an aperture for a neck neck as in spanish style construction.


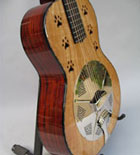
Here's the final results:


cheers,
Claire


Top
 Profile  
 
 Post subject:
PostPosted: Sun Mar 25, 2007 2:48 pm 
Offline
Brazilian Rosewood
Brazilian Rosewood
User avatar

Joined: Fri Jun 10, 2005 9:51 am
Posts: 2148
Location: San Diego, CA
First name: Andy
Last Name: Zimmerman
City: San Diego
State: CA
Zip/Postal Code: 92103
Country: United States
Focus: Build
Beautiful Job Claire
A very nice tutorial


Thanks
Andy

PS We need more women on this forum!!!!

_________________
Andy Z.
http://www.lazydogguitars.com


Top
 Profile  
 
 Post subject:
PostPosted: Sun Mar 25, 2007 4:21 pm 
Offline
Brazilian Rosewood
Brazilian Rosewood
User avatar

Joined: Thu Aug 04, 2005 7:50 am
Posts: 3152
Location: Canada
Claire. That is wonderful. Great Job! One thing that may make the next ones a bit easier is rather than using the collar on your router you can buy flush cutting router bits that have a bearing the same diametre as the cutter installed either at the top or the bottom of the bit. These are called trim bits or pattern bits and allow you to make your patterns the exact size you want, eliminating most measuring and "goes in to" errors.

Thanks for the tutorial!

Shane

_________________
Canada


Top
 Profile  
 
 Post subject:
PostPosted: Sun Mar 25, 2007 7:55 pm 
Offline
Contributing Member
Contributing Member
User avatar

Joined: Fri Aug 26, 2005 5:49 pm
Posts: 2915
Location: Norway
Nice!

I like to band saw each piece close to the final shape before flush routing them to a template on a router table. That way you avoid having to produce too much dust, which is always a problem when working with MDF or particle board which is what I use for my molds. I drill pilot holes in the template and use those as guides to drill holes through a stack of rough cut blanks in an area of the blank that will be cut away in the finished mold. When flush routing on the router table (I use a bottom bearing bit like Shane describes) I use the same diameter bits used to drill the pilot holes to attach the rough cut blank to the template. I use the same bits to line up the pieces when I glue them up and pull them out when all the clamps are in place. An added advantage to band sawing the pieces close to the final shape is that you can use the waste (male) pieces to make bending forms for your bender, assuming you are careful when you band saw.

_________________
Rian Gitar og Mandolin


Top
 Profile  
 
 Post subject:
PostPosted: Sun Mar 25, 2007 9:07 pm 
Offline
Cocobolo
Cocobolo
User avatar

Joined: Tue Jan 30, 2007 12:16 am
Posts: 174
Location: United Kingdom

its great seeing how everyone works - everyday's a school day!


 thanks for taking the time to put this up Claire... keep em coming!


its rare to see a lady making guitars (in fact most of these kinds of trades) my wife has been making stained glass for a few years - and i'm ashamed to say i thought that she would initially find it too laborious, but she is awesome at it.


its cool that she really unsderstands tools - i even dont mind when she 'borrows' mine :)!!


_________________
www.theguitarrepairworkshop.com


Top
 Profile  
 
 Post subject:
PostPosted: Sun Mar 25, 2007 11:27 pm 
Offline
Brazilian Rosewood
Brazilian Rosewood

Joined: Mon Feb 21, 2005 6:16 am
Posts: 2244
Location: United States
First name: michael
Last Name: mcclain
City: pendleton
State: sc
Zip/Postal Code: 29670
Status: Professional
i would agree with shane on the use of a pattern follower(bearing at the top of the cutter) and a flush trim bit(bearing at the bottom end) for the routing.

after trying several methods, i have found it simpler to use the template and pattern following bit to route the first mold piece, then successively attach the next piece using a couple of drywall screws, route using the flush trim bit, and so on till enough pieces are prepared to complete the mold. then it is easy to unscrew the pieces, arrange to make two mold halves, then glue using the screw holes to align everything.

would be very boring, not to mention crowded, if we all took the same path to our goal though. your method certainly enabled you to create an accurate and sturdy mold, which after all is the goal.

your forethought and attention to detail, e.g., your use of the scraps to support the router in an upright position, bode well for your success in your build. i am looking forward to seeing more of your work as construction proceeds.


Top
 Profile  
 
 Post subject:
PostPosted: Mon Mar 26, 2007 12:42 am 
Offline
Brazilian Rosewood
Brazilian Rosewood
User avatar

Joined: Mon Jul 04, 2005 7:13 am
Posts: 3270
Location: United States
Nice job, Claire. Good looking mold. I sure hope you were wearing your dust mask on that one.

Ron

_________________
OLD MAN formerly (and formally) known as:

Ron Wisdom

Somewhere in the middle of Arkansas......


Top
 Profile  
 
 Post subject:
PostPosted: Mon Mar 26, 2007 12:52 am 
Offline
Brazilian Rosewood
Brazilian Rosewood

Joined: Sat Jun 17, 2006 3:48 am
Posts: 2094
Brilliant tutorial Claire!!!


Thanks for posting it. I will refer to this when I start guitar #3   


Top
 Profile  
 
 Post subject:
PostPosted: Mon Mar 26, 2007 6:19 am 
Offline
Brazilian Rosewood
Brazilian Rosewood

Joined: Tue Feb 15, 2005 10:31 am
Posts: 3134
Location: United States
Thanks, Claire! You've probably shortened the learning curve considerably for someone(s). Not understanding how to start building something or executing a process is what holds many beginners back. Nice job (clean work, too!).


Top
 Profile  
 
 Post subject:
PostPosted: Mon Mar 26, 2007 2:58 pm 
Offline
Koa
Koa

Joined: Fri Jun 30, 2006 4:23 pm
Posts: 1694
Location: United States
First name: Lillian
Last Name: Fuller-Watson
State: WA
Country: USA
Focus: Build
Status: Amateur
Great piece Claire. Thanks for taking the time to put it together.


I still think we should have a tutorial section for things like this, just like we have a jig section. Just my 2 cents worth of opinion. Can't even buy gum with that anymore.

_________________
Aoibeann


Top
 Profile  
 
 Post subject:
PostPosted: Mon Mar 26, 2007 5:34 pm 
Offline
Mahogany
Mahogany

Joined: Tue Jan 16, 2007 7:40 am
Posts: 70
Location: United States
I agree sort of like a building faq section. Yeah boy


Top
 Profile  
 
 Post subject:
PostPosted: Mon Mar 26, 2007 7:29 pm 
Offline
Mahogany
Mahogany

Joined: Thu Nov 16, 2006 9:21 am
Posts: 97
Location: Australia

Thanks for your feedback and comments folks...

Cheers,
Claire


Top
 Profile  
 
Display posts from previous:  Sort by  
Post new topic Reply to topic  [ 13 posts ] 

All times are UTC - 5 hours


Who is online

Users browsing this forum: No registered users and 13 guests


You cannot post new topics in this forum
You cannot reply to topics in this forum
You cannot edit your posts in this forum
You cannot delete your posts in this forum
You cannot post attachments in this forum

Jump to:  
Powered by phpBB® Forum Software © phpBB Group
phpBB customization services by 2by2host.com